Creating an estimate
In addition to creating an actual permit, you can also create an estimate in the SmartGov permitting module. This allows you to supply potential applicants with permit information before they submit their actual application. *Note: The options displayed on an estimate are based on the configuration of the permit type selected. These options are not configurable on an estimate.
How to create an estimate
- Click on Permitting from the navigation menu.
- Click on Create Estimate.
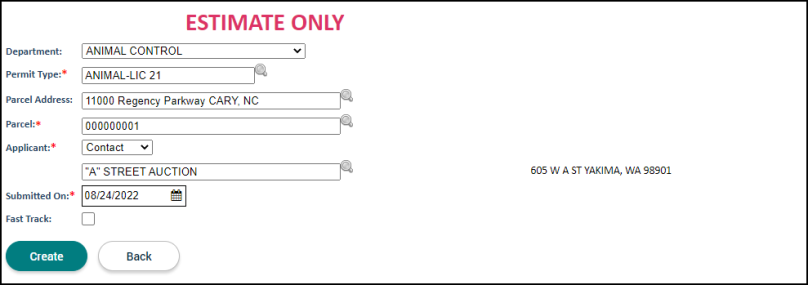
- Select a Department from the drop-down menu.
- Begin typing or click the magnifying glass icon (
 ) to view and select a Permit Type.
 - Begin typing or click the magnifying glass icon () to view and select a Parcel Address. *Note: This will automatically populate the Parcel and Applicant fields.
- Check the Fast Track box if your jurisdiction is using SmartGov to track expedited permit applications.
- Click the Create button to submit your permit estimate.
Permit Estimate tabs
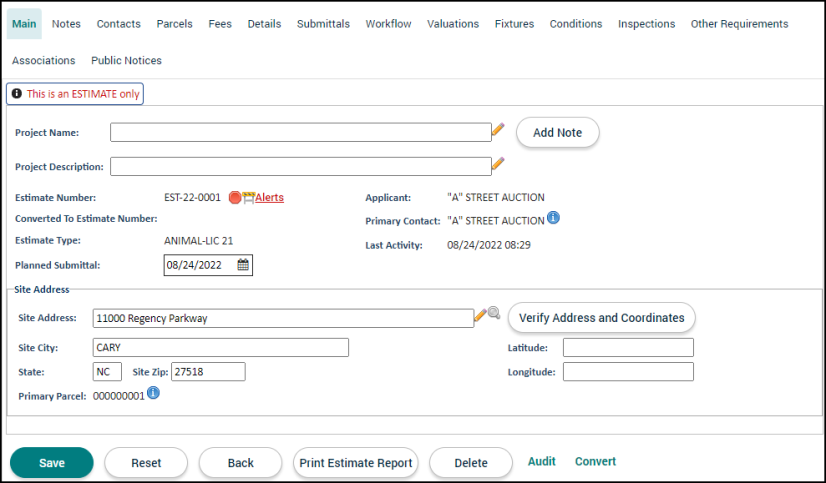
Once you enter the initial information, you will be taken to the full permit estimate. The permit type template determines the tabs that display and the order in which they display. There can be up to 16 tabs displayed for any given permit type, but two will always be visible: Main and Notes.
The Main tab displays an overview of the permit estimate at a glance. This tab shows the Project Name, Process State, and Primary Contact as well as a summary of information about the estimate.
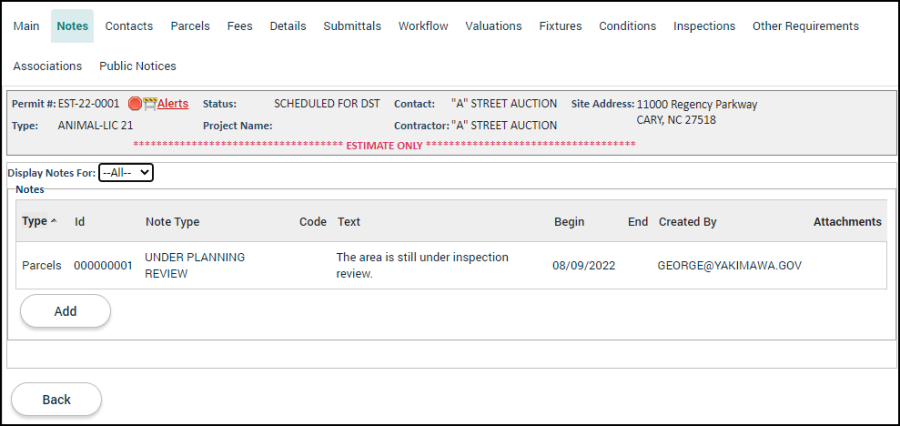
The Notes tab displays all notes associated with the permit estimate. These can be entered from many different sources, such as Parcels, Contacts, and Valuations. You can add a variety of note types and each note can have any number of attachments. Click on a note in the list to expand it and show more detail.
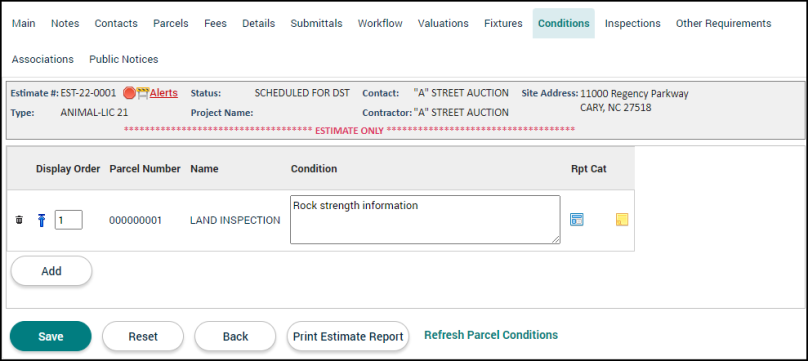
The Conditions tab allows you to associate conditions to the permit estimate. Click Add to select a condition type from the list or create a custom Condition. A text field allows you to describe the condition. You can adjust the report categories as well as add notes to each condition in the list. *Note: Conditions may be pre-populated in this section depending on the permit type selected.
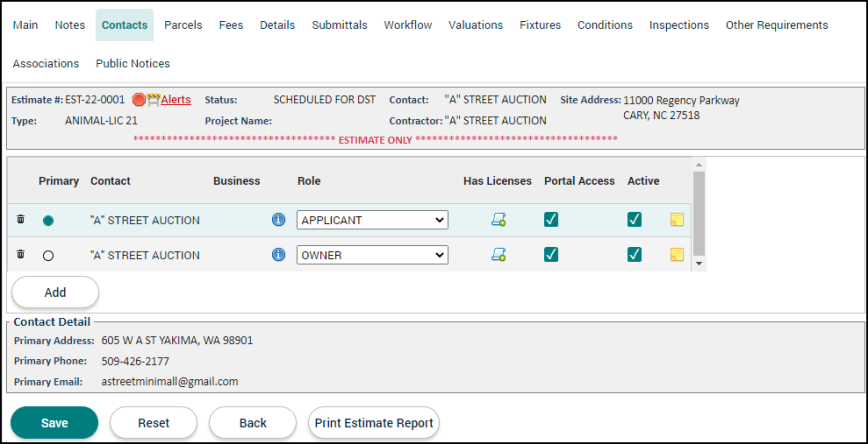
The Contacts tab allows you to list anyone associated with the permit estimate, such as owners and neighbors. You can look them up from your existing contact database or add them as a new contact. Select a role for each contact in the Role drop-down menu, if necessary. Click on a contact's information button (![]() ) to display and edit data for that contact. Each contact can have notes tied to it.
) to display and edit data for that contact. Each contact can have notes tied to it.
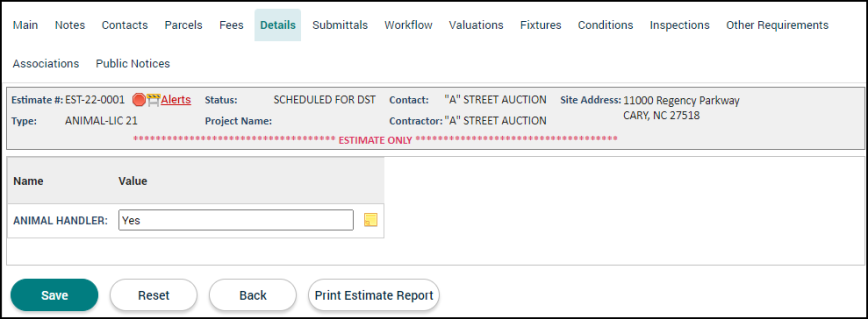
The Details tab contains custom fields defined by your SmartGov Administrator. Each custom field can have notes tied to it. *Note: Details may be pre-populated in this section depending on the permit type selected.
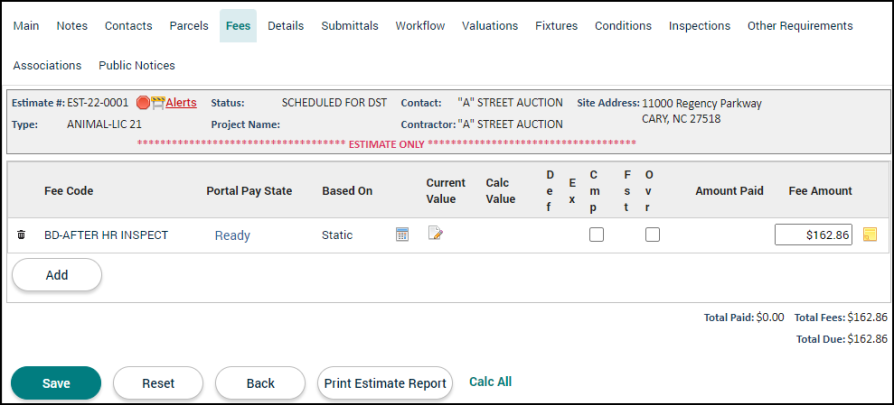
The Fees tab allows you to associate potential fees to the permit estimate. The calculator icon ( ) will update the fee amount for any fees added to the permit estimate. Each fee can have notes tied to it. *Note: Fees may be pre-populated in this section depending on the permit type selected.
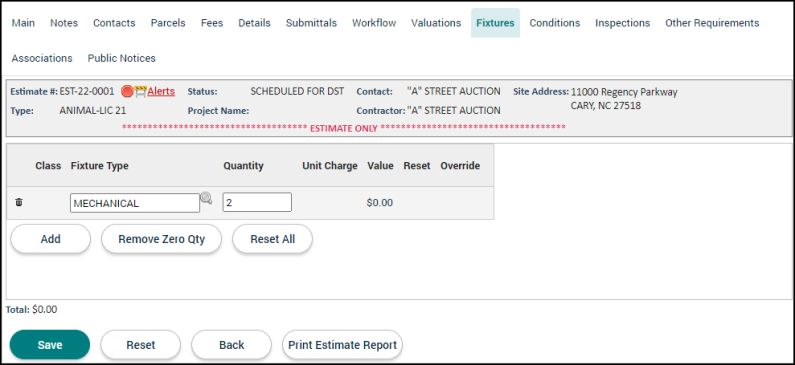
The Fixtures tab allows you to define any necessary fixtures. You can add a fixture type and its quantity to automatically calculate the value. Each fixture type can have notes tied to it. *Note: Fixture types may be pre-populated in this section depending on the permit type selected.
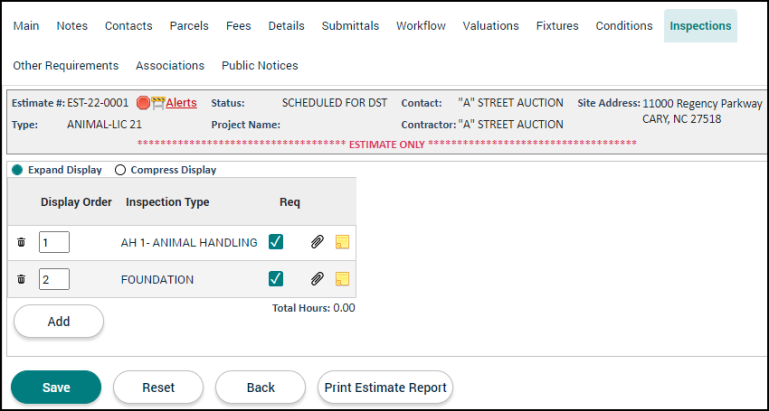
The Inspections tab displays the default inspection types for a permit estimate based on the selected permit type. You can add additional inspection types by clicking Add. Each inspection type can have notes tied to it. *Note: Inspection types may be pre-populated in this section depending on the permit type selected.
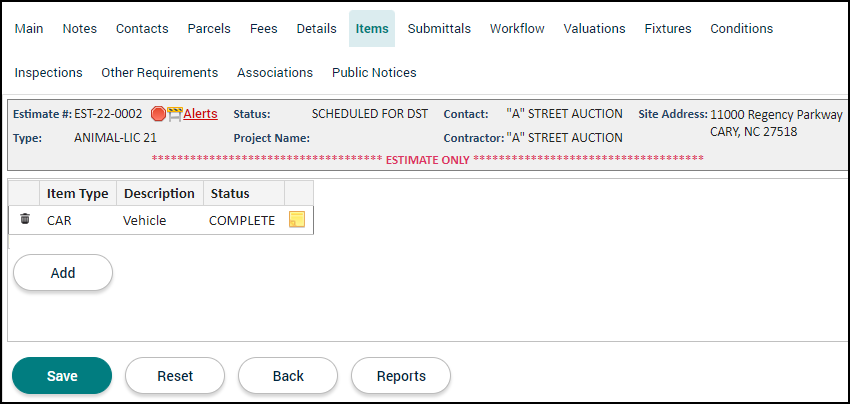
The Items tab allows you to associate item types to the current permit estimate. Click Add to list any additional item types associated with the permit estimate. Pertinent information related to the item can be included by clicking on the specific item type. Each item can have notes tied to it.
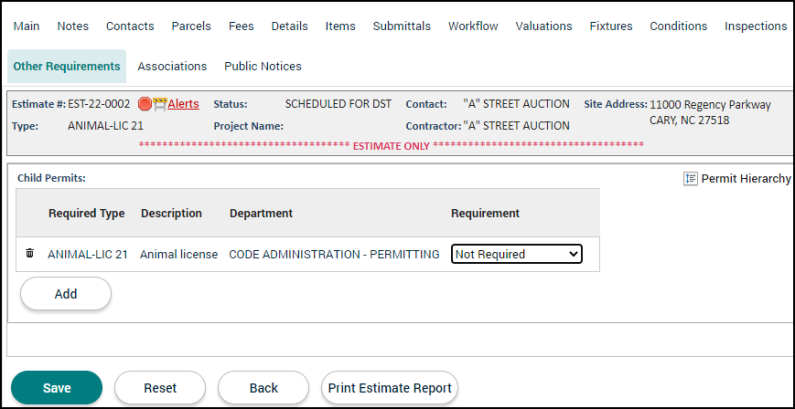
The Other Requirements tab allows you to define permit types as children to the current permit estimate. This will create a hierarchy of related permits. *Note: Child permit types may be pre-populated in this section depending on the permit type selected.
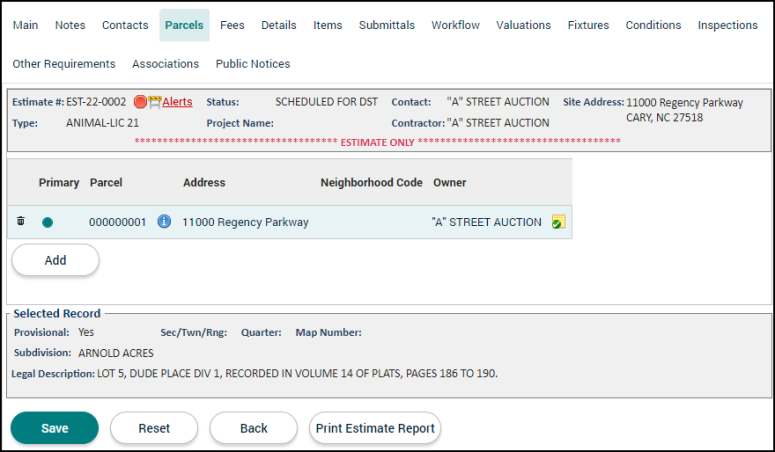
The Parcels tab allows you to attach as many parcels as necessary to the permit estimate. Select a parcel from the list to populate detailed information in the Selected Record panel. Click on a parcel's information button (![]() ) to display and edit data for that parcel. Each parcel can have notes tied to it.
) to display and edit data for that parcel. Each parcel can have notes tied to it.
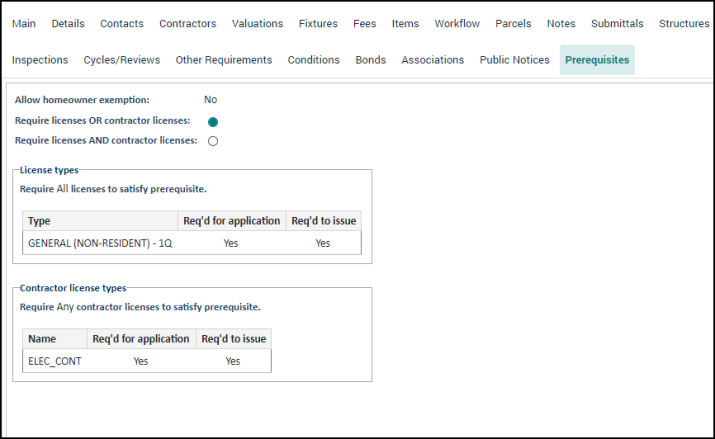
The Prerequisites tab allows you to view the license and/or contractor license prerequisites a contractor must meet.
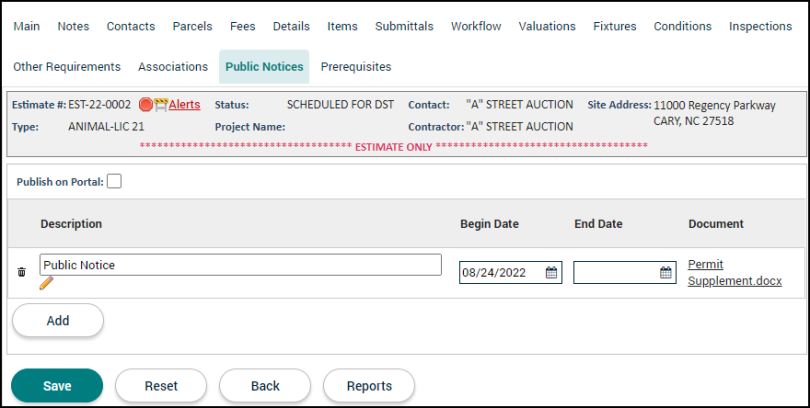
The Public Notices tab allows you to attach public notice files to a permit estimate. You have the option to publish these documents on the Citizen Portal for any citizen to view.
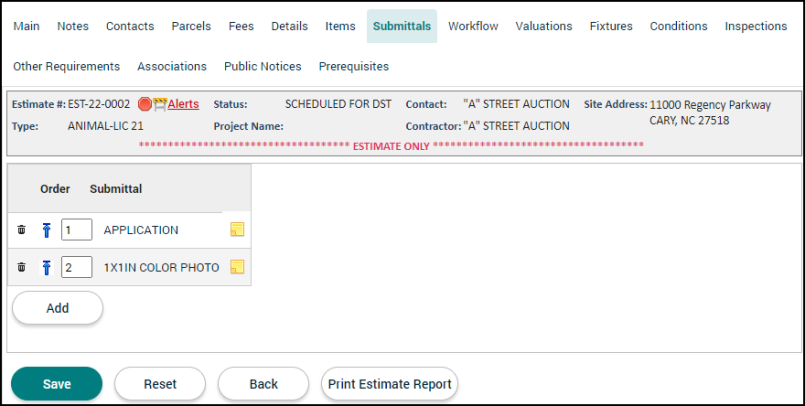
The Submittals tab allows you to define as many submittal records as necessary. This page may be pre-populated with submittals depending on the selected permit type. Click Add to select any additional submittals for the permit estimate. Each submittal can have notes tied to it. *Note: Submittals may be pre-populated depending on the permit type selected.
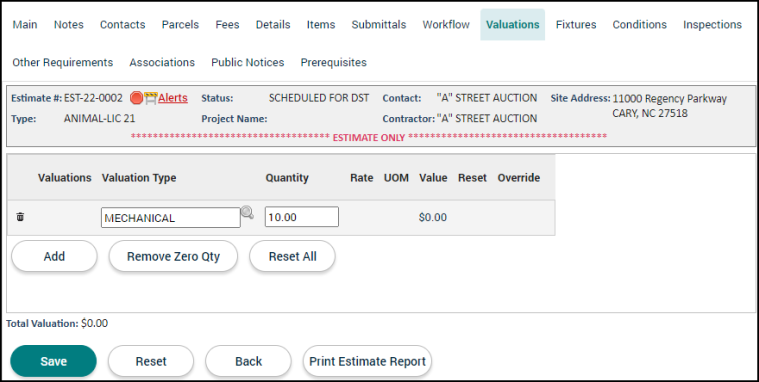
The Valuations tab allows you to define as many valuation records as necessary. Begin typing or click the magnifying glass icon () to select a valuation type from the list and add a quantity to automatically calculate the value. Each valuation type can have notes tied to it.
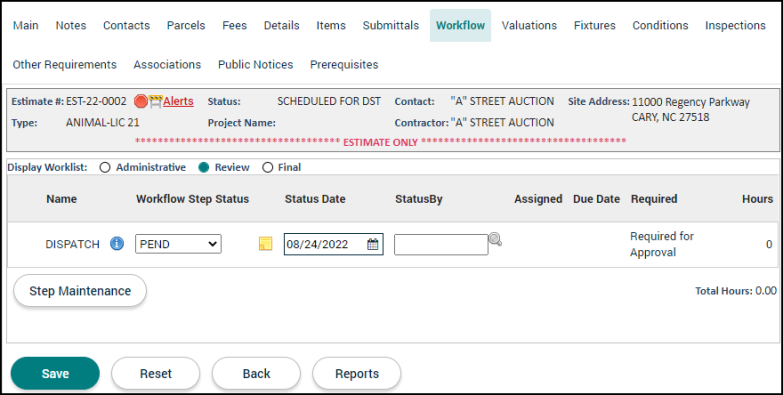
The Workflow tab displays the default workflow steps required to complete a permit and allows you to define the order of those steps. You can also add to, delete, or rearrange your workflow steps by clicking the Step Maintenance button. Click on a workflow step's information button (![]() ) to display and edit data for that step. Each workflow step can have notes tied to it. *Note: Workflow steps may be pre-populated depending on the permit type selected.
) to display and edit data for that step. Each workflow step can have notes tied to it. *Note: Workflow steps may be pre-populated depending on the permit type selected.