Permitting: Fixtures tab
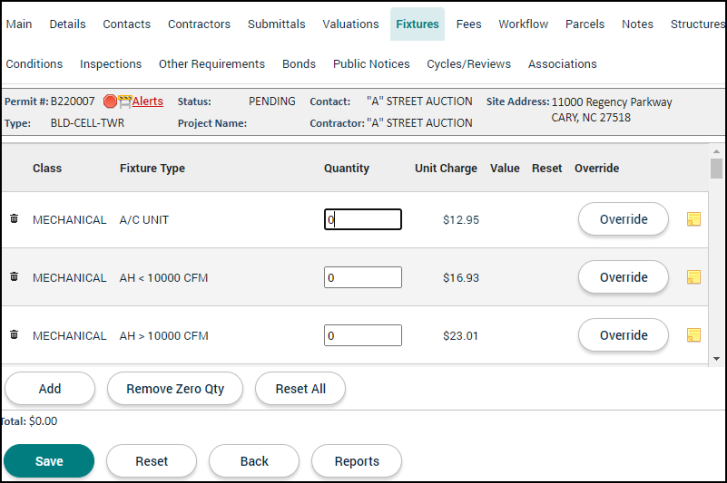
The Fixtures tab allows you to associate Fixture Types with a permit. Fixtures are items within a building such as sinks, HVAC units, or sprinklers, that need to be recorded for data collecting purposes. Many types of permits assess fees based on what fixtures are installed. Depending on your jurisdiction's configuration, the Fixtures tab will already be populated with Fixture Types based on the Fixture Classes added to the permit type. These Fixture Types may be removed if not needed and additional fixtures can be added if needed at a later time.
Adding a fixture
If there is a Fixture Type that is not listed on the Fixtures tab, you may add an additional fixture type. *Note: You will only be able to add Fixture Types associated with the Fixture Classes configured for the permit type.
- Click Add.
- Begin typing or click the magnifying glass icon (
 ) to select the Fixture Type.
 - Enter the Quantity of the fixture type.
- Repeat this process to add any additional fixtures.
- Click Save.
Managing fixtures
Updating quantities
A fixture type may already be listed on the Fixtures tab if the permit type has an associated fixture class. You may need to use the scroll bar within the Fixtures tab to find a specific fixture type.
- Fill in the Quantity of the fixture type needed for the permit. The Value will automatically populate based on the quantity and unit charge.
- Continue adding the quantity of any other fixtures associated with this permit in the Quantity column.
- Click Save.
-
Click Remove Zero Qty to remove any fixture type with a Quantity of 0 from the list.
Override a fixture
There may be times where the Unit Charge or Value for a fixture type may differ from the defaults set up by administration. If needed, you can override these values for the permit you are working on. You may also use the Override feature to adjust the quantity if this change needs to be documented.
- Click Override (
 ) beside the fixture type you are trying to edit.
 - Adjust the Quantity, Unit Charge or Value for the fixture type.
- Select a Note Type in the drop-down menu.
- Explain why you are overriding the default value in the Text field.
- Click Save.
- To revert back to the default values, click the Reset icon (
 ). Select whether you would like the unit charge to be reset based on Today's Date or the Submittal Date of the permit.
 - If at any point you need to reset the Unit Charge on all fixtures, you may do so by clicking the Reset All button. Select whether you would like the unit charge to be reset based on Today's Date or the Submittal Date of the permit.

Add a note to a fixture
- Click the sticky note icon (
 ) to add notes to the fixture. These notes can include links and attachments, such as documents, pictures, or spreadsheets.
 - Click Save at the bottom of the page.
Deleting a fixture
- Click the trash can icon (
 ) next to the fixture type. The fixture type will appear with a strike-through mark.
 - Click Save at the bottom of the page.
