Permitting: Conditions tab
The Conditions tab allows users to associate standard and custom conditions to a specific permit. Conditions can be set up to automatically populate whenever specific permit types are created, or the conditions can be added to a permit as needed. A common condition might be "Call before you dig."
Adding additional conditions
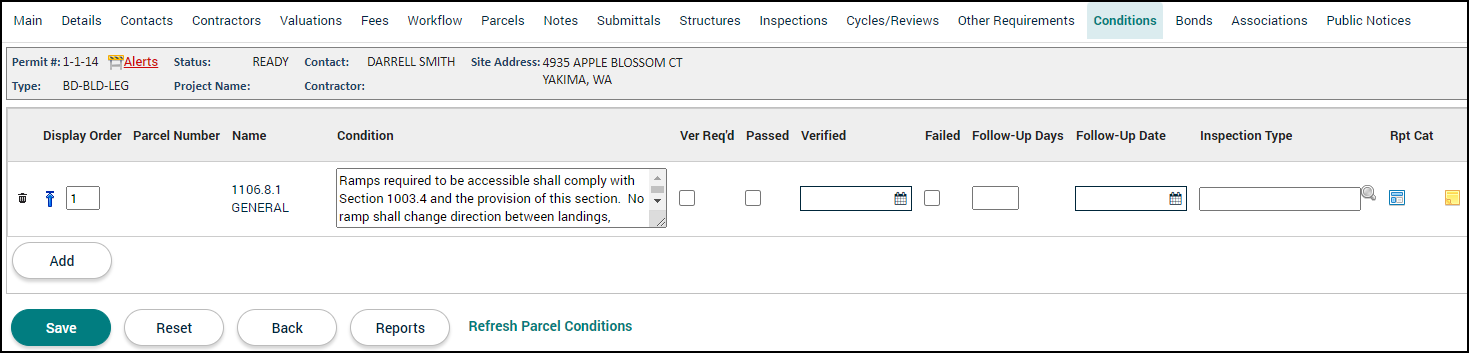
Depending on the permit type selected, the permit may already have one or more conditions listed on this tab. However, you can add additional conditions if needed.
- Click Add.
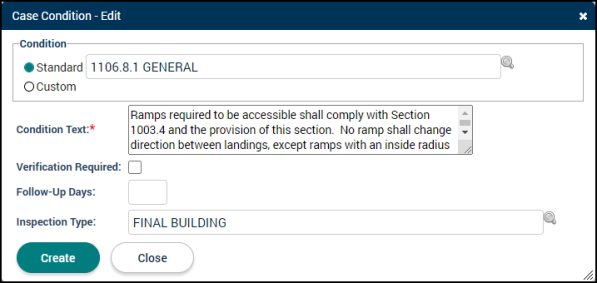
- If you are adding a Standard condition, begin typing or click the magnifying glass icon (
 ) in the Case Condition window to select the condition from the list.
 - If the condition you need to add is not available in the list of standard conditions, click the Custom option to create a custom condition for the permit. *Note: If you choose a standard condition and then add additional text to the condition text, the condition will change to be a custom condition.
- The Condition Text will automatically populate if you have selected a standard condition. If you are creating a custom condition enter the condition requirements into the Condition Text field.
- If the condition needs verification that its requirements have been met, check the Verification Required box. This indicates that the condition must be validated before the permit can be closed.
- Enter the number of Follow-Up Days needed to address the condition if its requirements are not met during the inspection review or during the review of the permit.
- If the condition references or needs to be associated with a specific Inspection Type, begin typing in the field or click the magnifying glass icon to select the inspection type from the list.
- Click Create to add the condition to the permit.
- Click Save on the Conditions tab.
Managing conditions
Changing the display order
- Enter the Display Order number to set the order that the condition displays in the list.
- To move a condition to the top of the list, click the up arrow icon (
 ).
). - Click Save.
Adding report categories
Conditions will usually be found on permit reports, but can be added to the Certificate of Occupancy report by using the Report Categories icon.
- Click the report categories icon (
 ).
). - The left side of the table will show the reports where the condition will appear.
- Click the plus sign next to Certificate of Occupancy to make this condition available on that report.
- If you do not want this condition to appear on a report, click the minus sign next to the report name.
- Click Save.
Adding notes
- Click the sticky note icon (
 ) to add notes to the condition. These notes can include links and attachments, such as documents, pictures, or spreadsheets.
 -
Click Save at the bottom of the page.
Deleting a condition
- Click the trash can icon (
 ) next to the condition record. The condition will appear with a strike-through mark.
 - Click Save at the bottom of the page.
