Managing business accounts
From an existing business account, you can manage contacts, licenses, fees, permits, and actions. *Note: SmartGov has built-in protections for PII and maintains high levels of storage encryption for data that is defined as sensitive information. You must have the Admin.Business security function in order to view Business Accounts.
- Click Accounts in the navigation menu, then select Business Accounts.
- Select the business account from the list.
Main tab
The Main tab gives an overview of the business including the information entered when creating the business account. Additional fields display once the business account has been created.
There are a few rules to keep in mind when managing business accounts:
- When a business license is created through the Citizen Portal, it will be created in an Incomplete state instead of the Pending state. You must add a status with the Incomplete state when configuring the license type used for the business license.
- When a business license that is associated with a business account is moved to an Approved state, an email notification is triggered to notify any active contact on the business that is portal enabled.
- The Status field will list the current status of the business account. The business will be listed as Active after the first business license is issued.
- The Begin Date will populate with the date that the first business license was issued for this account.
- The End Date will populate if the business is closed.
- The Access Code can be associated with a Citizen Portal account, allowing the portal user to view records and pay fees through the Citizen Portal.
- Enter a Primary Phone, Primary Email, and preferred Method of Contact for this business account.
- The Mailing Address and Billing Address will populate with the Business Mailing Address information entered when creating the business account.
- Click Edit Address to make any changes.
- Click Save at the bottom of this page if any changes are made.
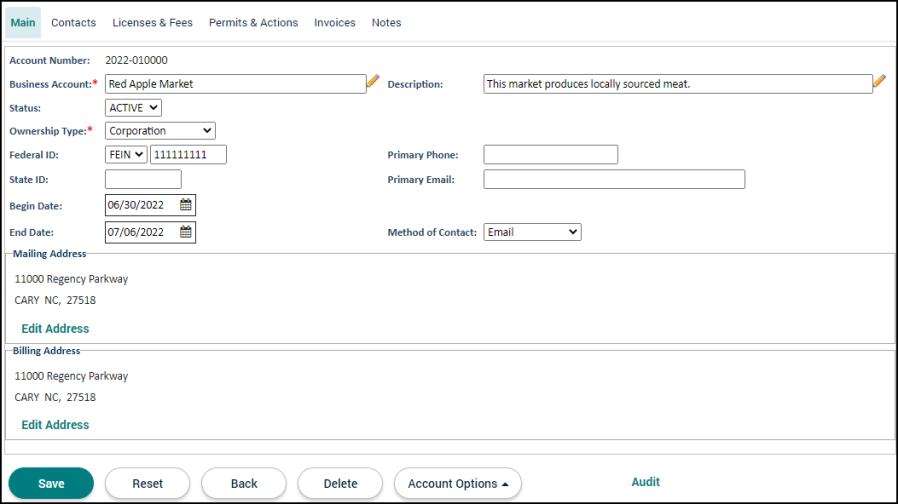
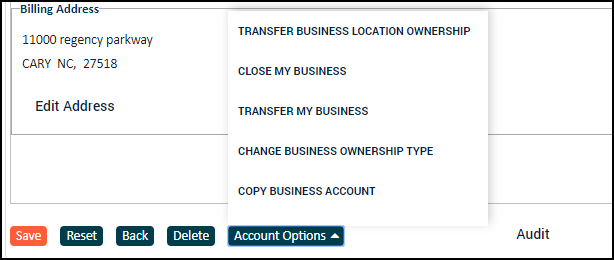
Account options
The Account Options menu displays a customizable list of options that have been configured to manage changes to the business.
-
Hover your mouse over the Account Options menu and select one of the available options. This will open a new permit of the selected permit type.

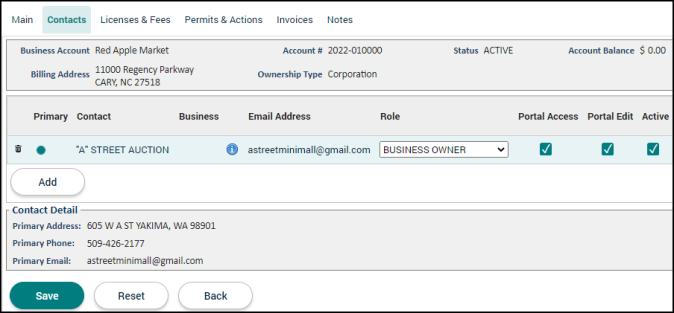
Contacts tab
The Contacts tab will list the Owner that was configured when the business account was initially created. You can add additional contacts on this tab as well as update existing contacts to reflect personnel change within the business.
- Click Add.
- Begin typing or click the magnifying glass icon (
 ) and select the Contact.
 - Select the appropriate Role.
- Check the box in the Portal Access column to allow the contact to manage their licenses and pay fees online through the Citizen Portal.
- Ensure the Active box is checked if this is a current contact for the business.
- Click Save.
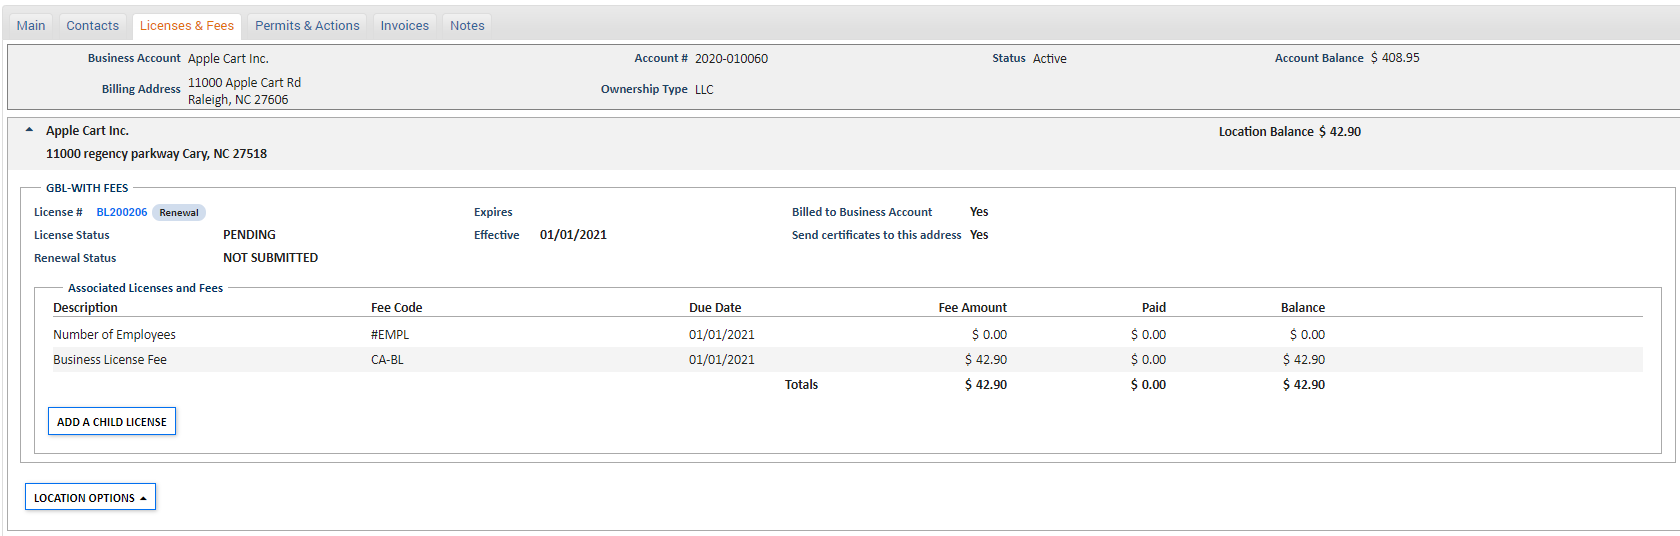
Licenses and Fees tab
The Licenses and Fees tab will list any location that has been set up for this business account. Within each location you will be able to see any licenses and associated fees. You can add new locations or licenses, create a bill, and manage all licenses associated with this account on this tab.
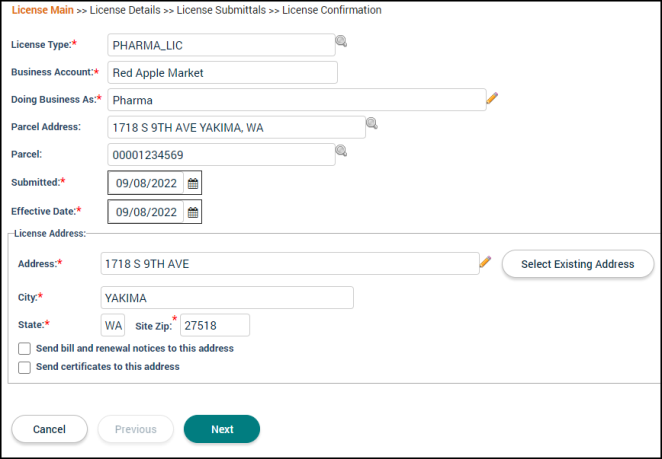
If a license needs to be associated with a location that is not already listed on the business account, you can add a new location to the business account and create a license tied to that location at the same time.
- Click Add a New Location at the bottom of the page.
- Begin typing or click the magnifying glass icon () to select a License Type.
- The Business Account will default to the account you are working in.
- Enter the Doing Business As name.
- If this license should be associated with a parcel, begin typing or click the magnifying glass icon () to view and select the Parcel.
- The Submitted Date and Effective Date will default to the current date. Edit these fields as needed.
- In the License Address section, enter the address for the new location.
- If you are adding the first license location for a business account, an Address is Same as Business Mailing Address option will display. Check this box to copy the business mailing address into the Address fields in this section.
- Select if SmartGov should Send bill and renewal notices to this address and/or Send certificates to this address.
- Continue clicking Next to go through each step of the license. You may need to enter License Details or add a Submittal as you proceed.
- On the License Confirmation step, confirm that each section has accurate information and click Save. The new location should display on the Licenses and Fees tab along with the license that was created.
- Click the license number to open the license, allowing you to process the license for the business account. *Note: Any contact listed as an Owner for this business will be copied to the Contacts tab of the license with a Role of Business Owner.
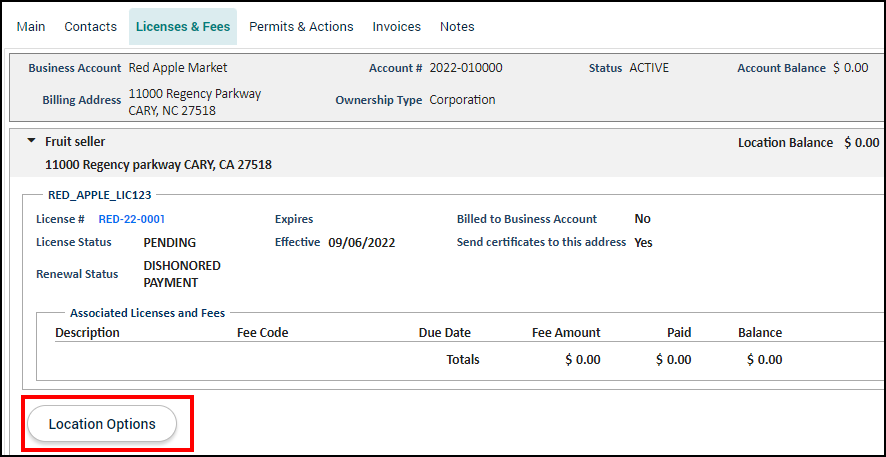
The Licenses and Fees tab is broken up by location. Within each location, you can see a list of existing licenses and create a new license.
- If a new license needs to be created for an existing location, navigate to that location and hover over Location Options.
- Select Add License To This Location.
- Begin typing or click the magnifying glass icon () to select the License Type.
- The remaining fields on this step of the application will be populated with the information from the associated location. Click Next.
- Continue clicking Next to go through each step of the license. You may need to enter License Details or add a Submittal as you proceed.
- On the License Confirmation step, confirm that each section has accurate information and click Save.
- Click the license number to open the license, allowing you to process the license for the business account. *Note: Any contact listed as an Owner for this business will be copied to the Contacts tab of the license with a Role of Business Owner.
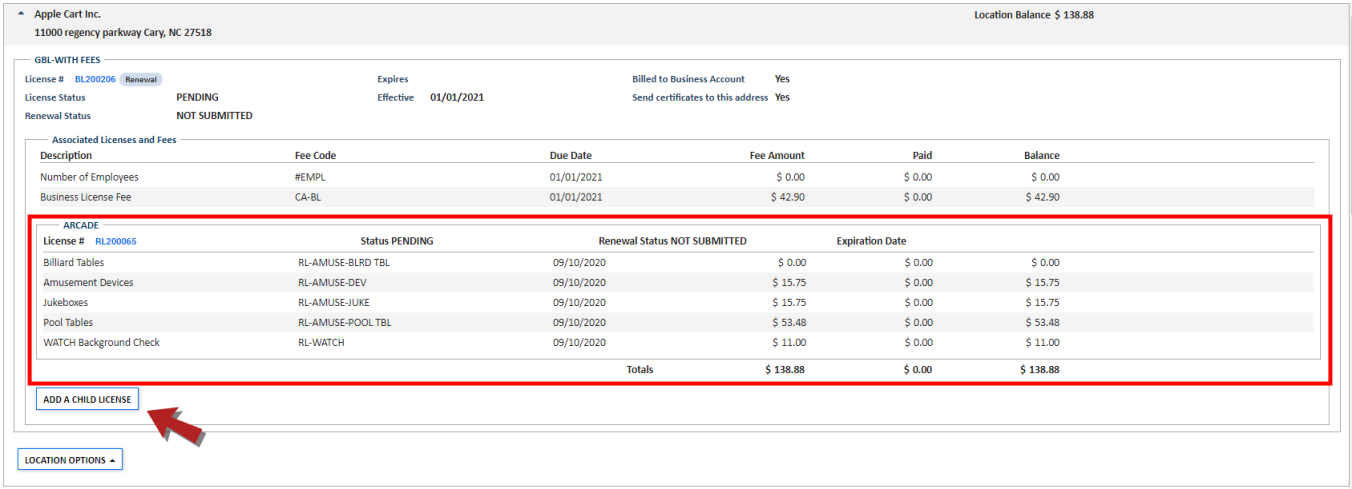
If a license type is configured as a Parent License Type, you can add a child license to the business account directly from the Licenses and Fees tab.
- Navigate to the parent license.
- Click Add a Child License.
- Begin typing or click the magnifying glass icon () to select the License Type.
- The remaining fields on this step of the application will be populated with the information from the associated location. Click Next.
- Continue clicking Next to go through each step of the license. You may need to enter License Details or add a Submittal as you proceed.
- On the License Confirmation step, confirm that each section has accurate information and click Save. The license will display under the parent license.
- Click the license number to open the license, allowing you to process the license for the business account. *Note: Any contact listed as an Owner for this business will be copied to the Contacts tab of the license with a Role of Business Owner.
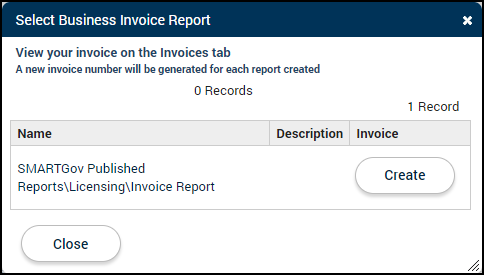
Any unpaid fees displayed on the Licenses and Fees tab can be billed at the same time. This allows you to generate one invoice for the business that encompasses any outstanding fees.
- Click Create Invoice at the bottom of the page.
- Click Create beside the report that you want to generate. The report will display in a new tab.
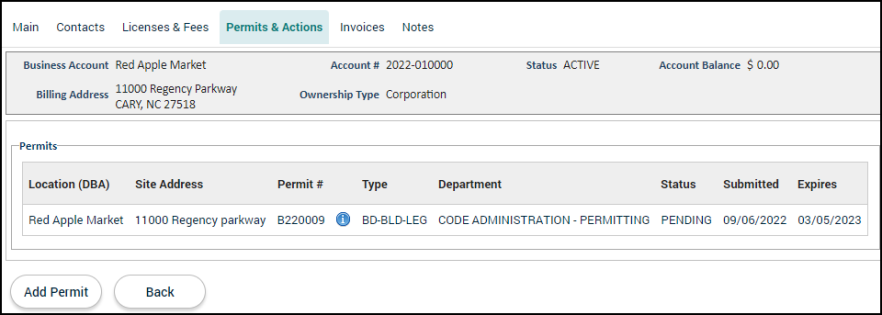
Permits & Actions tab
The Permits & Actions tab lists any permits or business actions that have been tied to this business account. You can also create a permit from this tab. For example, if a business is applying for a construction permit, that permit can be created through this tab. Click on an existing permit to view and process the permit.
- If you need to create a permit, click Add Permit at the bottom of the page.
- Select a Department from the drop-down menu.
- Begin typing or click the magnifying glass icon () to select a Permit Type.
- If applicable, enter a Parcel number.
- The Applicant will default to the associated business.
- The Submitted On date will default to the current date. Adjust this field as necessary.
- Enter the Site Address.
- If the location has been added to the business account, click Select Existing Address and select the address in the window that displays.
- Click Create. The page will refresh to display the newly created permit where you can view and process the permit.
Notes tab
The Notes tab will list any notes that have been associated with this business account, as well as any notes associated with parcels or contacts tied to this business account . You can also add a new note from this tab.
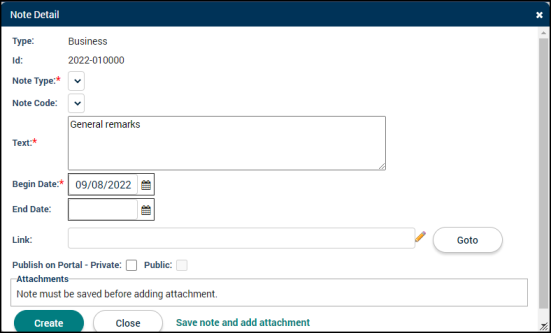
- If you need to add a note to this business account, click Add.
- Select the Note Type from the drop-down menu. *Note: In order to add a note to a business account, you must configure a note type to be available for business accounts.
- Note Codes are templates for commonly used notes. Select the appropriate Note Code from the drop-down menu, if applicable.
- Enter the details of the note in the Text field.
- The Begin Date will automatically populate with the current date, but can be changed.
- Enter an End Date, if necessary. *Note: If the Note Type selected triggers a hold, the End Date will mark the end of the hold.
- If the note is associated with a web address, enter the URL in the Link field. You can use the Goto button to test the link.
- Check the box next to Publish on Portal - Private if only Citizen Portal users that are listed as contacts or contractors with portal access should have access to the note.
- If anyone should have access to the note, check the Publish on Portal - Public box.
- To add attachments to the note, click the Save note and add attachment link, then click Add in the Attachments section.
- Select the file from your computer and click Save. *Note: Attachments can include documents, images, and spreadsheets.
- If you do not need to add attachments, click the Create button to add the note to the business account.
Requesting an action for a business account
If a permit type has been configured as a Business Only permit type, you can create a business action for the business account directly from the Main tab. For example, if a business is closing, a permit can be created from this option to document the closure.
- Click Accounts in the navigation menu, then select Business Accounts.
- Select the business account.
- At the bottom of the Main tab, click Account Options and select the appropriate permit type. *Note: A permit type will only display here if the Business Only box is checked on the Main tab of the permit type and Business Only is selected in the Applies To: drop-down.
- Confirm the information displayed in the New Permit window is correct, and click Create. The page will refresh to display the newly created permit where you can view and process the permit.
- You can access this permit from the Permits & Actions tab under the Business Actions section.
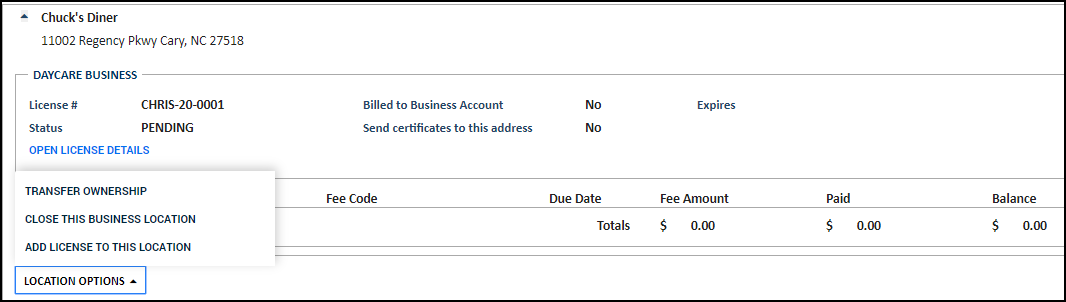
Requesting an action for a business location
If a permit type has been configured as a Business Location Only permit type, you can create a business action for a business location directly from the Main tab. For example, if a business is moving to a new location, a permit can be created from this option to document the move.
- Click Accounts in the navigation menu, then select Business Accounts.
- Select the business account and navigate to the Licenses and Fees tab.
- Click Location Options at the bottom of the location and select the appropriate permit type. *Note: A permit type will only display here if the Business Only box is checked on the Main tab of the permit type and Business Location Only is selected in the Applies To: drop-down.
- Confirm the information displayed in the New Permit window is correct, and click Create. The page will refresh to display the newly created permit where you can view and process the permit.
- You can access this permit from the Permits & Actions tab under the Location Actions section.