Creating and managing a contact or contractor
The Contact List page displays all contacts and contractors available to associate with records throughout SmartGov. You can create new contacts or contractors and manage existing contacts or contractors from this page.
Creating a new contact or contractor
- Click Common in the navigation menu, then click Contacts.
- Select Contact List.
- Click the Create New button.
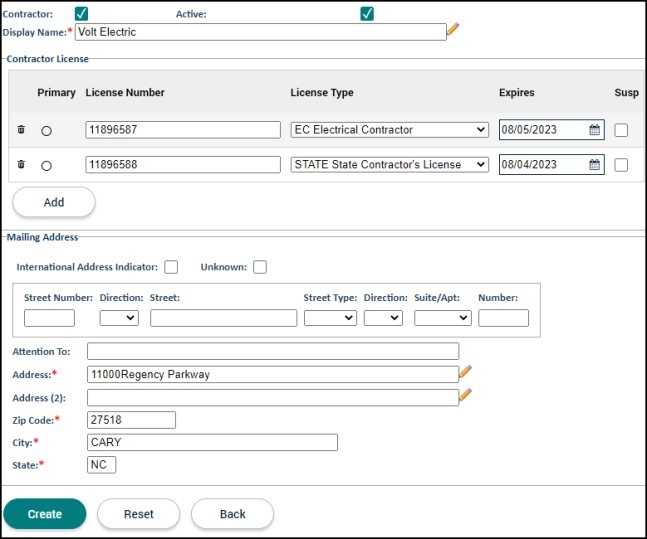
- You can designate if this contact is a contractor by checking the Contractor box. This will add an additional section for entering the contractor's license information.
- Enter the contact's identifying information.
- A Contact will include fields for First Name, Middle Name, Last Name, and Display Name.
- A Contractor will include a field for Display Name.
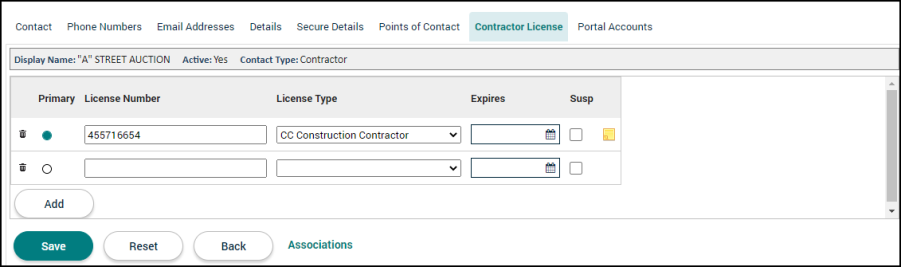
- If this contact is a contractor, you will see a Contractor License section.
- Click Add to associate any relevant licenses to this contractor.
- Enter a License Number.
- Select a License Type. *Note: Contractor license types are configured through the Jurisdiction Lookup Values page.
- Use the Expires field to note when the license will expire.
- Select if the license is the contractor's Primary license. *Note: A Primary license must be selected.
- If this license is suspended, check the box in the Susp column.
- Repeat this process to add any additional licenses.
- Enter the contact or contractor's Mailing Address.
- If the contact has an international address, check the International box to provide additional international mailing address information.
- If the address is Unknown, check the box to auto-populate the required address information with placeholders.
- Click Create. The page will refresh to display additional tabs.
The Contact tab lists the primary contact information, portal access code, mailing address, and physical address for the contact or contractor. You also have the ability to upload an identification photo or image to the contact and add notes to the contact record on this tab.
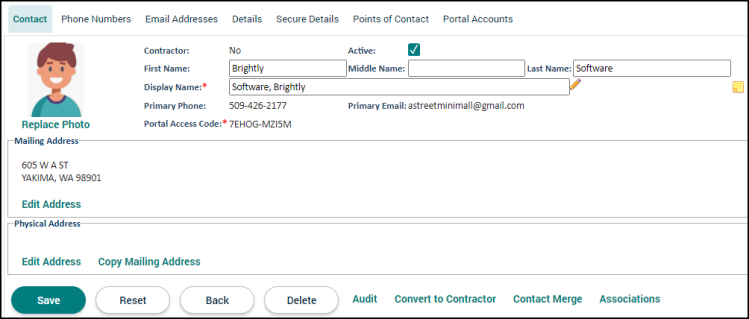
Portal access code
The Portal Access Code automatically populates when the contact or contractor record is created in SmartGov. When a citizen is registering for an account on the Citizen Portal, they have the option to enter their portal access code. This will allow them to associate any existing records in SmartGov with their newly created portal account. If the user already has a portal account, they can still associate the access code with their account by entering the access code under their "My Account" settings. If the citizen needs assistance in associating their access code with their account, the Managing your Citizen Portal Account content can guide the citizen through finding this section.
Mailing, physical, and assessor supplied address
The Mailing Address section includes the address information that was entered when the contact was initially created.
- Click Edit Address to update the contact's mailing address in the window that displays.
- Click Save to update these changes.
The Physical Address, by default, will be blank.
- If the Physical Address is the same as the Mailing Address, click Copy Mailing Address.
- Adjust any necessary fields in the window that displays and click Save.
- If the Physical Address is different than the Mailing Address, click Edit Address.
- Enter the physical address in the window that displays.
- Click Save.
- Click Save at the bottom of the page.
The Assessor Supplied Address section will display if this contact was imported through the Parcel Load Job connector. This address cannot be edited in SmartGov and is managed through the job.
Identification photo
The identification photo can be displayed in ad-hoc report results.
- Click Replace Photo.
- Locate the file in the window that displays and click Open.
- Crop the photo as needed and click Crop and Upload.
- If additional photos are needed, click Select File and repeat this process.
- Select the Primary option for the image that should display on the Contact tab.
- Click the trash can icon (
 ) to remove an image from this contact.
 - Click Close to return to the Contact tab.
Retrieving audit information
- Click Audit at the bottom of the page to see a list of all changes made to the contact in the window that displays.
Convert to contractor
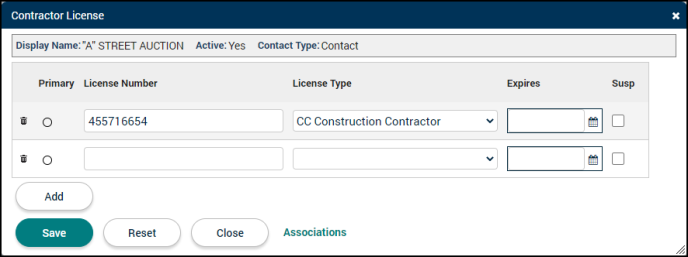
If the contact you are viewing needs to be converted to a contractor, click Convert to Contractor at the bottom of the page.
- In the window that displays, enter a License Number.
- Select a License Type. *Note: Contractor license types are configured through the Jurisdiction Lookup Values page.
- Use the Expires field to note when the license will expire.
- Select if the license is the contractor's Primary license.
- If this license is suspended, check the box in the Susp column.
- If additional license are needed, click Add and repeat this process.
- Click Save.
- Click Close to return to the converted contact record. A Contractor License tab will now display for this contact.
Contact merge
If multiple contacts need to be combined into one contact record, you can merge contacts through this tab.
- Click Contact Merge at the bottom of the page.
- Search for and select each contact you want to merge together. *Note: Clicking Contact Merge on a specific contact will not automatically include that contact in the merge. Ensure that all desired contacts are selected.
- Click Merge to view all selected contacts on one page.
- Select a Master contact. The master contact display name, portal access code, and address information will override the other contact information on the merged contact. Any records that are associated with the included contacts will be updated to reflect master contact information. *Note: If one or more contractors are included in the merge, one of the contractors must be selected as the master contact. If a contact has a Source of 'A' (Assessor Contact), you cannot merge the record with a contractor record.
- Click Merge.
- Click Yes in the window that displays.

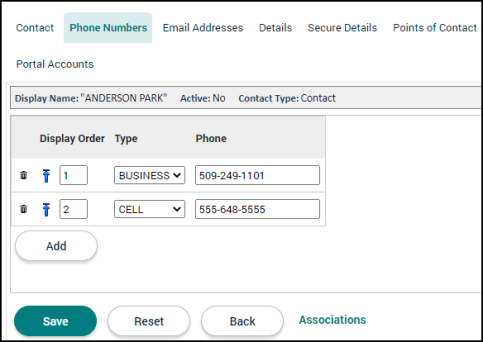
The Phone Numbers tab lists any phone number associated with the contact. You can add phone numbers and delete existing phone numbers from this page.
- Click Add.
- Select a Type. *Note: Phone Types are configured through the Jurisdiction Lookup Values page.
- Enter the Phone number.
- Repeat this process to add any additional phone numbers.
- Use the Display Order column to sort the phone numbers into a sequential order.
- Click the trash can icon () to delete a phone number.
- Click Save.
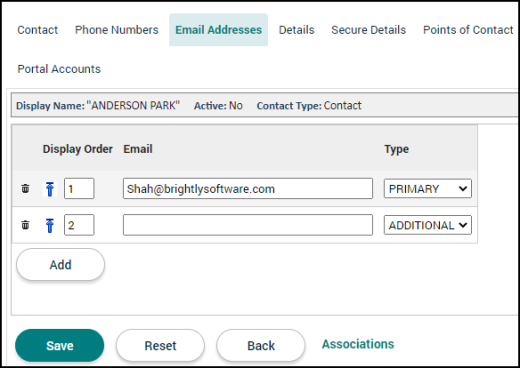
The Email Addresses tab lists any email addresses associated with the contact. You can add email addresses and delete existing email addresses from this page.
- Click Add.
- Enter the Email.
- Select a Type. *Note: Email Types are configured through the Jurisdiction Lookup Values page.
- Repeat this process to add any additional email addresses.
- Use the Display Order column to sort the email addresses into a sequential order. *Note: Only the first email in this list will display as an option when emailing a report.
- Click the trash can icon () to delete an email address.
- Click Save.
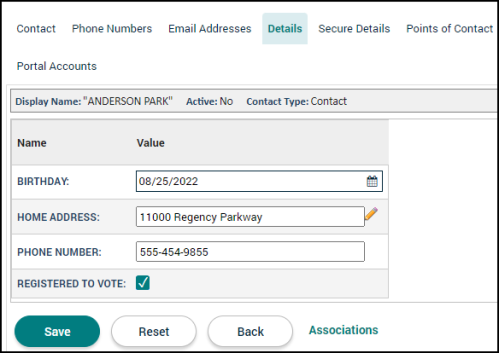
The Details tab lists any custom attributes applicable to this contact. *Note: Custom attributes are configured through the Contact Custom Attributes page. The attributes that display on this tab may differ between contacts and contractors.
- Enter a Value for any relevant custom attribute. *Note: Any attribute with an asterisk (*) is required.
The Secure Details tab allows you to include Personally Identifiable Information (PII) for the contact. Once a value is entered and saved, the information entered will display as asterisks. Information included on this tab will not display to all users in SmartGov. Data entered here can only be viewed in your production account by a user that has been given full access to the "Attribute.Contact.SensitiveData" user privilege. It will not display in your training account or when Client Services accesses your account. *Note: This tab will only display if your account has been configured to enable PII during implementation. Please contact Client Services to enable this feature.
- Enter a Value for any secure detail. *Note: SSN (Social Security Number) is a predefined PII custom attribute for all jurisdictions.
- Click Save.

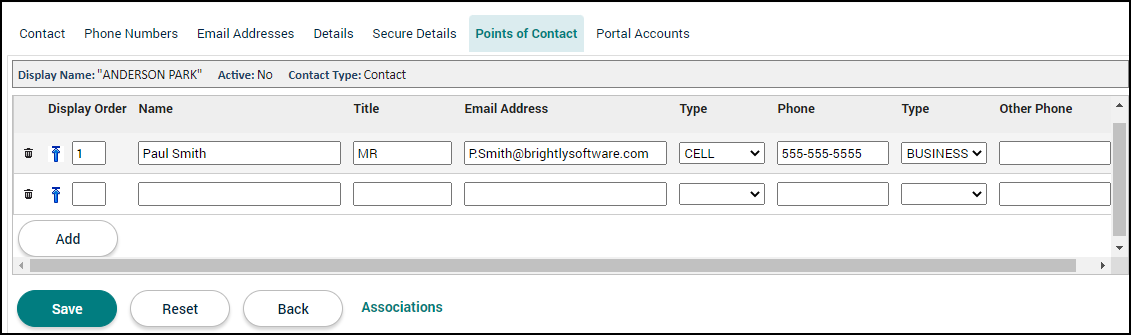
The Points of Contact tab lists any additional contact information for this contact. This may be used if the contact is a company and you need to list out multiple employees.
- Click Add.
- Fill out any necessary contact information.
- Repeat this process to add any additional points of contact.
- Click Save.
If the contact you are viewing is a contractor, the Contractor License tab will allow you to add any license information. This tab also lists any contractor licenses issued in SmartGov that have this contractor listed as an applicant in the Related Licenses section. *Note: The Related Licenses section will only display if the contact has contractor licenses being managed in the SmartGov licensing module
- If you need to add license information, type the License Number and select a License Type. *Note: The License Types are added through the Jurisdiction Lookup Values page.
- Begin typing or click the calendar icon (
 ) to list when the license Expires.
 - Select if this license is the Primary license for the contractor.
- Check the box in the Susp column if this license has been suspended.
- If additional licenses are needed, click Add and repeat this process.
- Click Save at the bottom of the page.
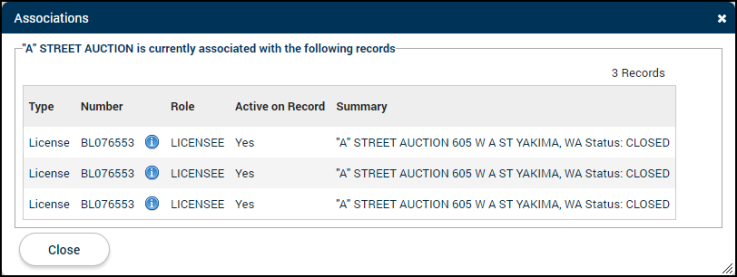
The Associations option lists any record, including parcels, which this contractor or contact is associated with. A citizen portal user may reach out asking for a way to connect their existing applications and records to their portal account. They can do this by entering the Access Code found on the Contact tab into their portal account.
- Click the Associations option at the bottom of the record to display the Associations window.
- Click the information icon (
 ) to view the record details.
 - Click Back at the bottom of the record to return to the contact.
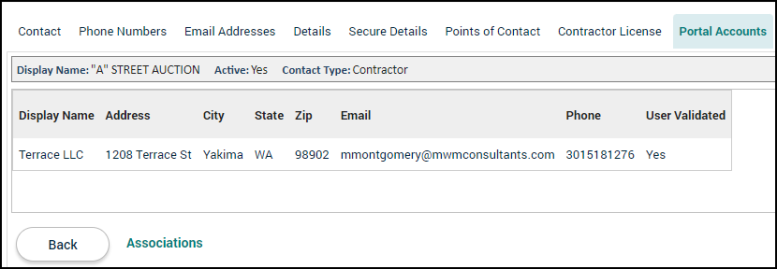
The Portal Accounts tab lists any portal accounts associated with this contact or contractor. A citizen portal user may reach out asking for a way to connect their existing contact information and records to their portal account. They can do this by entering the Access Code found on the Contact tab into their portal account.