Contact custom attributes
Custom Attributes are jurisdiction defined fields that display on the Details tab of a contact and allow you to capture a wide variety of data types associated with the specific contact record.
Adding a custom attribute
- Click on Administration in the navigation menu, then select Contact Setup.
- Click Custom Attributes. *Note: SSN (Social Security Number) is a predefined PII custom attribute for all jurisdictions.
- Click Create New.
- Enter a Name and a Description.
- Ensure the Active box is checked to display the attribute on the Details tab.
- Check the Required box to make this value required.
- Check the Read Only box to prevent this value from being changed.
- Use the Display order field to order the attributes on the Details tab.
- Select an appropriate Type.
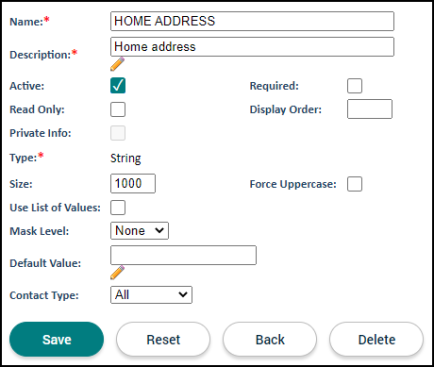
String
The String option should be used if the data being collected is in a text format. This custom attribute type can also be configured to display a list of options in a drop-down menu.
- Enter the character limit in the Size field. *Note: The maximum character limit is 1000 characters.
- Check the Force Uppercase box to automatically convert any text entered to uppercase format.
- Click Save.
- If you would like the custom attribute to display a list of options in a drop-down menu, check the Use List of Values box.
- To begin defining the list of options, click the Create button in the Values section that appears.
- In the window that displays, enter the Value and Description, then click Save. *Note: The text entered in the Value field will display as the option in the list.
- Repeat this process to add any additional values.
- Check the Private Info box if this attribute is considered secure Personally Identifiable Information (PII). *Note: SmartGov has built-in protections for Personally Identifiable Information and maintains high levels of storage encryption for data that is defined as sensitive information.
- Select a Mask Level:
- None will leave the entire value visible.
- Partial will only display the last four characters of the value. Only users with specific secure functions will be able to see or edit this value.
- Full will display the entire value entered as asterisks. Only users with specific secure functions will be able to see or edit this value.
- If you would like specific text to be pre-populated, enter the text in the Default Value field.
- Select the Contact Type this attribute should display for.
- Click Save.

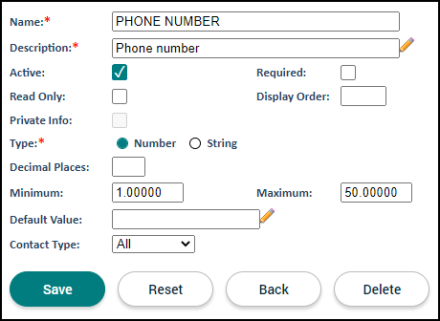
Number
The Number option should be used if the data being collected is in a number format.
- Enter the number of decimal places the value should be rounded to in the Decimal Places field. For example: If the Decimal Places field is set to 2 and the number 3.648 is entered, the system will automatically round that number to 3.65.
- If applicable, enter the Minimum and Maximum values.
- If you would like a specific number to be pre-populated, enter the number in the Default Value field.
Select the Contact Type this attribute should display for.

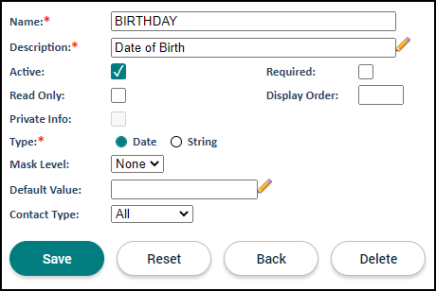
Date
The Date option should be used if the data being collected is in a date format. If this option is used, there will be a calendar icon that displays to select the appropriate date.
- If you would like a specific date to be pre-populated, enter the date in the Default Value field.
- Select the Contact Type this attribute should display for.

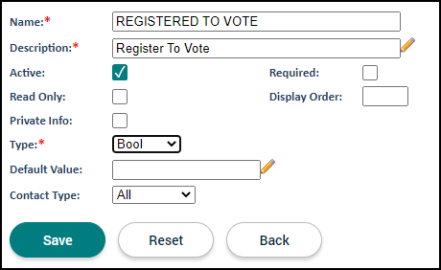
Boolean
The Boolean option should be used if you would like the field to be displayed as a checkbox.
- If you would like the checkbox to be checked automatically, enter "Y" in the Default Value field.
- Select the Contact Type this attribute should display for.

- Once all custom attribute information has been entered, click Save.
- Repeat this process to add any additional custom attributes.
