Adding a new business permit on the citizen portal
If you have added a Business Account, you can apply for a new business permit from the Citizen Portal.
- Click the Go button on the Business Portal tile from the Citizen Portal.
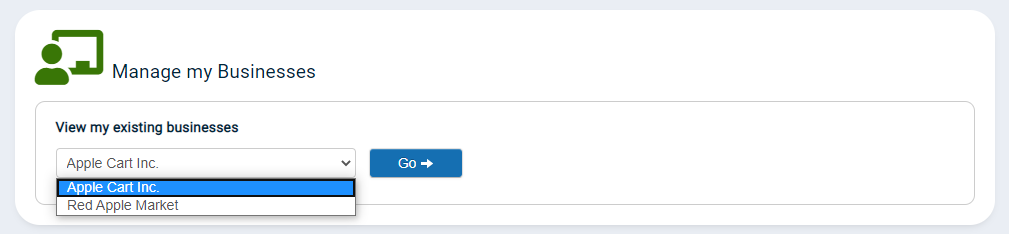
- Select the business you would like to manage from the drop-down menu under the Manage My Businesses panel. Then, click Go.
- Click on Apply For A Permit. This will open the Business Permit Application wizard.
How to apply for a business permit
You will need to define the category and application type prior to filling out the Permit Application Wizard. This will determine the steps that display throughout the application process.
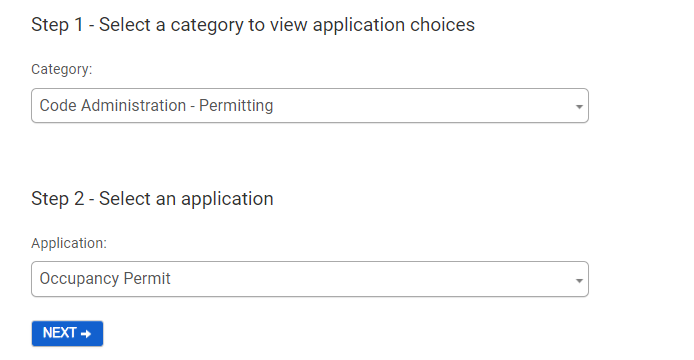
- Select the appropriate permit Category under Step 1, such as Building Department. *Note: The categories available will match the different departments defined by your jurisdiction.
- Select the appropriate permit type from the Application drop-down menu under Step 2. *Note: The applications available will match the different permit types defined by your jurisdiction.
- Click Next to proceed to the Permit Application Wizard.
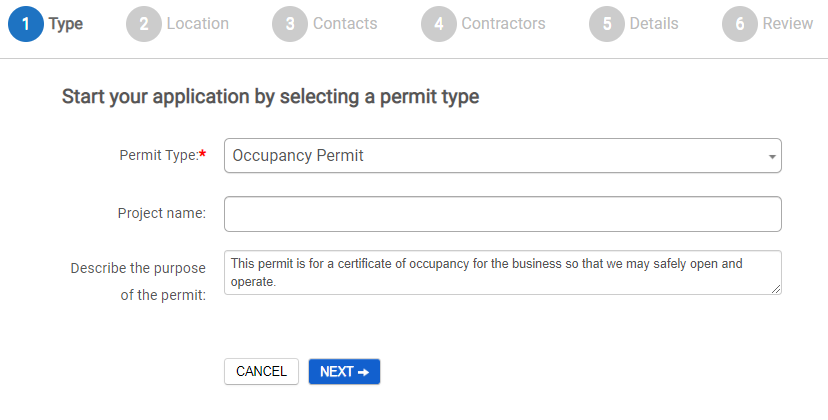
Type
The steps available in the Permit Application Wizard will be determined based on the application selected in Step 2 above. *Note: Required fields throughout the wizard will be indicated with an asterisk (*).
- The Permit Type will auto-populate based on the previous selection, but can be edited if necessary.
- Enter a Project Name, if needed. The jurisdiction will see this project name when they view the permit.
- Describe the Purpose of the Permit so that the jurisdiction will understand why it is needed.
- Click Next.
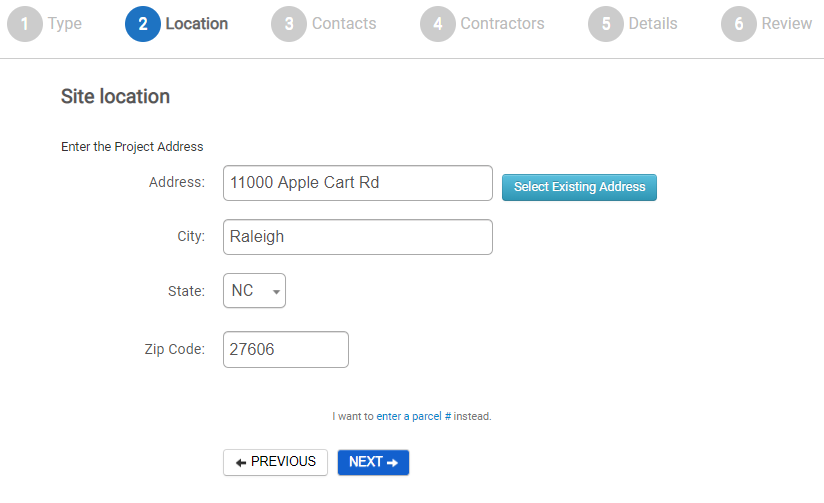
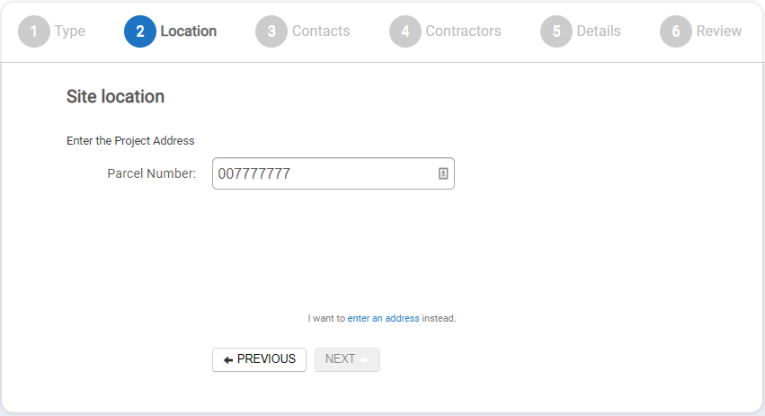
Location
The Site Location for the permit can be defined by either an address or a parcel number, if available.
Defining Location by Address
- Begin entering the Address for this permit and select the correct address from the filtered list. *Note: If the address is not listed, you will not be able to request a permit for this address, but you can still search by Parcel Number, if known. Parcel numbers can usually be provided by your jurisdiction.
- Click Next.
Defining location by parcel number
- Click Enter a Parcel # at the bottom of the application.
- Begin entering the Parcel Number and select the appropriate parcel for this permit. *Note: If the parcel is not listed, you will not be able to request a permit for this parcel number. Please contact your jurisdiction if your address or parcel does not exist.
- Click Next.
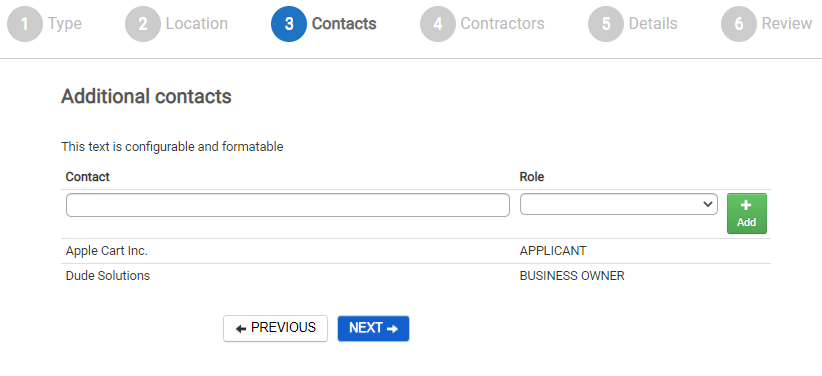
Contacts
The Contacts step will automatically list you as a contact on the application as the Applicant. If a parcel has been selected, the Owner will be listed as a contact as well. You have the option to associate more contacts to this permit application, if necessary.
- Begin typing and select the appropriate Contact from the list that displays.
- Select the Role in the drop-down menu.
- Click Add.
- Repeat this process to add any additional contacts.
- Click Next.
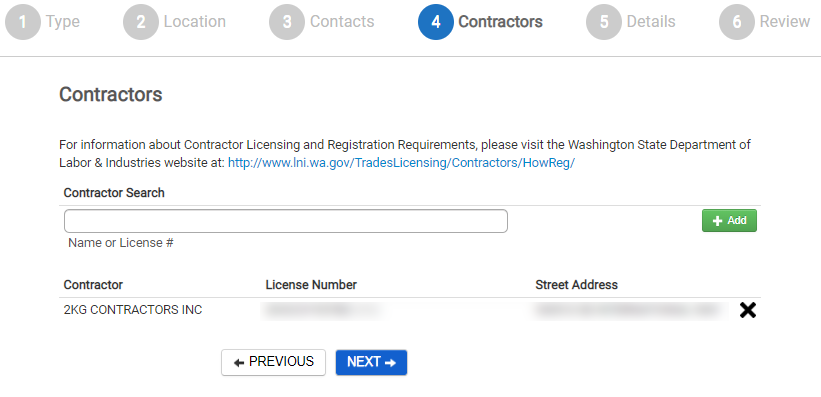
Contractor
If you are a contractor or need to list a contractor for this permit, you may do so on the Contractor step.
- Begin entering the Name or License # for the contractor and select the appropriate option.
- Click Add.
- Repeat this process to add any additional contractors.
- Click Next.
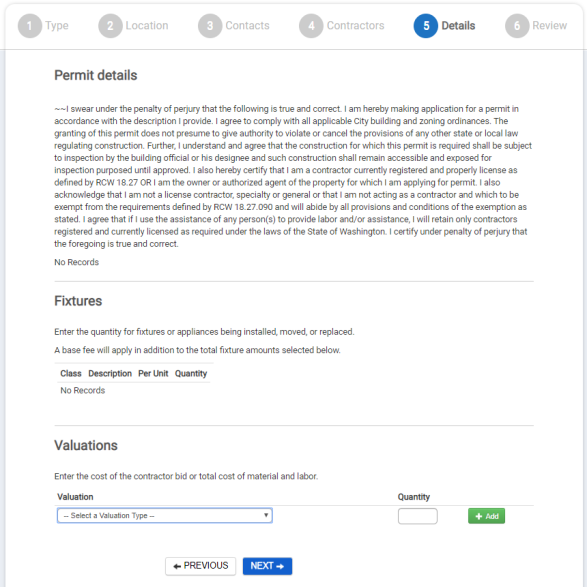
Details
The Details step lists attributes, fixtures and valuations that may need to be associated with your application. Any field marked with an asterisk (*) is required. *Note: The options that display on the Details step depend on the permit type you have selected. These options may not display on your specific application.
- Enter any details that apply to this permit application.
- Enter the Quantity of any fixture you need to include on the application.
- If applicable, select a Valuation Type from the drop-down menu and enter its associated Quantity.
- Click Add.
- Repeat this process to add any additional Valuations.
- Click Next.
Review
- Verify that all information provided for this permit application is correct.
- If changes need to be made, click Edit next to that section of the permit application. This will bring you back to the step that you want to edit and will walk you through the rest of the wizard again.
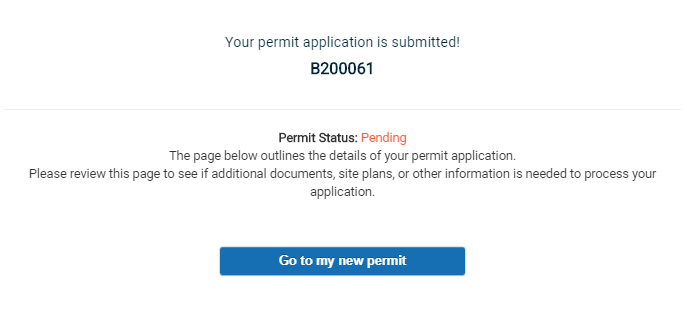
- Click Save and Continue once all information has been verified and changes have been made.
- A confirmation window will display across the top of the screen listing the current status of your permit.
- The page you are directed to is your permit application. There may be additional documents, site plans, or information needed to further process your application. Take a thorough look through your application to ensure the jurisdiction has all documentation and information needed to process your application.
Finishing your business permit application
Once you have submitted your initial permit application, your jurisdiction may need further information in order to process and issue your permit. You must be logged in to the Citizen Portal to manage your permit application. You will receive email notifications throughout the application process depending on the email notifications you are set up to receive. *Note: The permitting feature may not be available depending on the configuration set up by your jurisdiction.
- Click the Go button on the Business Portal tile from the Citizen Portal.
- Select the business whose permit you would like to complete from the drop-down menu under the Manage My Businesses panel. Then, click Go.
- Click on the permit number of the business permit that you would like to finish.
