Inspection areas
Inspection areas represent a collection of neighborhoods within SmartGov. Each inspection area is assigned to a department and can have a default inspector.
Adding an inspection area
- Click on Administration from the navigation menu, then click Inspection Setup.
- Click Inspection Areas.
- Click the Create New button.
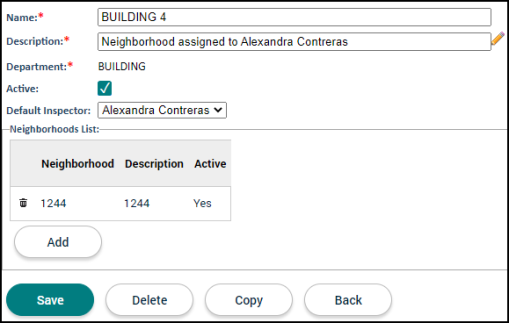
- Enter a Name for the inspection area.
- Use the Description field to describe the area.
- Select a Department from the drop-down menu.
- Ensure the Active box is checked to display this area when configuring neighborhoods as well as associating an inspection area to a record.
- Add any neighborhoods associated with this inspection area. *Note: You may only associate a neighborhood to one inspection area per department.
- Click Add.
- Begin typing or click the magnifying glass icon (
 ) to view and select the Neighborhood you would like to add to this inspection area.
 - Repeat this process to add any additional neighborhoods.
- Click the trash can icon (
 ) to remove a neighborhood from the inspection area.
- Click Save.
- Once you have saved the inspection area, you can select a Default Inspector from the drop-down menu. Click Save if any changes are made. *Note: If the Default Inspector does not meet the required qualifications for an inspection type, the inspection will not be automatically assigned to the inspector.
Managing inspection areas
- Click on Administration from the navigation menu, then click Inspection Setup.
- Click Inspection Areas.
- Click the Name of the inspection area.
- To change the Default Inspector, select the inspector from the drop-down menu.
- To remove a neighborhood from the inspection area, click the trash can icon ().
- To delete an inspection area, click Delete at the bottom of the page. *Note: If there are child records associated with the inspection area, you must inactivate the inspection area.
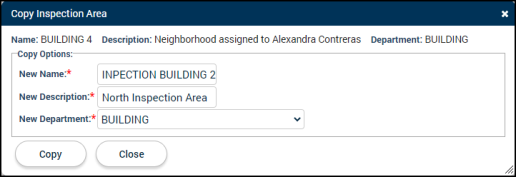
- If an inspection area is needed with similar configurations, you can easily copy the configurations from one inspection area to a new one.
- Click Copy.
- Enter a New Name and New Description.
- Select a New Department from the drop-down menu.
- Click Copy.