Back to Event Manager Main Menu
Submitting Tasks as Asset Essentials Work Requests
The Event Manager and Asset Essentials integration will allow an Event Manager Task to be submitted as an Asset Essentials Work Request. This creates a seamless communication experience between your departments which allows for work to be completed quickly and efficiently. *Note: Only certain clients are eligible for this integration. To learn if you are eligible, contact Client Services.
How to Submit a Task as a Work Request
You can submit a task as a work request in two ways: from the task creation window and directly from the task list.
- Be sure you are logged in to Event Manager before submitting a task as a work request. *Note: You may not have login credentials for both Event Manager and Asset Essentials. Please contact your administrator to be added as a user, if necessary.
- Click Tasks from the navigation menu.
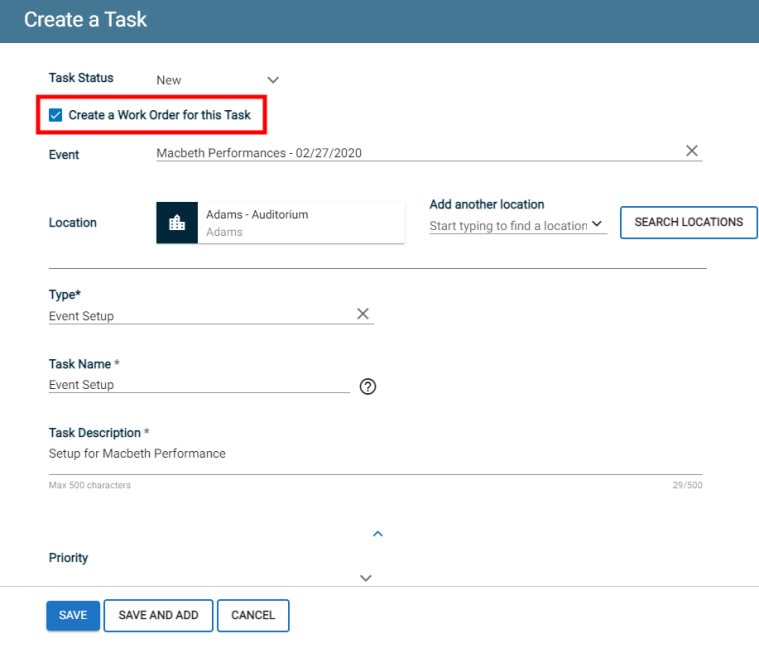
From the Create a Task Window
- Click the Add a Task button at the top of the page.
- In the window that appears, check the Create a Work Order for this Task box.
- Fill in the necessary task details.
- Click Save. The task will be added to the task list, and the work request will be sent to Asset Essentials.
- Once the work request has been created, the work order number will display in the task list and in the top right corner of the task window. *Note: There are no other Asset Essentials work order fields that will show on the task.
- If you need to manage the work request in Asset Essentials, you will need to log in to Asset Essentials and search for the associated work request.
From the Task List
- Search or filter the task list to find the task that should be submitted as a work request.
- Click the Create Work Order button on the task.
- Once the work request has been created, the work order number will display in the task list and in the top right corner of the task window. *Note: There are no other Asset Essentials work order fields that will show on the task except for the task status that will reflect the status changes of the work order in Asset Essentials.
- If you need to manage the work request in Asset Essentials, you will need to log in to Asset Essentials and search for the associated work request.

From Bulk Actions
-
Search or filter the task list to find the tasks that should be submitted as work orders.
-
Check the box next to each task that should be submitted as a work order.
-
Click on the Bulk Actions drop-down menu and then select Bulk Create Work Orders.
- Once the work request has been created, the work order number will display in the task list and in the top right corner of the task window. *Note: There are no other Asset Essentials work order fields that will show on the task.
- If you need to manage the work request in Asset Essentials, you will need to log in to Asset Essentials and search for the associated work request.

Overview of Information in the Asset Essentials Work Order Generated From the Event Manager Task Submission
The workflow within this integration is enhanced through a practical and effective use of information available in the Asset Essentials work order description. This functionality lets you see added details in the Asset Essentials work order once generated from submitting your Event Manager task.
To optimize the use of the integration in helping you identify what event the task in Event Manager is for
-
Ensure the product integration license is enabled on your tenant
-
Create a task in the task list in Event Manager and check the Create a Work Order for this Task box
-
View the task in Asset Essentials
-
You will see the following additional information in display in the work order:
-
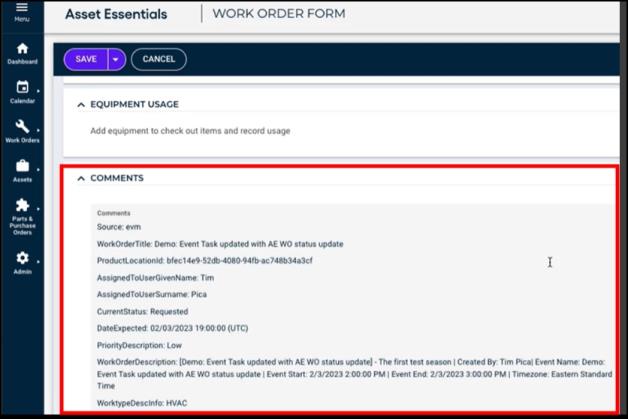
The work order description shown in the Comments and Work Requested fields
-
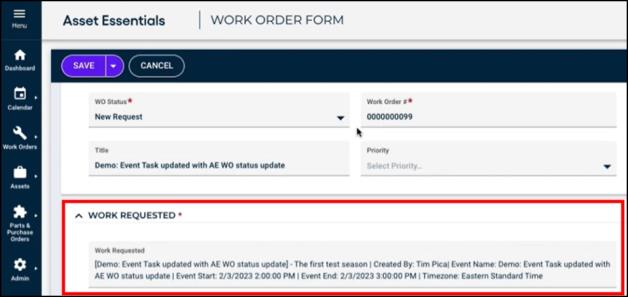
Task Creator first and last names
Event Name
Event Start Date, Time, and Time Zone
Event End Date, Time, and Time Zone
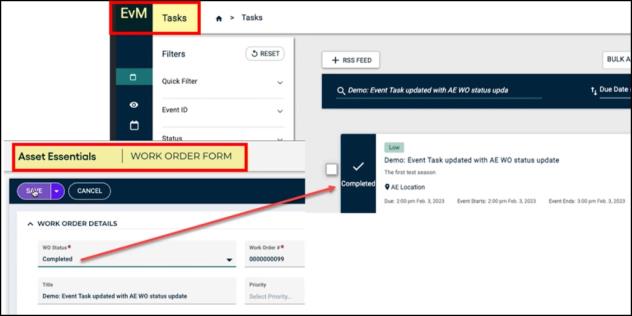
The current task status in Event Manager is updated to reflect the work order status changes in Asset Essentials. They parallel to help users effectively match a work order within Asset Essentials to the correct event within Event Manager. *Note: The task in the list in Event Manager will not include task status updates being pushed to Asset Essentials work orders.
The Asset Essentials work order description shown in the Comments field can be helpful when something gets accidentally changed in the program. These are the inputs available in the field:
-
Source
-
Work Order Title
-
Product Location ID
-
Assigned to User Given Name
-
Assigned to User Surname
-
Current Status
-
Date Expected
-
Priority Description
-
Work Order Description
-
Work Type Description Info
Reporting on Tasks Submitted as Work Requests
You can report on tasks that have been submitted as Asset Essentials work requests.
- Click Reports from the navigation menu.
- Click the Create A Report button.
- Select the Tasks report type from the 'Reporting on' drop-down menu in the Filters panel.
- Select whether you would like to display this report in Card View or Table View.

- Click Change next to the Work Order Number filter under the Filters section.
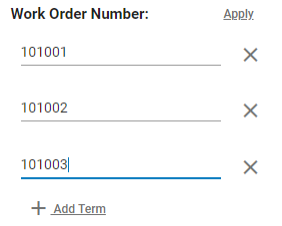
- Enter the appropriate work order number.
- If you need to display additional tasks, click Add Term and enter the appropriate work order number.
- Click Apply to refine the report results. This will adjust the data that displays.
- Repeat this process with any additional filters you'd like to apply to the report results.
- You can click the Reset button at any time to restore the report results to default.
- Once you have finished editing this report, you can save it as a template, print the report, or export it.
- Print: Click this button to open your computer's print window and print out a physical copy of the report.
- Export: Click this button if you would like to export the report as a PDF or CSV document.
- Choose either PDF or CSV.
- Click Download. The report will be downloaded to your computer as the selected file type.
