Back to Event Manager Main Menu
Creating and Running Reports
The Reporting feature allows you to manage your facilities more efficiently by tracking and analyzing key information. Reports can be created and run easily from the Reports list in Event Manager. Additionally, you can set reports to auto-generate on a schedule and send them to one or more email addresses. *Note: If you do not currently have access to this feature, please contact your Sales Representative or Client Services for more information.
How to Create a Report
- Click Reports from the side navigation menu.
- Click the Create a Report button from the Report Templates list.
Filtering Report Data
The Filters available will change depending on the selected Report Type. To filter your report data:
- Select a report type from the Reporting on drop down menu in the Filters panel. If there is data available for the selected report type, it will populate in the list of results.
- Select whether you'd like to display this report in Card View or Table View.
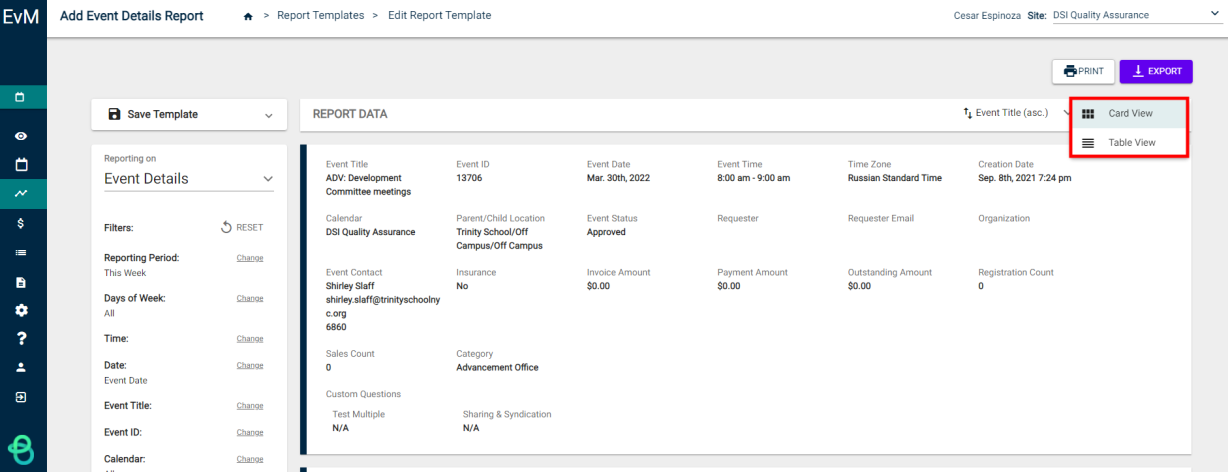
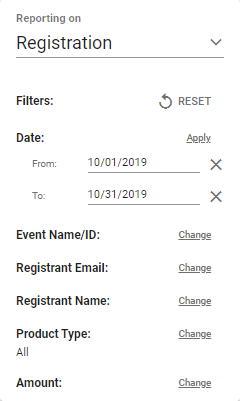
- Click Change next to the appropriate filter under the Filters section.
- Enter text or make a selection to adjust the filter as necessary. *Note: If your report is set to auto-generate, filtering by a specific date range will return results for that date range each time the report is generated.
- Click Apply to refine the report results. This will adjust the data that displays in the list of results.
- Repeat this process with any additional filters you'd like to apply to the report results.
- You can click the Reset button at any time to restore the report results to default.
Saving and Auto-Generating Reports
You can save this report if you'd like to view it later, or set this report to generate on a recurring schedule and to be sent to certain email addresses.
- Click Save Template in the top left corner of the page.
-
In the expanded panel, enter a Report Name. *Note: This field is required to save your report. Be sure to enter a name that will allow you to identify this report from the list.
- Click the pencil icon (
 ) if you'd like to set up this report to auto-generate on a schedule.
 - In the window that appears, select an option from the Auto-Generate & Send Report drop down menu:
- Daily: This will generate the report and email it to all recipients every day.
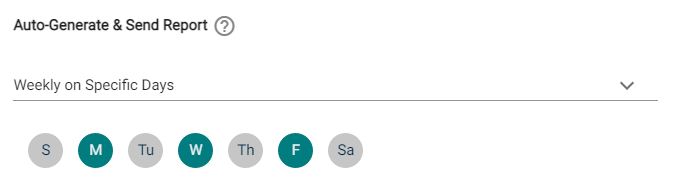
- Weekly on Specific Days: This will generate the report and email it to all recipients every week on the days prior to the selected days at 7 PM ET. The report will still include information for the days selected.
- Click on the day(s) of the week you'd like to generate and email the report.
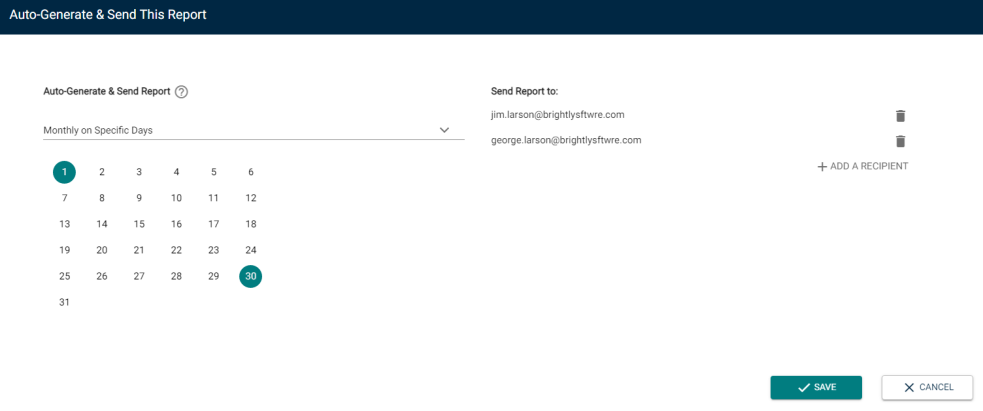
- Monthly on Specific Days: This will generate the report and email it to all recipients every month on the selected days.
- Click on the day(s) of the month you'd like to generate and email the report.
- sadadaasaSas
- Click on Add a Recipient.
- In the field that appears under Send Report to: , enter the email address of the person who should receive the generated report. *Note: This email address does not have to belong to a user in Event Manager.
- Click the check mark icon (
 ) to save this recipient.
 - Repeat this process to add any additional recipients.
- Recipients can be removed by clicking the trashcan icon (
 ).
). - Click the Save button to finalize any changes.
- Once you have finished creating this report, click the Save Template button to allow you to come back to this report later as well as save any auto-generation settings.
How to Manage And Run Reports
Once reports have been saved in Event Manager, there are a number of options available for running and managing them from the reports list.
- Click Reports from the side navigation menu.
-
Search or filter to narrow the list of reports as necessary.
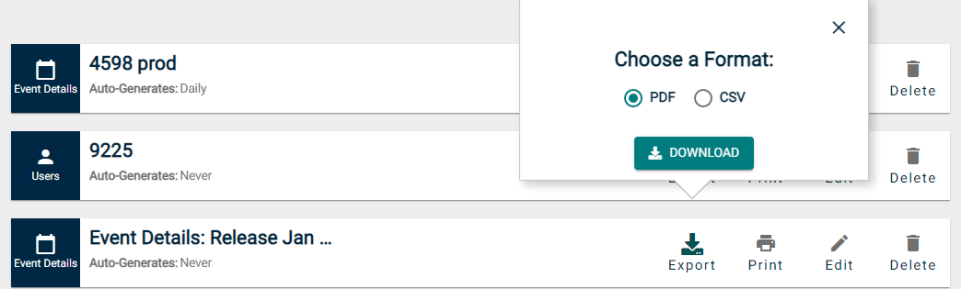
Exporting a Report
- Click the Export button next to the report you'd like to export.
- In the window that appears, select either PDF or CSV. *Note: PDF reports are capped at 200 records and CSV reports are capped at 10,000 records. If you attempt to run a PDF report with more than 200 records or a CSV report with more than 10,000 records, you will see an error message instructing you to narrow your filters.
- Click the Download button to save the report to your computer.
Printing a Report
- Click the Print button next to the report you'd like to print.
- Make all necessary changes on the print preview window for your computer and click Print
Editing a Report
- Click the Edit button next to the report you'd like to make changes to.
- Make all necessary changes to the report, including auto-generation frequency, active filters, and recipients.
- Click the Save Report button to finalize the changes.
Deleting a Report
- Click the Delete button next to the report you'd like to remove from Event Manager.
- In the window that appears, click the Delete Report button to confirm deletion of this report.