Back to Event Manager Main Menu
Setting up SSO
You can control how users access your calendar site by user ID and password. By default user accounts are created and managed in Event Manager. However, Event Manager supports creating and managing users from external sources via SAML (Security Assertion Markup Language).
- To access the Authentication Settings page, click on the gear icon (
 ).
). - Click on Authentication Settings under Advanced Settings.
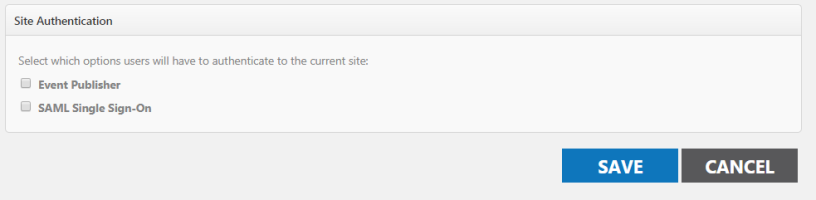
- Here you can choose how users should be authenticated. You can choose Event Manager authentication, SAML Single Sign-On, or both.
Brightly allows for SAML 2.0 connections to your IDP. Currently, we provide documentation for ADFS and Azure SSO. If you have any questions about setting up either SSO connection, or if you have questions about configuring Google for SSO, please contact Client Services.
Event Manager
- Selecting this check box will allow for users to create and manage their user account via Event Manager.
- The first time that you sign into the site, you will be added as a visitor profile.
- Your calendar administrator will need to assign you the appropriate roles in the application. Group permissions can be used to set the default level of permission. Additionally, when assigning roles to externally authenticated users in Event Manager you will search for, create, and modify users via the email address associated to the user.
SAML single sign-On
Selecting this check box will allow for users to access Event Manager using an external account managed by your Identity Provider.
Global SAML Configuration
When using SAML, you will need to specify a number of fields to allow Event Manager to communicate with your Identity Provider. The following Fields will need to be configured:
- Identity Provider Name: This field is used by Event Manager and the end-user to better identify the configuration. This field is not used by SAML or SSO metadata files.
- Identity Provider Metadata URL: Enter the URL of a page that outputs the XML of the Identity Provider. This URL is accessed by Event Manager to download information from the Identity Provider. Upon attempting to save the configuration, Event Manager will check this URL to determine if it is a valid SAML Metadata format.
- Use Legacy Security: If you have an existing SHA-1 SAML connection this checkbox will already be checked. If you wish to configure a SHA-1 SAML connection, then check this box. With the box unchecked, SAML-2 will be the protocol used, so you need to do nothing unless you are moving from SHA-1 to SHA-2.
- Identity Provider Claims: This area defines the default information required to create and authenticate a user in Event Manager. This information is provided to Event Manager from the SAML Identity Provider. Here you will map your User Identifier, First Name, Last Name, E-mail Address, and Telephone Number.
- User Identifier: This field will be used as the USER ID for Event Manager. This should be a permanent unique identifier for the user that never changes and will always uniquely identify a user, even as attributes like last name and email address may change.
- First Name: This field will be used as the FIRST NAME for Event Manager. In this field provide the http:// route (Active Directory) of the attribute provided by the Identity Provider which will be used in Event Manager as the FIRST NAME.
- Last Name: This field will be used as the LAST NAME for Event Manager. In this field provide the http:// route (Active Directory) of the attribute provided by the Identity Provider which will be used in Event Manager as the LAST NAME of the user.
- E-mail Address: This field will be used as the EMAIL ADDRESS for Event Manager. In this field provide the http:// route (Active Directory) of the attribute provided by the Identity Provider which will be used in Event Manager as the EMAIL ADDRESS of the user. *Note: The email address will be used to login to Event Manager, however email address changes are not a problem. As long as the user identifier does not change, all account history will be retained.
- Telephone Number: This field will be used as the TELEPHONE NUMBER for Event Manager. In this field provide the http:// route (Active Directory) of the attribute provided by the Identity Provider which will be used in Event Manager as the TELEPHONE NUMBER of the user.
Site Settings
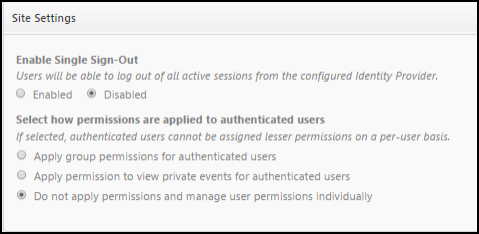
This area controls Single Sign Out and the default permissions applied to SAML authenticated users.
*Note: If you have multi-site calendars, this setting is specific to each site. If you have 3 calendar sites, you will need to select the radio option for all 3 sites individually. You will need to navigate to each calendar site to do so.
- Enable Single Sign Out: Selecting this radio option will enable SAML External Authorization during the "Sign out" process. This option is only selectable once you have enabled "Single Sign-On". Please note, not all authorization methods support nor require single sign out.
- Default Permissions - This area allows you to control the level of permissions that SAML authenticated users will have once authenticated (signed in). You can choose to use a group to control permissions, which allows for the greatest level of control.
- Apply Group Permissions for authenticated users - Selecting this radio option will enable SAML External Authorization to apply permissions to a user based upon the permissions of a specific group. Use this option if you would like to have the most control over the default permissions applied to SAML authenticated users. When selected, the group access panel will be exposed, and show you a list of available groups to be applied to the SAML authenticated users.
- To select a group, click the Add link displayed to the right of the group name.
- To view the permissions assigned to the group, click the triangle icon to the left of the group name. *Note: If a user is granted a greater level of permissions on the Users page, the highest level of individual permissions will be applied.
- Apply Permission to view private events for authenticated users - Selecting this radio option will enable SAML External Authorization to provide access to private calendar sites, as well as the ability to view private events on public calendars.
- Do not apply permissions and manage user permissions individually - Selecting this radio option will default the SAML authenticated user to have the same permissions as a Visitor Profile. They will not be able to submit events unless public event submission has been enabled in site management. They will not have access to private calendar sites, or the ability to view private events on public calendars.
- Apply Group Permissions for authenticated users - Selecting this radio option will enable SAML External Authorization to apply permissions to a user based upon the permissions of a specific group. Use this option if you would like to have the most control over the default permissions applied to SAML authenticated users. When selected, the group access panel will be exposed, and show you a list of available groups to be applied to the SAML authenticated users.
Event Manager and SAML Single Sign-On
Your calendar can be configured to allow for both Event Manager and SAML Identity Provider Authentication. This allows for:
- Creation of Visitor Profiles by your calendar visitors
- Ability for Visitor Profiles to submit events for approval if public event submission is enabled
- Ability for Visitor Profiles to create favorite events, subscriptions, and view their upcoming events
- Easy authentication for your administrative users managed via SAML
