Back to Event Manager Main Menu
Using Azure for single sign-on
The process below addresses the appropriate steps to configure Azure for logging into Event Manager using single sign-on (SSO). *Note: If you are having difficulty setting up Azure for SSO with Event Manager or you are unsure whether your organization utilizes SSO for their Dude Solutions products, please contact your technology help desk for assistance.
How to configure Azure SSO for Event Manager
- Log in to the Azure Active Directory admin center.
- Click on Azure Active Directory.
- Select Enterprise Applications from the Application Type drop-down menu.
- Click on New Application.
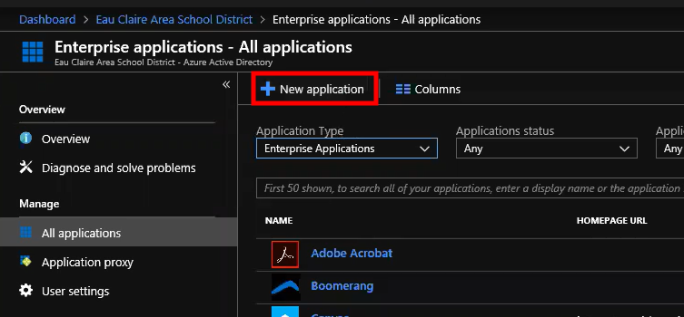
- Click on the Non-gallery application option.

- In the window that appears, enter a Name for the application, such as "DudeEventManager".
- Click the Add button.
- Click on the Overview (recommended) option.
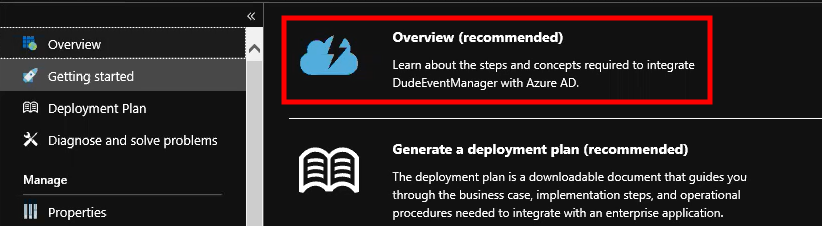
- Under Getting Started, click on Assign users and groups.
- Assign the users and groups that should have access to Event Manager through SSO.
- Click on Set up single sign-on.
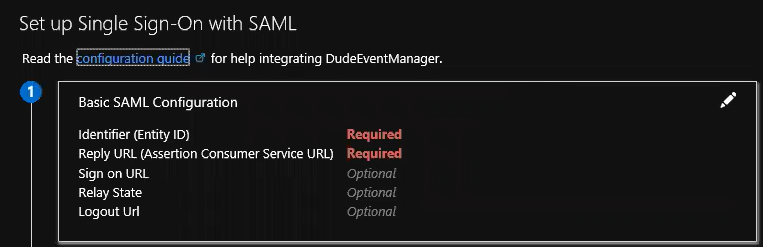
- In the window that appears, click on SAML.

- Click on the pencil icon and enter the Identifier (Entity ID) and Reply URL (Assertion Consumer Service URL). *Note: Both of these fields are required. To provide the appropriate values, navigate to https://yoursiteurl/sso/metadata/ in your web browser.
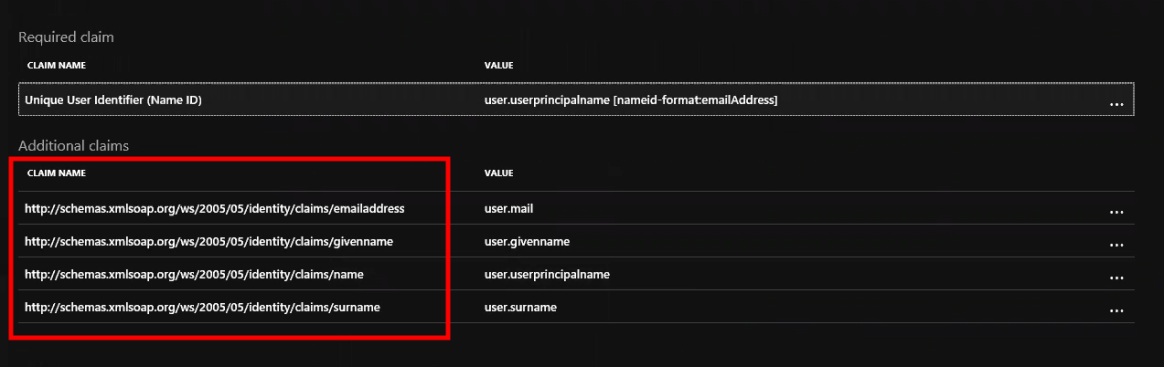
- Click on the pencil icon to edit the User Attributes & Claims as needed.
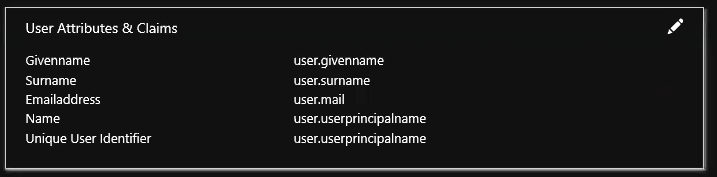
- In the Additional claims section, copy the URL for each Claim Name into a text editor. You will need the URLs to finish setting up SSO in Event Manager.
Event Manager configuration
Once you have configured the SSO connection in Azure, there are additional steps to take in Event Manager to complete the connection.
- Log in to Event Manager.
- Click on Settings from the navigation menu.
- Click on the Authentication Settings tile under Advanced Settings.
- For now, leave Event Manager checked under the Site Authentication panel until all settings have been tested.
- Check the box next to SAML Single Sign-On.
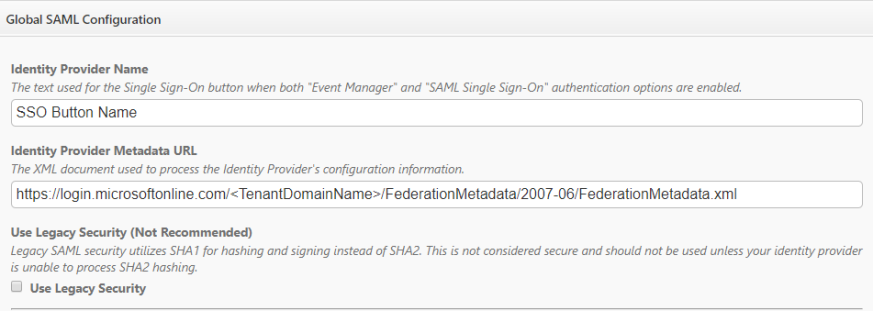
- Enter the Identity Provider Name. This will be the name of the button that users click to log into Event Manager.
- Enter the Identity Provider Metadata URL. *Note: You will have to create this manually. Use "https://login.microsoftonline.com/<TenantDomainName>/FederationMetadata/2007-06/FederationMetadata.xml". Your <TenantDomainName> is the domain name assigned by Microsoft. It should look like "example.onmicrosoft.com".
- Leave the Use Legacy Security box unchecked.
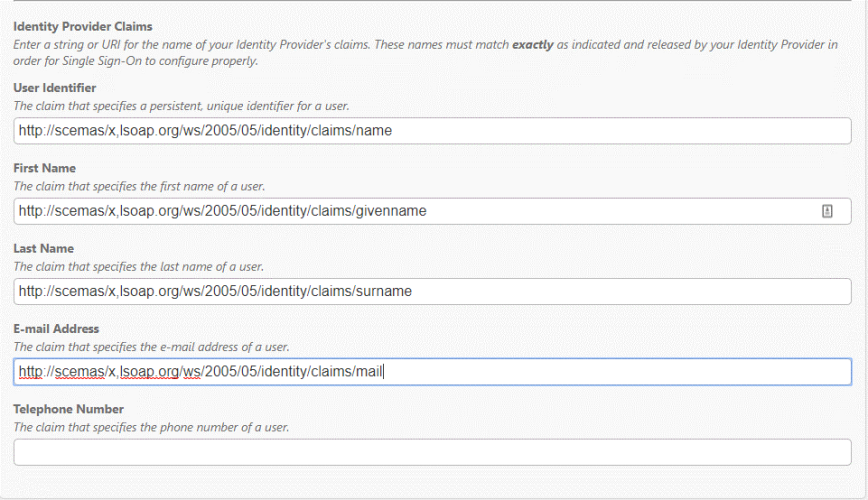
- Enter the appropriate information under Identify Provider Claims. These should be the URLS from the Additional claims step when configuring Azure SSO. *Note: The Telephone Number field should be left blank.
-
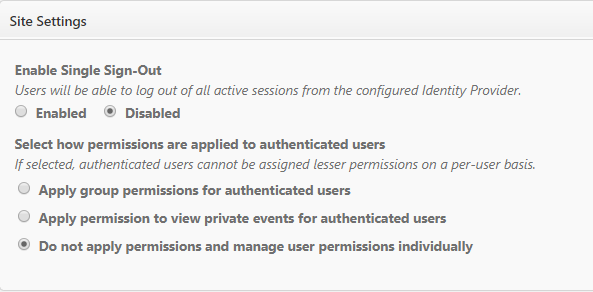
Under the Site Settings panel in Event Manager, leave the Disabled option selected under Enable Single Sign-Out.
- Select how permissions are applied to authenticated users:
- Apply group permissions for authenticated users: The user will possess the same permissions of that group while logged in. *Note: A user will never show in the list as a member of the group.
- Apply permission to view private events for authenticated users: The user will only be able to view private events.
- Do not apply permissions and manage user permissions individually: The user will need to have permissions assigned to them manually.
-
Click on the Save button to finalize your changes. You can now test your login with new and existing users.
- After you have completed testing, you may uncheck Event Manager under the Site Authentication panel if you do not want users to sign in locally. All current logins will be converted to SSO upon first login.
