Back to Event Manager Main Menu
Using ADFS for single sign on
The process below addresses the appropriate steps to configure Microsoft ADFS for Event Manager. *Note: If you are having difficulty setting up ADFS for SSO with Event Manageror you are unsure whether your organization utilizes SSO for their Dude Solutions products, please contact your technology help desk for assistance.
How to configure ADFS for Event Manager
ADFS relying party configuration
- Open the Active Directory Federation Services (ADFS) management tool on the Primary ADFS server.
- Expand the Trust Relationships folder.
- Right click on Relying Party Trusts and select Add Relying Party Trust from the pop-up menu.

- A new window will appear. Click the Start button to begin the wizard.
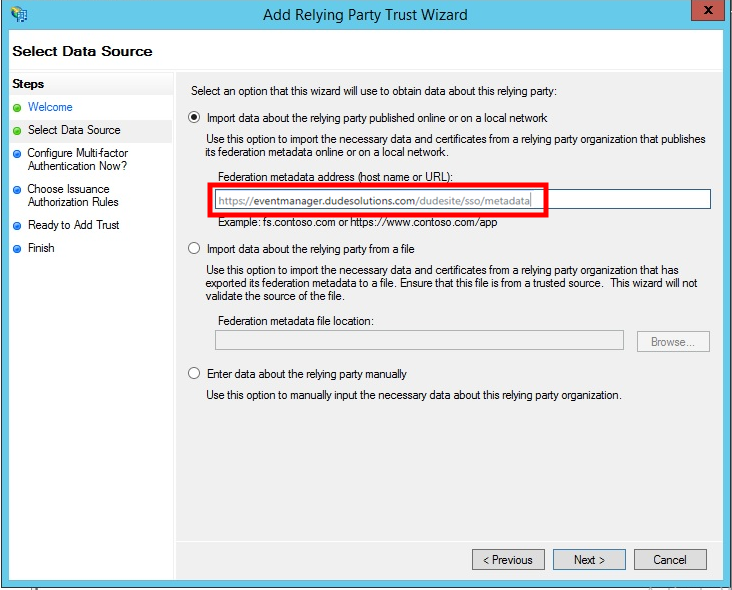
- On the Select Data Source step, select "Import data about the relying party published online or on a local network".
- Under the Federation metadata address field, copy and paste the URL sent by Brightly, or enter it yourself. The URL format should be: "https://URL of Site/sso/metadata"
- Click Next.
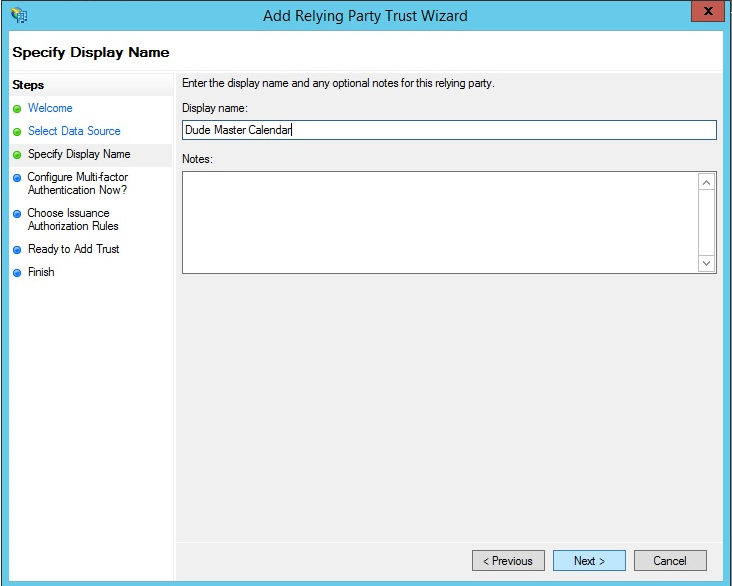
- Enter a name for the Relying Party in the Display name section on this step. *Note: Be sure to enter a name that will allow you to distinguish this Relying Party from others in the list.
- You may enter Notes about this Relying Party if necessary.
- Click Next.
- On the Configure Multi-factor Authentication Now? step, select "I do not want to configure multi-factor authentication settings for the relying party trust at this time".
- Click Next.

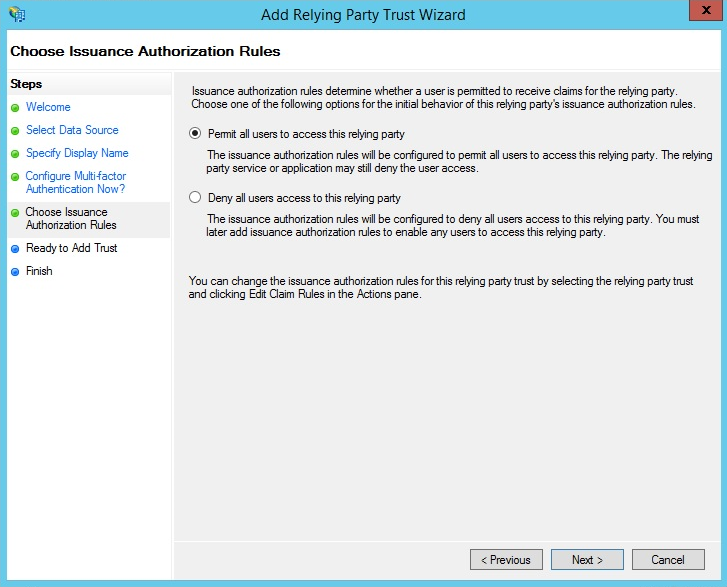
- On the Choose Issuance Authorization Rules step, select Permit all users access to the relying party.
- Click Next.
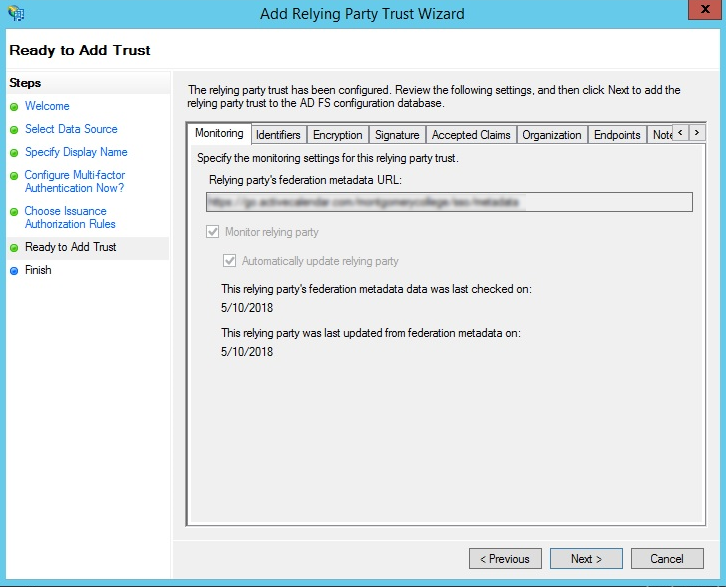
- Use the Ready to Add Trust step to review the data that was imported using the metadata URL.
- Click through the available tabs to confirm the data is correct and click Next.
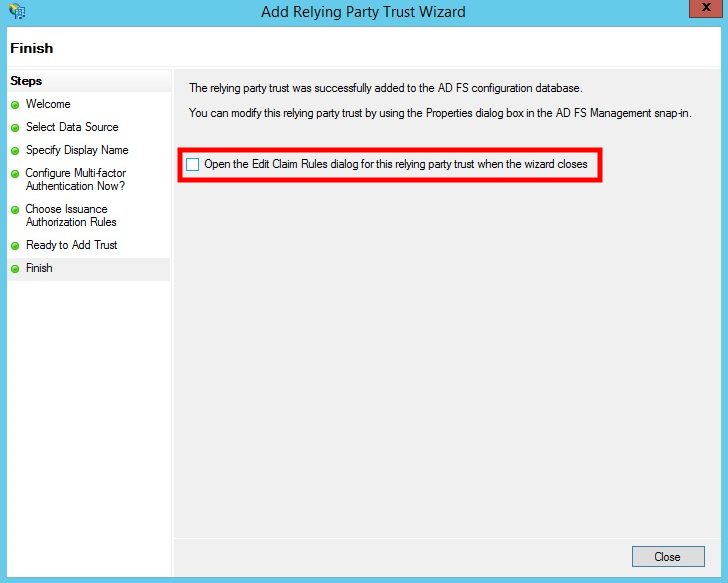
- On the last step of the wizard, uncheck the box and click Close at the bottom right hand corner of the window.
Claim rules configurations
The next step to configure ADFS for Event Manager is to add the Claim Rules that are required for the relying party.
- Open the Relying Party Trusts folder and right click on the Relying Party that you'd like to add Claim Rules to.
- Select Edit Claim Rules from the pop-up menu.

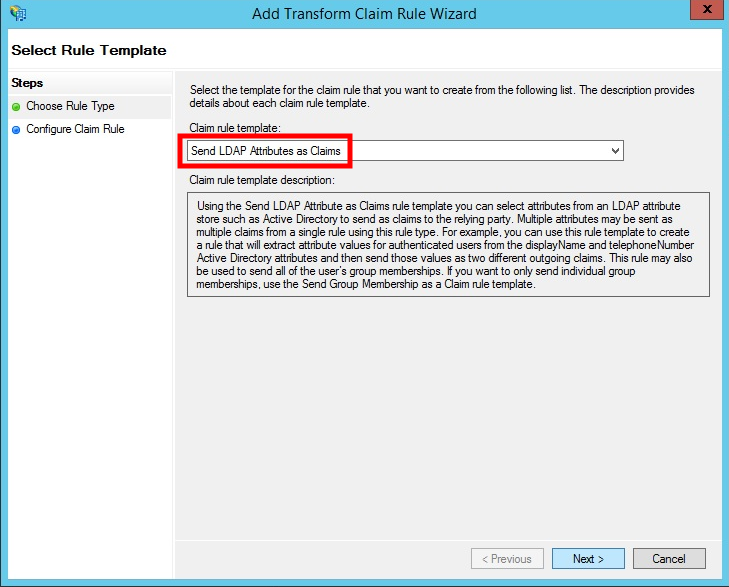
- Click on the Add Rule button at the bottom of the Edit Claim Rules window.
- Select Send LDAP Attributes as Claims from the Claim rule template drop down menu.
- Click Next.
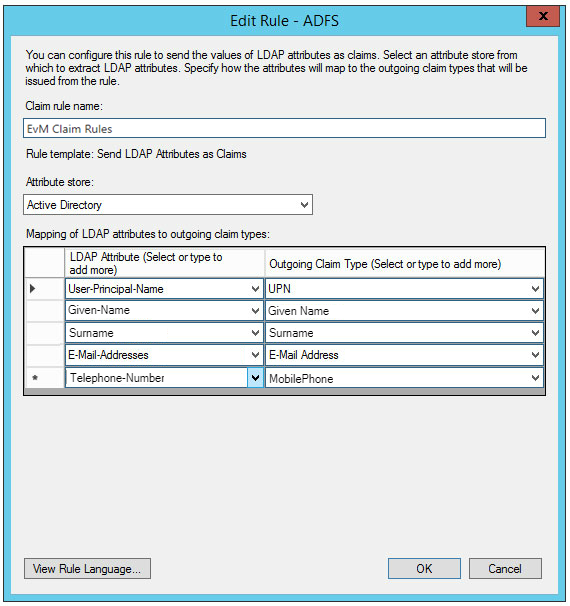
- On the next step, enter the Claim rule name as "EvM Claim Rules".
- Select Active Directory from the Attribute store drop down menu.
- Click the OK button at the bottom of the page to save the changes.
- Click on the Add Rule button at the bottom of the Edit Claim Rules window.
- Select Transform an Incoming Claim from the Claim rule template drop down menu.
- Click Next.
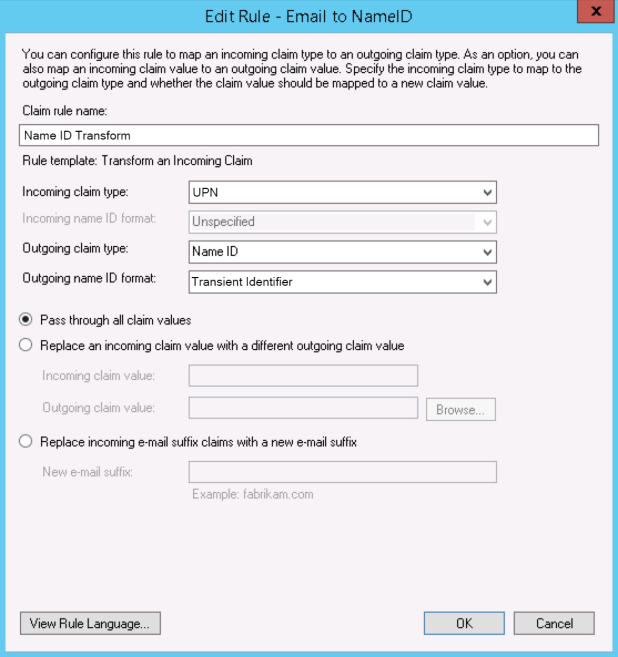
![]()
- Enter the information below in the following fields:
- Claim rule name: Name ID Transform
- Incoming claim type: UPN
- Outgoing claim type: Name ID
- Outgoing name ID format: Transient Identifier
- Select the Pass through all claim values radio button.
- Click the OK button at the bottom of the page to save the changes.
- The two Claim Rules that have been added should now display in the Issuance Transform Rules panel.
- Click OK.
Event Manager configuration
- Log in to Event Manager.
- Click on Settings from the side navigation menu.
- Click on the Authentication Settings tile under Advanced Settings.
- Check the box next to SAML Single Sign-On.
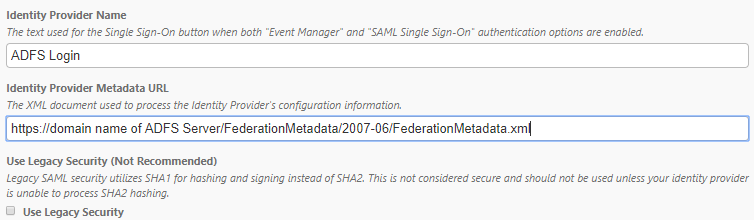
- Enter the Identity Provider Name. This will display as the text on the SSO button on the login page.
- Enter the Identity Provider Metadata URL. For example: "https://domain name of ADFS Server/FederationMetadata/2007-06/FederationMetadata.xml"
-
Check the Use Legacy Security box if your identity provider is utilizing SHA1 hashing. *Note: Legacy SAML security utilizes SHA1 for hashing and signing instead of SHA2. This is not considered secure and should not be used unless your identity provider is unable to process SHA2 hashing.
- In order to provide the correct information in the Identify Provider Claims fields, navigate back to Microsoft ADFS.
Open the Relying Party Trusts folder and right click on the appropriate Relying Party
- Select Edit Claim Rules from the pop-up menu.
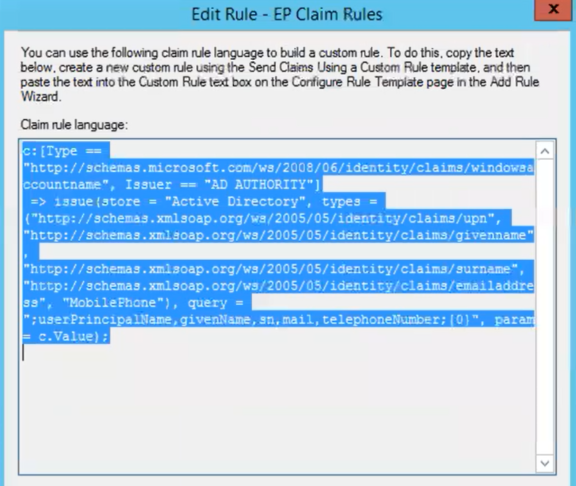
- Click on View Rule Language.
- This will open the Claim rule language box. These URLS should be entered into the Identity Provider Claims fields in Event Manager. As an example, "http://schemas.xmlsoap.org/ws/2005/05/identity/claims/upn" is used for the User Identifier.
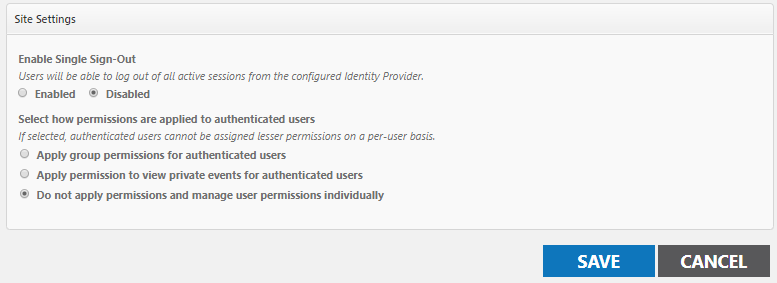
- Under the Site Settings panel in Event Manager, leave the Disabled radio button marked under Enable Single Sign-Out.
- Select how permissions are applied to authenticated users:
- Apply group permissions for authenticated users: The user will possess the same permissions of that role while logged in. *Note: A user will never show in the list as a member of the role.
- Apply permission to view private events for authenticated users: The user will only be able to view private events.
- Do not apply permissions and manage user permissions individually: The user will need to have permissions assigned to them manually.
- Click on the Save button to finalize your changes. You can now test the new SSO Login button on the login page.