Schedule inspections
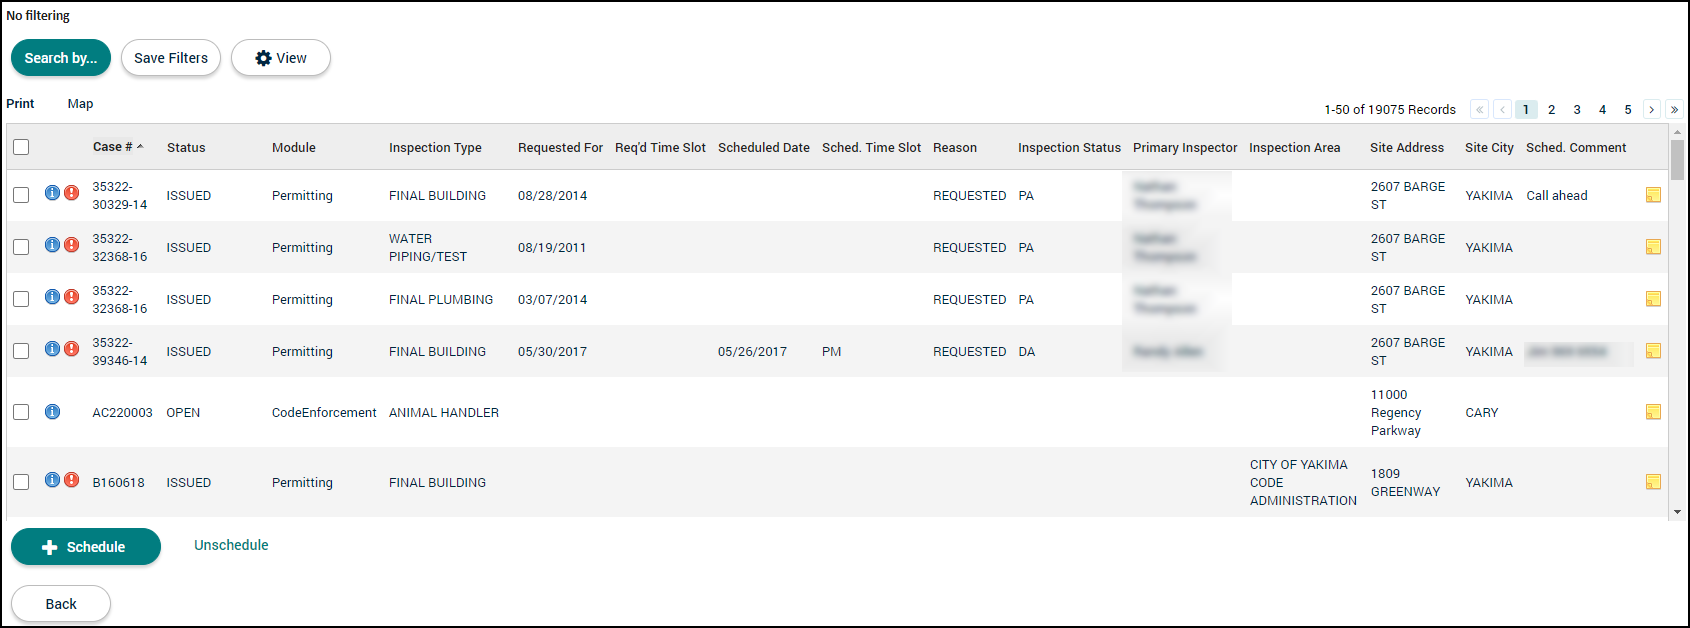
The Schedule Inspections page allows users to assign and schedule requested inspections, unschedule inspections, print a list of inspections, and view requested inspections on a map. An inspector may save a filter on this page to quickly display all of their assigned inspections.
- Click Common in the navigation menu, then select Schedule Inspections.
- This page lists any inspection that has been requested within SmartGov or through the Citizen Portal.
Assigning and scheduling requested inspections
- Check the box beside one or multiple inspections you would like to schedule. Checking more than one inspection allows you to bulk assign them to the same inspector on the same day. *Note: Only inspections with a status state of Cancelled, Requires Reinspection, or Initial, as well as inspections that have not been requested will display in this list.
- Click Schedule at the bottom of the page.
- In the window that displays, enter any scheduling information.
- Begin typing or click the magnifying glass icon (
 ) to select an Inspector.
 - Begin typing or click the calendar icon (
 ) to select a Scheduled Date.
 - Use the drop-down to select a Scheduled Time Slot, if necessary.
- Enter any Scheduling Comments. If the selected inspection(s) already have scheduling comments listed, anything entered in this field will be appended to the existing comments. *Note: The character limit for this field is 4000 characters.
- Click Schedule.
- Begin typing or click the magnifying glass icon (
- The Schedule Inspections list will update to show the Scheduled Date, Scheduled Time Slot, Inspector, and any Scheduling Comments.
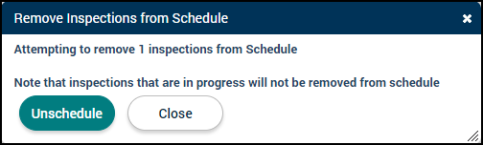
Unscheduling inspections
There may be times, such as an employee taking sick leave, where previously scheduled inspections will need to be unscheduled.
- Check the box beside one or multiple inspections you would like to remove from the schedule. Checking more than one inspection allows you to bulk unschedule them.
- Click Unschedule at the bottom of the page.
- In the confirmation window that displays, click Unschedule. *Note: Inspections that are In Progress will not be unscheduled.
-
The Schedule Inspections list will update to show the inspections without a Scheduled Date, Scheduled Time Slot, Inspector, and any Scheduling Comments.
Printing inspections
Printing a list of inspections can be used as a quick reference tool for an inspector. The printed list will include information relevant to the inspections including the Scheduled Date, Scheduled Time Slot, Site Address, and any Scheduling Comments.
- Use the filter options across the top of the page to narrow down the inspection list. You may want to narrow the results by Inspector, Date, Area, or Site City, for example.
- Click Print at the top of the page.
- A new tab will open and a Print window will display. Follow the prompts in the window to print the list of inspections.
- Exit out of the current tab to return to the Schedule Inspection page.
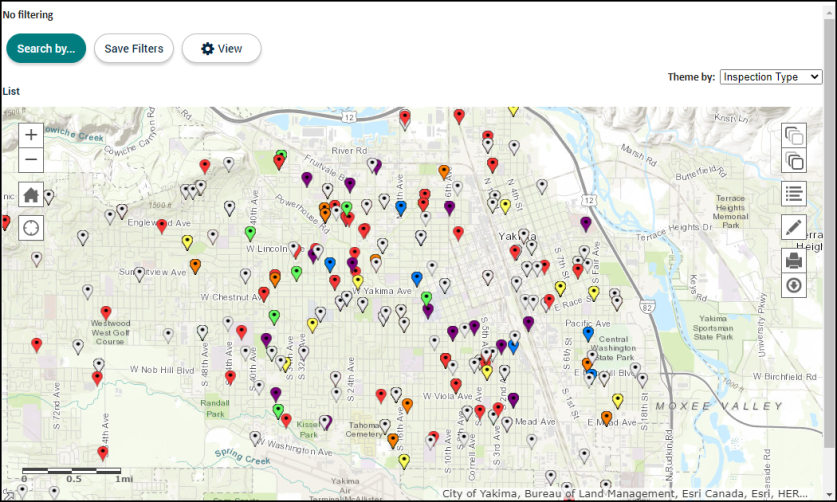
Mapping inspections
Mapping inspections allows you to see a visual layout of where inspections are located. From the map view, you can draw lines, annotate the image, and print the image.
- Use the filter options across the top of the page to narrow down the inspection list. You may want to narrow the results by Inspector, Date, Area, or Site City, for example.
- Click Map at the top of the page.
- A map will display with markers located at each inspection site. *Note: The default view, ArcGIS Server information, Map Layers, and Base Maps are configured on the Mapping Setup page.
- Each color represents a theme, such as Inspection Type. Use the Theme By drop-down menu in the top right corner of the page to change the theme the inspections are color-coded by.
- Click the Change Basemap icon (
 ) to change the map view.
 - Click the Change Layers icon (
 ) to display additional map layers on the map view. *Note: These layers are typically set up during the initial implementation of SmartGov through the GIS Connector.
 - Click the View Legend icon (
 ) to view a legend describing what each colored marker on the map represents.
 - Click the Draw icon (
 ) to make any annotations on the map. You can draw shapes, type onto the page, or mark individual points.
- Once you have made any necessary changes to the map view, you can click the Print icon (
 ) to print the map view or click the Download Image icon (
 ) to save the image of the map to your computer.