Recurring inspection lookup values
Recurring inspection lookup values represent the options you will see in various fields and drop-down menus throughout a recurring inspection account. These can be customized to represent your jurisdiction's preferences and processes. *Note: Options tied to child records cannot be deleted. We recommend deactivating unwanted options if you are unable to delete due to a child record issue.
Managing lookup values
- Click Administration from the navigation menu, then click Recurring Inspection Setup.
- Select Lookup Values.
- Select the lookup value from the list to view its associated options.
This lookup value refers to the individual conditions that can be added to recurring inspection types or individual recurring inspection accounts. Each condition must be associated with a condition type. You can associate the condition with a particular inspection type, as well as require that the condition be verified prior to closing a recurring inspection account.
- Click Condition from the list of lookup values.
- Click Add.
- Enter the display name for the condition in the Name field.
- Use the Condition Text field to describe the condition.
- Ensure the Active box is checked to display the record in the list of available conditions.
- Begin typing or click the magnifying glass icon (
 ) to select the associated Condition Type.
 - Check the box in the Ver Req'd (Verification Required) column if the condition needs verification that its requirements have been met. This indicates that the condition must be validated before the recurring inspection account can be closed.
- Begin typing or click the magnifying glass icon () to select the associated Inspection Type, if applicable.
- Repeat this process to add any additional records.
- Click Save.
- To remove a condition from the list, click the trash can icon (
 ).
).

This lookup value allows you to categorize the different condition types that will be available to add to recurring inspection accounts.
- Click Condition Type from the list of lookup values.
- Click Add.
- Enter the display name for the condition type in the Name field.
- Use the Description field to describe the condition type.
- Ensure the Active box is checked to display the record in the list of available condition types.
- Repeat this process to add any additional records.
- Click Save.
- To remove a condition type from the list, click the trash can icon ().
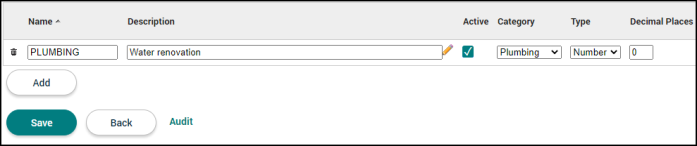
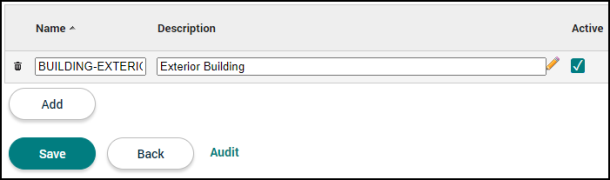
This lookup value allows you to categorize different fixture types under a fixture class. Each fixture class must be associated with one of four categories: Electrical, Mechanical, Plumbing, or Resources. *Note: There is not a way to add additional categories at this time.
- Click Fixture Class from the list of lookup values.
- Click Add.
- Enter the display name for the fixture class in the Name field.
- Use the Description field to describe the fixture class.
- Ensure the Active box is checked to display the record in the list of available fixture classes.
- Select the Category the fixture class is associated with from the drop-down menu.
- Use the Type drop-down menu to select the appropriate type.
- Enter in the number of Decimal Places a user can enter for the fixture class.
- Repeat this process to add any additional records.
- Click Save.
- To remove a fixture class from the list, click the trash can icon ().
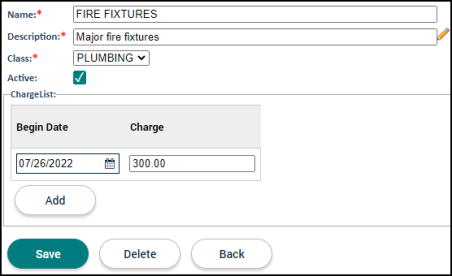
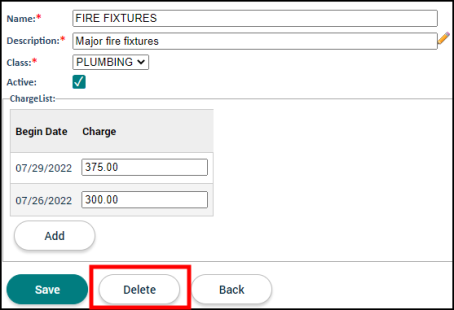
This lookup value refers to the fixtures that need to be tracked on a recurring inspection account. Each fixture type must be associated with a fixture class. You will be able to set up each fixture type with a specific charge amount and the date the charge goes into effect. There is also an option to bulk increase the charge rate by a percentage for all fixture types.
Adding a FixtureType
- Click Fixture Type from the list of lookup values.
- Click Create.
- Enter the display name for the fixture type in the Name field.
- Use the Description field to describe the fixture type.
- Select the fixture class this fixture type should be associated with in the Class drop-down menu.
- Ensure the Active box is checked to display the record in the list of available fixture types.
- Begin typing or click the calendar icon (
 ) to input the Begin Date for the charge of the activity type.
 - Enter the Charge for this fixture type.
- Click Create.
-
Repeat this process to add any additional fixture types.
Changing the charge for the fixture type
- Click the Fixture Type from the list.
- Click Add.
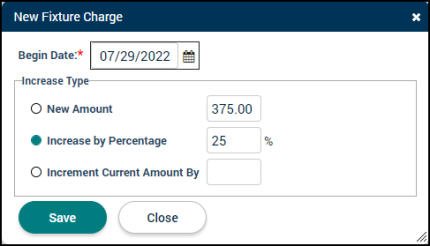
- Begin typing or click the calendar icon () to select a Begin Date for this change to take effect.
- Select the appropriate option:
- New Amount: This option allows you to type in a new rate in the text field.
- Increase Percentage: This option allows you to increase the current rate by a percentage.
- Increment Current Amount By: This option will increase the current rate by a fixed amount.
- Click Save.
Deleting a fixture type
- Click the Fixture Type from the list.
- Click the Delete button.
- Click Delete Record in the window that displays.
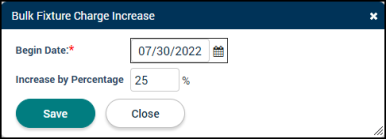
Increasing the charge of all fixture types by a percentage
- Click the Bulk Charge Increase button at the bottom of the list of fixture types.
- Begin typing or click the calendar icon () to select a Begin Date for this change to take effect.
- Use the Increase by Percentage field to enter the percentage by which all charges should increase.
- Click Save.
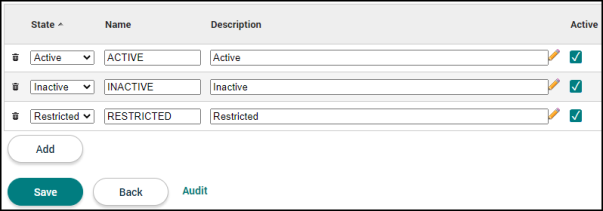
This lookup value refers to the status of an inspection account. Each account status must be associated with one of three states: Active, Inactive, or Restricted. The Inspection Account Status will display in the information bar across the top of a recurring inspection account. *Note: There is not a way to add additional states.
- Click Inspection Account Status from the list of lookup values.
- Click Add.
- Select the State in the drop-down menu.
- Enter the display name for the inspection account status in the Name field.
- Use the Description field to describe the inspection account status.
- Ensure the Active box is checked to display the record in the list of available inspection account statuses.
- Repeat this process to add any additional records.
- Click Save.
- To remove an inspection account status from the list, click the trash can icon ().
This lookup value allows you to categorize different inspection actions under an inspection action group. Inspection action groups must be enabled while configuring your inspection type in order for this field to display on an inspection associated with a recurring inspection.
- Click Inspection Action Group from the list of lookup values.
- Click Add.
- Enter the display name for the inspection action group in the Name field.
- Use the Description field to describe the inspection action group.
- Ensure the Active box is checked to display the record in the list of available inspection action groups.
- Repeat this process to add any additional records.
- Click Save.
- To remove an inspection action group from the list, click the trash can icon ().
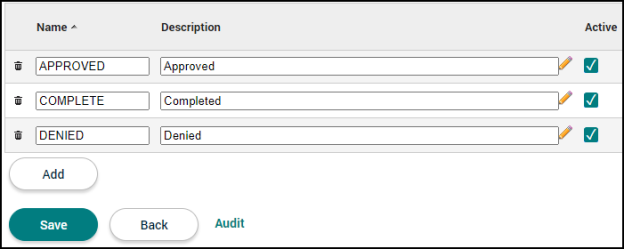
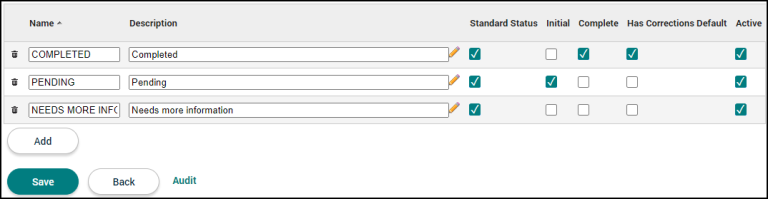
This lookup value refers to the inspection action's status on an inspection. Each status can be defined as an initial or complete status.
- Click Inspection Action Status from the list of lookup values.
- Click Add.
- Enter the display name for the inspection action status in the Name field.
- Use the Description field to describe the inspection action status.
- Check the Standard Status box to include this status by default when adding an action to an inspection type.
- Check the Initial box if this status should be the initial status for an inspection action. *Note: You can only have one Initial status.
- Check the Complete box if this status should be indicative of a completed inspection action.
- Check the Has Corrections Default box if this status should be the default when a correction is added to an inspection action. *Note: You can only have one Has Corrections Default status.
- Ensure the Active box is checked to display the record in the list of available inspection action statuses.
- Repeat this process to add any additional records.
- Click Save.
- To remove an inspection action status from the list, click the trash can icon ().
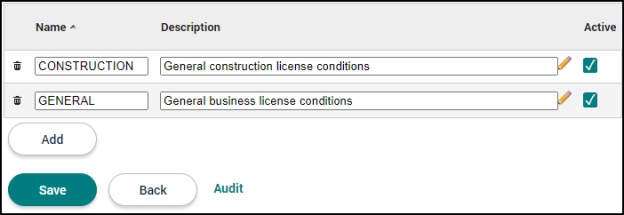
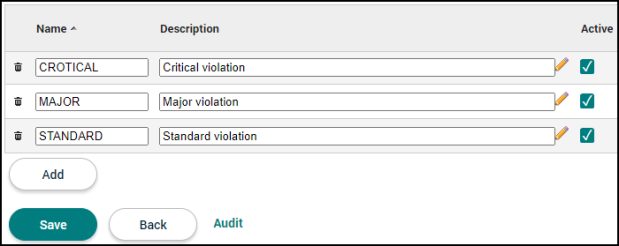
This lookup value refers to the levels available to apply to corrections that are associated with inspection actions on an inspection.
- Click Inspection Correction Level from the list of lookup values.
- Click Add.
- Enter the display name for the inspection correction level in the Name field.
- Use the Description field to describe the inspection correction level.
- Ensure the Active box is checked to display the record in the list of available inspection correction levels.
- Repeat this process to add any additional records.
- Click Save.
- To remove an inspection correction level from the list, click the trash can icon ().
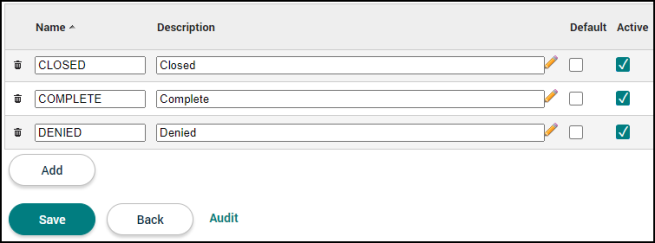
This lookup value refers to the statuses available to apply to corrections that are associated with inspection actions on an inspection.
- Click Inspection Correction Status from the list of lookup values.
- Click Add.
- Enter the display name for the inspection correction status in the Name field.
- Use the Description field to describe the inspection correction status.
- Check the Default box if this status should be the default for inspection corrections. *Note: You can only select one default status.
- Ensure the Active box is checked to display the record in the list of available inspection correction statuses.
- Repeat this process to add any additional records.
- Click Save.
- To remove an inspection correction status from the list, click the trash can icon ().
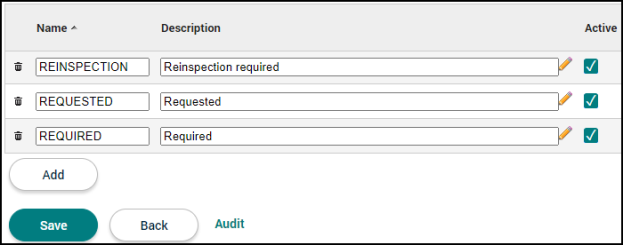
This lookup value refers to the reasons an inspection may be needed for a recurring inspection account. These options will display when configuring an inspection type for the Recurring Inspection module.
- Click Inspection Reason from the list of lookup values.
- Click Add.
- Enter the display name for the inspection reason in the Name field.
- Use the Description field to describe the inspection reason.
- Ensure the Active box is checked to display the record in the list of available inspection reasons.
- Repeat this process to add any additional records.
- Click Save.
- To remove an inspection reason from the list, click the trash can icon ().
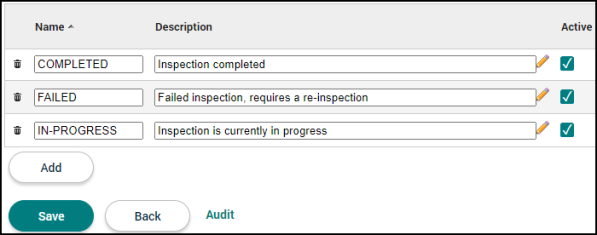
This lookup value refers to the status of an inspection associated with a recurring inspection account.
- Click Inspection Status from the list of lookup values.
- Click Add.
- Enter the display name for the inspection status in the Name field.
- Use the Description field to describe the inspection status.
- Ensure the Active box is checked to display the record in the list of available inspection statuses.
- Repeat this process to add any additional records.
- Click Save.
- To remove an inspection status from the list, click the trash can icon ().
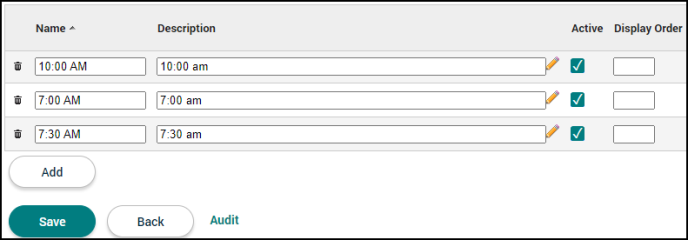
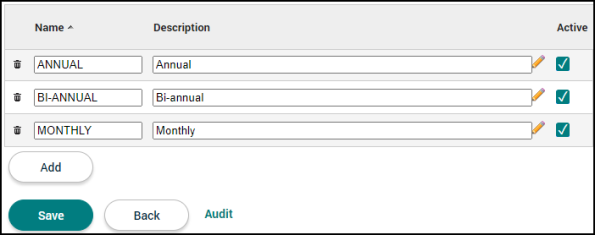
This lookup value refers to the time options that will display when requesting and scheduling an inspection associated with a recurring inspection account in SmartGov.
- Click Inspection Time Slot from the list of lookup values.
- Click Add.
- Enter the display name for the inspection time slot in the Name field.
- Use the Description field to describe the inspection time slot.
- Ensure the Active box is checked to display the record in the list of available inspection time slots.
- Use the Display Order field to determine what order the time slots appear in the drop-down menu on an inspection.
- Repeat this process to add any additional records.
- Click Save.
- To remove an inspection time slot from the list, click the trash can icon ().
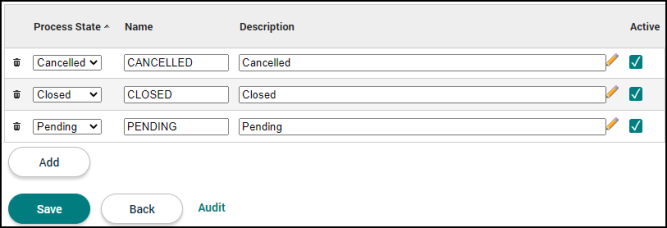
This lookup value refers to the status of a recurring inspection interval. These are the statuses that can be selected in the Status field on the Main tab of the recurring inspection account.
- Click Interval Status from the list of lookup values.
- Click Add.
- Select the Process State.
- Enter the display name for the interval status in the Name field.
- Use the Description field to describe the interval status.
- Ensure the Active box is checked to display the record in the list of available interval statuses.
- Repeat this process to add any additional records.
- Click Save.
- To remove an interval status from the list, click the trash can icon ().
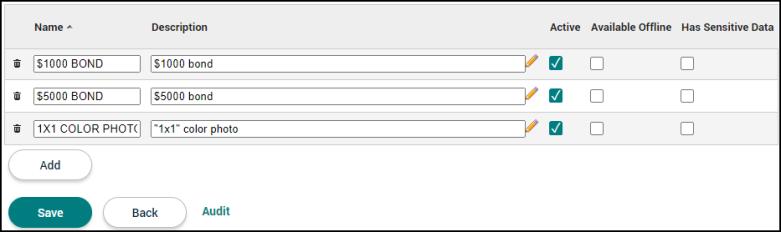
This lookup value refers to a document that can be uploaded to a recurring inspection account. Submittals in this list can be added to any recurring inspection type. You can make any of the submittals in this list available to download offline when using the SmartGov mobile app.
*Note: If your jurisdiction has configured SmartGov to integrate with a third-party document management system, documents stored on the third-party system are outside of the boundary and controls of your Dude Solutions product. Security and privacy controls provided in Dude Solutions product documentation and contracts will not apply to documents stored in third-party systems. The Client is responsible for assessing and maintaining the security of documents stored in third-party systems.
- Click Interval Submittal from the list of lookup values.
- Click Add.
- Enter the display name for the submittal in the Name field.
- Use the Description field to describe the submittal.
- Ensure the Active box is checked to display the submittal in the list of submittals available to associate to the recurring inspection type or to an existing recurring inspection.
- Check the Available Offline button if you would like to allow this submittal to be downloaded via the SmartGov mobile app.
- Repeat this process to add any additional records.
- Click Save.
- To remove a submittal from the list, click the trash can icon ().
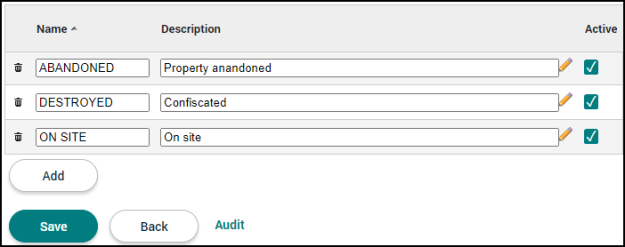
This lookup value refers to the status of an item associated with a recurring inspection account. Items may be added to a recurring inspection account as needed.
- Click Item Status from the list of lookup values.
- Click Add.
- Enter the display name for the item status in the Name field.
- Use the Description field to describe the item status.
- Ensure the Active box is checked to display the record in the list of available item statuses.
- Repeat this process to add any additional records.
- Click Save.
- To remove an item status from the list, click the trash can icon ().
This lookup value refers to the group that a specific interval rule can be associated with on the Interval Rules List tab when configuring a recurring inspection type.
- Click Rule Group from the list of lookup values.
- Click Add.
- Enter the display name for the rule group in the Name field.
- Use the Description field to describe the rule group.
- Ensure the Active box is checked to display the record in the list of available rule groups.
- Repeat this process to add any additional records.
- Click Save.
- To remove a rule group from the list, click the trash can icon ().
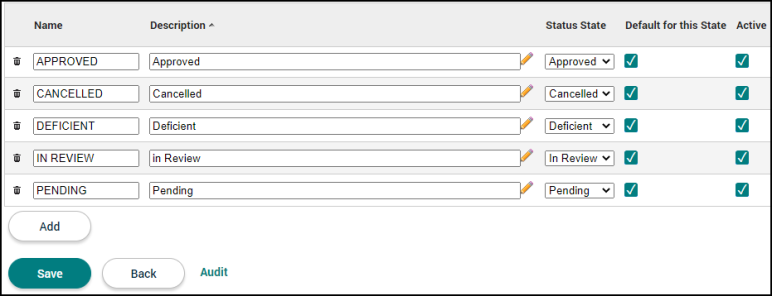
This lookup value refers to a submittal's status on a recurring inspection account. Each status must be tied to a status state. You can have multiple statuses tied to a status state, however one status must be set as the default for the status state.
- Click Submittal Version Item Status from the list of lookup values.
- Click Add.
- Enter the display name for the status in the Name field.
- Use the Description field to describe the status.
- Select the appropriate Status State from the drop-down menu.
- Check the Default for this State box to make this status the default display option for the selected status state. *Note: Each status state can only have one default.
- Ensure the Active box is checked to display the record in the list of available submittal version item statuses.
- Repeat this process to add any additional records.
- Click Save.
- To remove a submittal version item status from the list, click the trash can icon ().
This lookup value refers to the status of individual workflow steps. When configuring the workflow step, you will be able to choose from the list of statuses created here.
- Click Workflow Status from the list of lookup values.
- Click Add.
- Enter the display name for the workflow status in the Name field.
- Use the Description field to describe the workflow status.
- Ensure the Active box is checked to display the record in the list of available workflow statuses.
- Repeat this process to add any additional records.
- Click Save.
- To remove a workflow status from the list, click the trash can icon ().