Back to Event Manager Main Menu
Managing the Events List
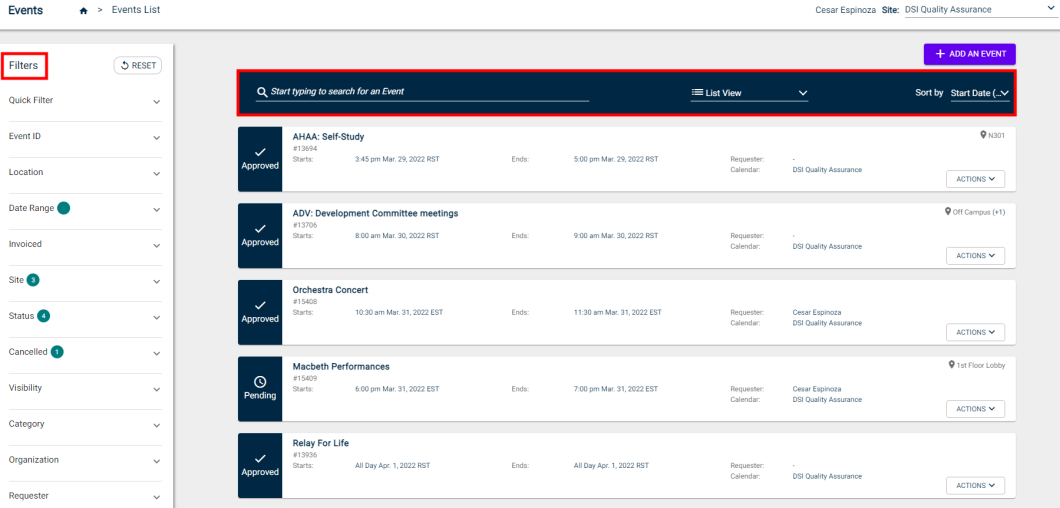
Tenant and Site Administrators have several options to manage events from the Events List, including editing, cancelling, or deleting an event, as well as creating an invoice for a specific event. You can filter the list of events displayed using the Filters panel on the left side of the screen. Requesters can also access the events list, but can only see their own events.
- Click on Events from the side navigation menu and select Events List.
How to Search and Filter the Events List
- Use the Search and Filter options to find or show specific events.
- You can switch from the List View to Calendar View if you would like to view where events fall on the calendar.
- You can also use the Sort By drop-down menu to adjust the primary sort option for events in the list.
- You can search by event ID when you enter the event ID in the filter section.
- Click away from the data entry box to enable the Apply button.
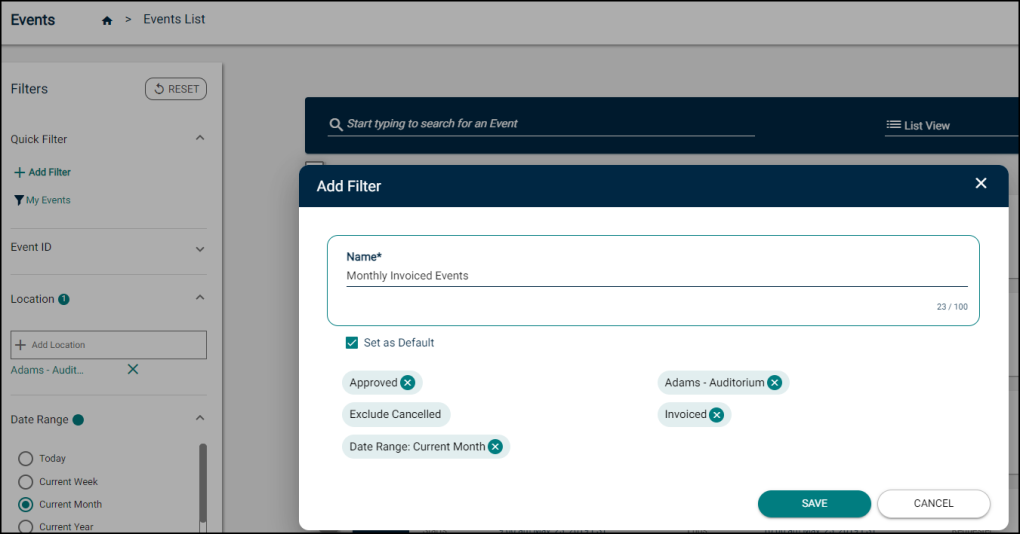
Custom default filters
You can define a custom default filter to display when you first navigate to the Events list. *Note: These filters are only created for your individual user account and are not shared with other users in Event Manager.
You can add up to 20 custom filters using this method, but only one can be defined as the default filter that will display upon opening the Events list. Additionally, be advised that Event Manager will prioritize the default filter, then stock filters, then any custom user defined filters.
-
From the Events list, define the filter criteria you would like to save as part of the default filter.
-
Click Quick Filter and then select Add Filter.
-
Enter a Name for this custom filter.
-
Check the Set as Default box if this should be the default filter that displays when first navigating to this page.
-
Click Save.
Deleting a Custom Filter
-
Click the pencil icon next to the custom filter you'd like to delete.
-
Click Delete.
Editing a Custom Filter
-
Adjust the filters from the Filters side panel.
-
Click Apply.
-
Click the pencil icon next to the custom filter you'd like to edit.
-
Click Save.
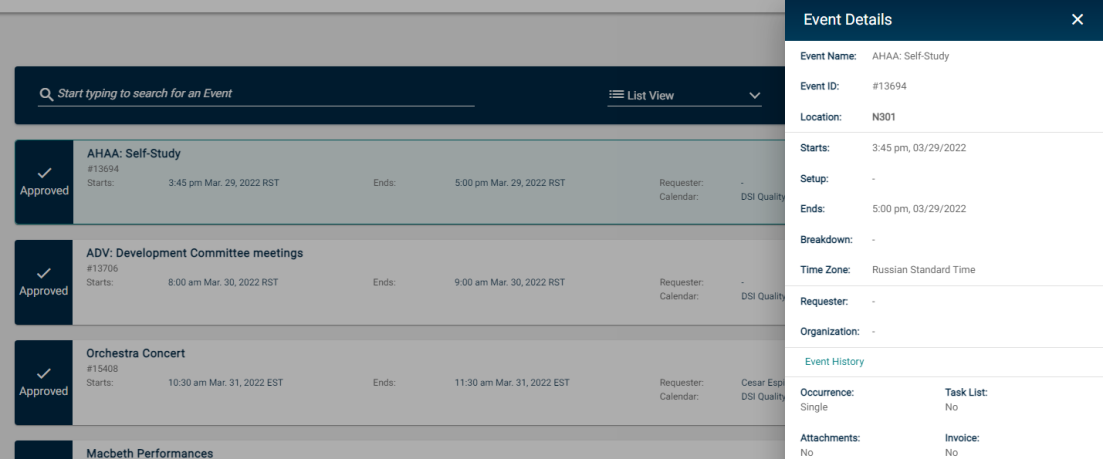
How to View Event Details
Events displayed on the event list have certain details displayed, such as the Event Title, Event ID, Event Start and End, and Requester. You can also view additional details about an event from the list, such as the Location, Organization, and whether the event has been invoiced.
- Use the Search and Filter options to find or show specific events.
- Click anywhere on the event card in the list. A panel will expand that displays more detailed information about the event.
Event Actions
There are a number of actions that can be taken on events in the list, including editing, force-approving, canceling, or deleting an event.
When managing your events from the Events List, you may see an exclamation mark icon (  or
or  ) next to an event in the list. Be advised, when one of these icons is displayed, it means that action is needed on the event for some reason. Reasons that you may need to take action on an event include:
- () The event has expired insurance and needs to be updated with current insurance information.
- ( or ) The event is double booked with another event and one of the two events should be moved. *Note: The red exclamation icon will display only when a location has been set to "Prevent Double Booking".
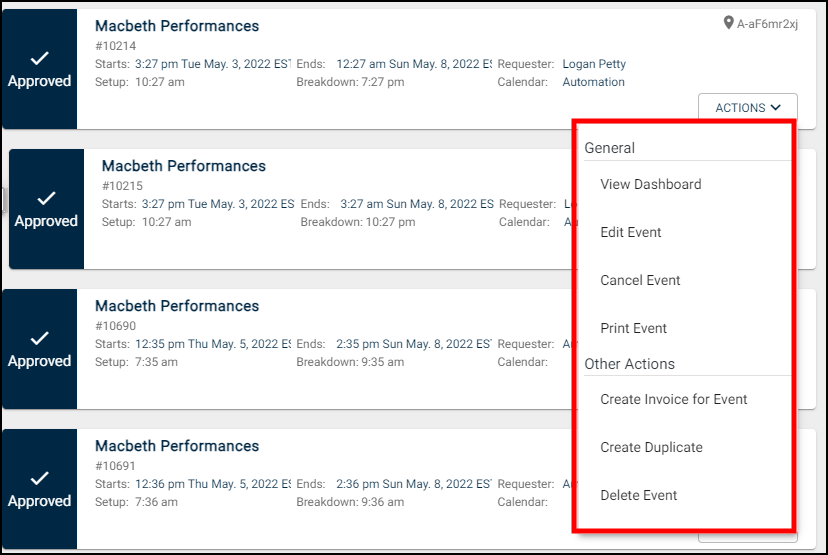
- Click the Actions drop-down menu on the event you would like to manage.
- Select one of the available options under General or Other Actions:
- View Dashboard will take you to an event specific dashboard for that event.
- Edit Event will open the event form and allow you to make changes. If the event is a series, this option modifies only the single occurrence of that series event.
- Edit Series will open the event form and allow you to make changes to all occurrences of the series.
- Cancel Event will allow you to cancel the event, cancel any sale items or registrations, and choose to notify contacts for the event.
- Print Event will enable you to print an event.
- Print Event Series will allow you to print all occurrences of this event series from the site.
- Create Invoice for Event will open the invoice form and allow you to create an invoice for this event.
- Create Invoice for Series will open the invoice form and allow you to create an invoice for this event series.
- Create Duplicate allows you to create a new event based on this event's information. You will be redirected to the Create an Event page with the event's details already filled in.
- Delete Event removes this event from the site.
- Delete Series removes all occurrences of this event series from the site.
- To modify an individual event, click on the event's name and select Edit Event in the panel that displays, or select Edit Event from the Actions drop-down menu.
- To modify an event series, click on the event's name and select Edit Series in the panel that displays, or select Edit Series from the Actions drop-down menu.
- To expedite an event approval process during editing, use the Submit & Force Approve button directly on the form to force-approve an event.
Navigate to an event on the Events list.
Choose Edit Event from the Actions drop-down menu.
Scroll to the bottom of the form.
Click the Submit & Force Approve button. *Note: This button is only available to tenant admins.
-
Make all necessary changes to the event.
If you are a Tenant Administrator or a user with the Event Administrator permission, you can make changes to any event fields regardless of where in the approval process an event is. Any changes made to an event will be recorded in the event history. Editing certain fields will restart any existing approval processes that the event is going through. These fields are:
- Location
- Date/Time
- Category
- Organization
If one of the newly edited fields causes the event to follow another workflow, that approval process will be added to the event. A message will display at the bottom of the event form informing you which approval processes (if any) will be restarted or added because of the changes.
For example, the event "Macbeth Performances" is currently undergoing approval. It is in a workflow for all theatrical spaces on campus, and has received its first approval. A Tenant Administrator notices that the event has not been given a Category, and adds the "Fine Arts" and "Theatre" categories to the event. After saving, because there is an existing workflow in place for all "Fine Arts" category events, the "Macbeth Performances" event must now go through that approval process. Additionally, the approval process it was already in has been restarted and it must receive all approvals in the initial workflow.
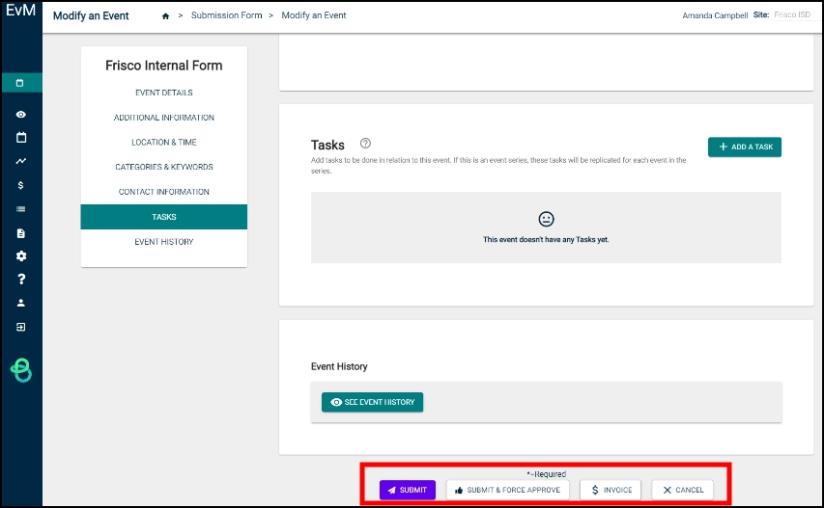
- Click one of the buttons at the bottom of the page:
- Submit to finalize the changes.
- Invoice to begin creating an invoice for this event or series.
- Cancel to exit this page without saving any changes.
- Submit & Force Approve to force-approve an event. *Note: This time-saving button is only available to tenant admins.
- To create an invoice for an individual event, select Create Invoice for Event from the Actions drop-down menu on the event.
- To create an invoice for an event series, select Create Invoice for Series from the Actions drop-down menu on the event.
- Complete the invoice form.
- Click on the event's name and select Edit Event in the panel that displays, or select Edit Event from the Actions drop-down menu.
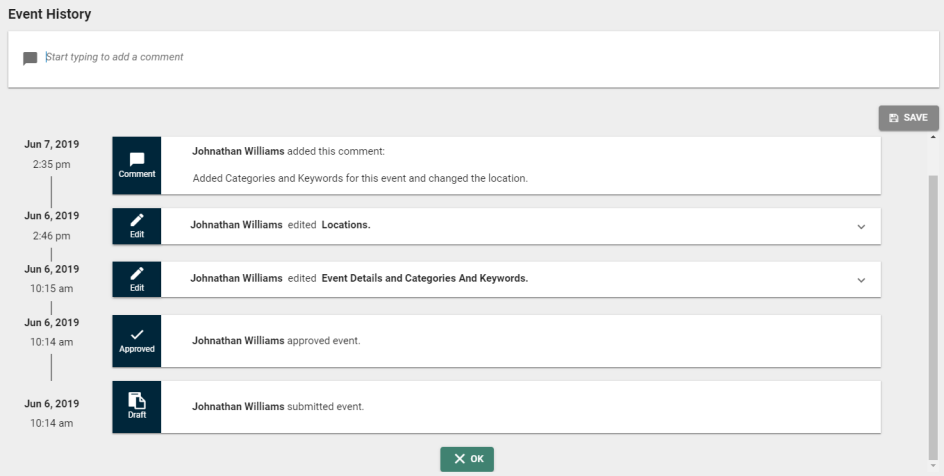
- Click See Event History under the Event History panel.
- Changes to the Event or Event Series are displayed with a time and date stamp.
- To view more details about an edit, click the down arrow to expand the panel.
- To add a comment to the event history, start typing in the field at the top of the page and click Save.
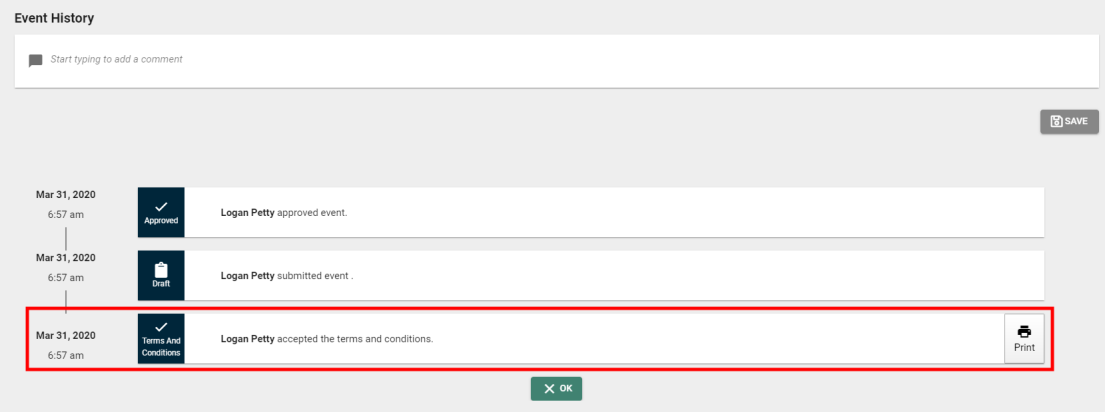
Viewing Terms and Conditions in Event History
If the event was created using an event form with terms and conditions, the time and date that the user accepted the terms and conditions will be recorded in the event history. Additionally, you can view the version of the terms and conditions that the user accepted.
- Follow the steps above for navigating to Event History.
- Locate the time and date that the user accepted the terms and conditions in the Event History list.
- Click Print next to the Terms and Conditions line to view the version of the terms and conditions that the user accepted. The terms and conditions will open in a new tab, where they can be downloaded to your computer or printed, if necessary.
- From the Events List, select Create Duplicate from the Actions drop-down menu next to the event you'd like to duplicate.
- All information from this event will be copied into a new event form.
- Make any necessary changes.
- Click one of the buttons at the bottom of the page:
- Submit to finalize the changes.
- Cancel to exit this page without saving any changes.
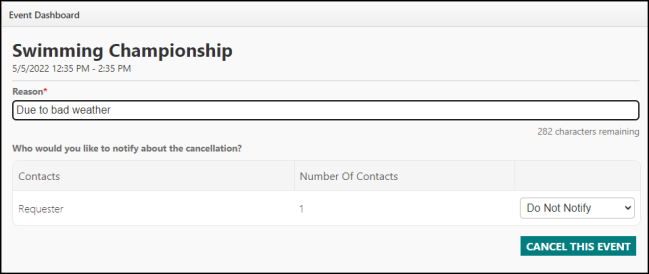
- From the Events List, select Cancel Event from the Actions drop-down menu next to the event you'd like to cancel. This will take you to the Cancel Event screen. *Note: Once done, the event will be marked as Cancelled on the public calendar.
- In the Reason field, add a reason for cancelling the event. *Note: You can add the cancellation reason for ONE approved event at a time.
- This field is mandatory as indicated by the asterisk.
- Summarize the reason for cancelling the event within 300 characters. The character count will indicate the remaining characters as you write.
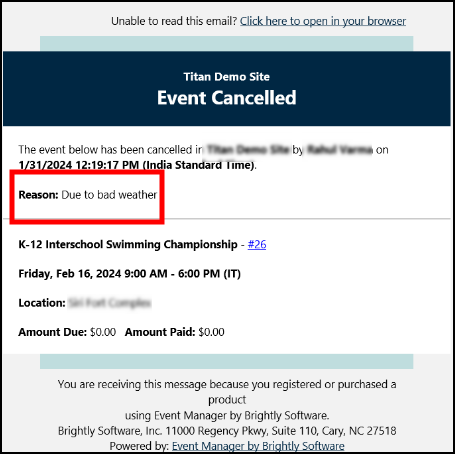
Select either Notify or Do Not Notify to choose whether or not to alert the requestors of the cancellation reason.
If you've subscribed to receive Event Cancellation Notifications, you'll get the following email message:
- If there are no Sale Items or Registrations for this event, click Cancel This Event and then click OK in the window that appears.
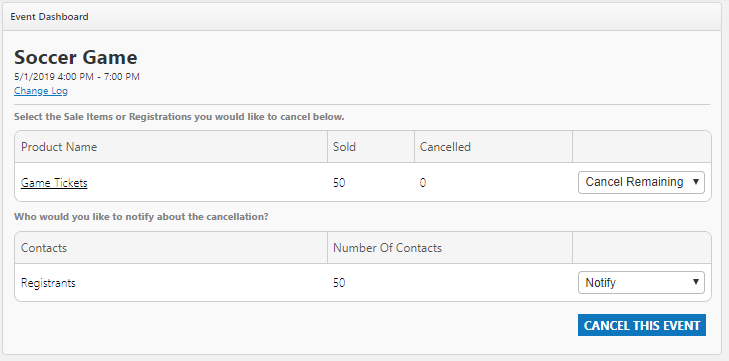
- If there are Sale Items or Registrations for this event, there are two cancellation options to select from:
- Select Cancel Remaining to automatically cancel and alert the registrant or purchaser for the product indicated. *Note: This will not automatically issue a refund. Refunds must be issued via the Events Dashboard.
- Select Do Not Cancel to retain all registrants as active for this event. *Note: This option is not recommended if the event is cancelled.
- If there are Contacts for this event, select either Notify or Do Not Notify to choose whether or not to alert them of the cancellation.
- Once you have addressed any Sale Items, Registrations, or Contacts, click Cancel This Event and then click OK in the window that appears.
- To delete an individual event, select Delete Event from the Actions drop-down menu.
- To delete an event series, select Delete Series from the Actions drop-down menu.
- Click Confirm in the window that appears to delete the event or series of events.
Restoring a Deleted Event
- From the Events List, next to the deleted event, select Restore Event or Restore Series from the Actions drop-down menu.
- Restoring an event will change the status from Deleted to Saved.
Purging a Deleted Event
- To permanently remove an event with the Deleted status, select Purge Event or Purge Series from the Actions drop-down menu. *Note: Purged events cannot be restored or recovered in any way.
Bulk Actions
You can modify multiple events at one time by using bulk actions on the Events list.
Bulk Cancel
-
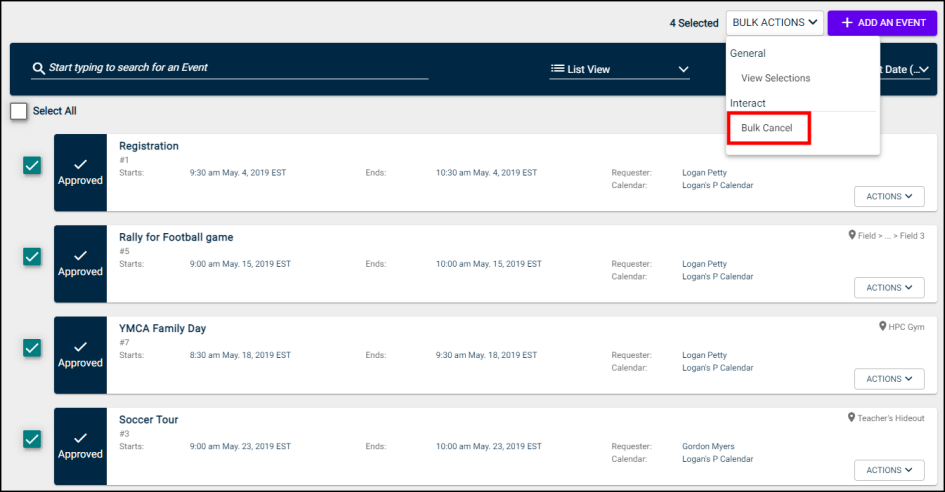
From the events list, check the box next to each event you would like to cancel.
-
Click Bulk Actions and then select Bulk Cancel.
-
In the window that appears, click Yes to cancel the selected events.
Calendar View
To see a month-to-month view of your events, utilize the Calendar View feature. Events displayed on the calendar will be color coded according to their status.
- Above the events list, select Calendar View. from the drop-down menu.
- Events will be displayed on the calendar and color coded according to their status:
- Approved: Events that have been approved and published will display as green on the calendar.
- Canceled: Events that have been canceled will display as red on the calendar.
- Pending: Events that still require approval will display as yellow on the calendar.
- Denied: Events that have been rejected will display as red on the calendar.
- Deleted: Events that have been deleted will display as black on the calendar.
- Saved: Events that have been saved will display as blue on the calendar.
- Version: Events that have been versioned during the approval process will display as grey on the calendar.
Bright Idea:If an event needs to be updated during the approval process, such as changing the start or end time, a separate version of the event will appear on the calendar. The approved event will display in green, and the versioned event will display in grey.

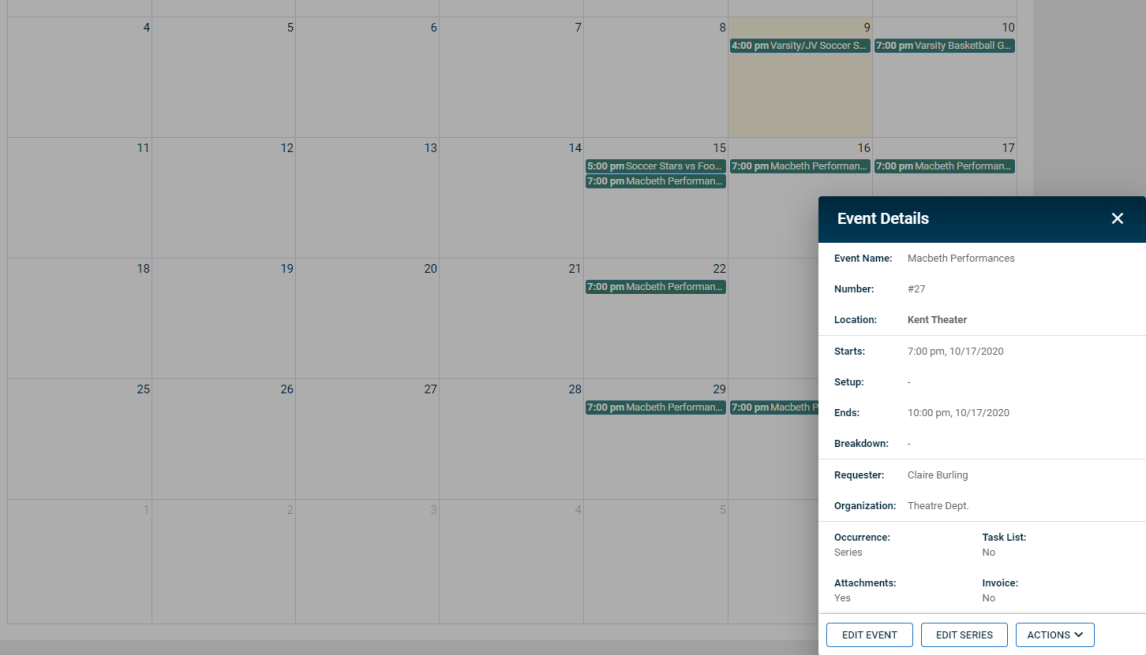
- Click on an event from the calendar to open the Event Details panel. You can view relevant event information, edit the event or event series, or use the Actions menu to make certain changes to the event.
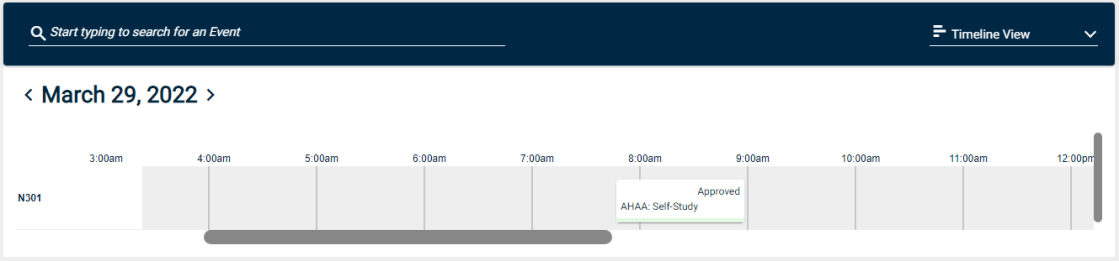
Timeline View
To see the events occurring at your facilities on a particular day, use the Timeline View. You can see where events fall on the timeline for each location to get an at-a-glance idea of how busy a particular location might be. *Note: You can only view 100 events at a time, so you may need to filter your event list by Location, Organization, or Category if you have a high concentration of events on a particular day.
-
Above the events list, select Timeline View. from the drop-down menu.
-
The timeline will default to display today's date, but you can change the Start Date under Filters if you'd like to view events for a future date.
-
You can also filter the timeline by other search criteria, such as Location, Organization, Category, or Requester.
- Events will be displayed on the timeline and color coded according to their status:
- Approved: Events that have been approved and published will display as green on the timeline.
- Canceled: Events that have been canceled will display as red on the calendar.
- Pending: Events that still require approval will display as yellow on the timeline.
- Denied: Events that have been rejected will display as red on the timeline.
- Deleted: Events that have been deleted will display as black on the timeline.
- Saved: Events that have been saved will display as blue on the timeline.
- Version: Events that have been versioned during the approval process will display as grey on the timeline.
- Click on an event from the timeline to open the Event Details panel. You can view relevant event information, review the event or event series, or use the Actions menu to make certain changes to the event.
