Adding a part
Parts are the materials used to keep your assets functioning. These materials can include screws, batteries, filters, etc. Parts can be added to work orders to track materials used to complete work. *Note: The Parts & POs feature is available to Asset Essentials clients for an additional cost. Please contact your Sales Representative or Client Services if you are interested in purchasing this feature.
Watch the video tutorial:

How to add a part
- Click on the Parts & Purchase Orders menu icon and then click on Parts.
- Click the New button. *Note: Fields marked with an asterisk are required.
- Fill out the appropriate information in the following sections.
General
- If your account has multiple sites, select a Site from the drop down menu.
- Enter a Name for the Part. This will be how you identify the Part when you select it in other areas of the program.
- Optionally, you can also enter a Part # or leave the box next to Auto Generate checked and the system will create a part number.
- Select a Manufacturer by clicking on the Supplier icon and then clicking the plus sign to the left of the appropriate Supplier.
- If you plan to print barcode labels for your parts, enter a Barcode number. This is also where you would enter a non-Asset Essentials QR code value for the Part, if you are using them.
- Select a Category that describes the type of group your part falls under. *Note: Categories are fully customizable and are an important aspect of organizing Assets and Parts. To learn more about how to set up Categories in your account, see Adding Categories.
- Select the Cost Rule for the part. This indicates how you want the cost for the part to update.
- Cost rule from Site: use this option if you would like the part to have the same cost rule as the selected site.
- Standard: use this option if the part has a fixed cost possibly due to a contract with the supplier.
- Average: use this option if the cost of the part can vary with each shipment.
- Select the Reorder Method from the drop down.
- Min/Max - This option will determine how much should be ordered based on the minimum and maximum amounts set for each Location where the part is stored. For example, a part with a minimum amount set at five and a maximum amount set at thirty will suggest reordering the amount required to reach the maximum of thirty when the quantity on hand is either at or below five.
- Depending on the Part Min Max Calculation chosen under system settings, this notification may be triggered when the on hand quantity is equal to or below the Min Value.
- Reorder Point: This option will determine how much should be ordered based on a set minimum value set for each Location. The Reorder Point is closely tied to the Reorder Qty field.
- Reorder Point - The set minimum value that will trigger a notification to reorder the item. Depending on the Part reorder point calculation chosen under system settings, this notification may be triggered when the on hand quantity is equal to or below the Reorder Point value.
- Reorder Qty - This set value will be suggested for the reorder when the Reorder Point triggers a notification.
- Fill out any other fields as needed.

Note
Enter any notes that pertain to the Part you are adding. This is a free text field.
Suppliers
- Choose your Supplier(s) by clicking on the Select Supplier icon (
) and then clicking the plus sign to the left of the appropriate Supplier(s).
- Select the Unit of Purchase for each supplier in this section.
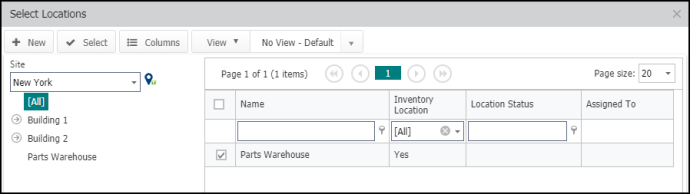
Locations
- Click the Select Locations icon (
) and then check the box next to the inventory location(s) where the part is stored. *Note: The list only includes locations marked as Inventory Locations.
- Depending on your Reorder Method selection in the General section, enter either a Reorder Point and Reorder Qty or a Min Level and Max Level amount for each Location.
- If you select the Reorder Point method, the Reorder Qty will default to "1". This can be set to any value greater than "1".
- If you select the Min/Max method, the Max Level must be greater than the Min Level.
- Enter the Qty on Hand if you already have the part on hand and know the exact quantity stored at each location.
- If parts storage information has been set up in your account, you can select the exact aisle, bin, shelf, etc. where this part is located.

Photo
- Click on the Select Document/Image icon (
) to either select an image from the Documents Library, or add an image from your computer.
Documents
- Click on the Select Document/Image icon (
- Click Save to add this Part to Asset Essentials.
Duplicating parts
You can easily create a copy of one of your Parts in Asset Essentials.
- Click on the Parts & Purchase Orders menu icon and select Parts.
- Right-click on the Part that you will be duplicating and select Duplicate.
- The Add Part page will load with the majority of the information copied over from the selected Part.
- Make any necessary changes to the duplicate Part and click Save.
