Recurring inspections: Fees tab
The Fees tab displays all fees that have been associated with the recurring inspection interval. You can pay for fees, as well as override, defer, mark exempt, and add new fees on this page.
Adding a fee
- Begin typing or click the magnifying glass (
 ) icon to select the appropriate Fee Code.
 - If additional fees are needed, click the Add button and repeat this process.
- Click Calc All at the bottom of the screen to pull in the fee amount for the selected fees. *Note: If the fee is based on a value that must be filled out on a different tab, such as the Details tab, that value must be filled out before calculating the fee.
- Click Save.

Paying fees
- Click the Calc All link at the bottom of the page to ensure all fees associated with the recurring inspection interval are calculated and up-to-date. *Note: If payments have already been applied to the recurring inspection interval, you will receive a message saying "Calculated fee amounts may differ from what was originally paid. Include fees that are currently paid in full?". Click Yes to include these fees or click No to exclude these fees from the calculation.
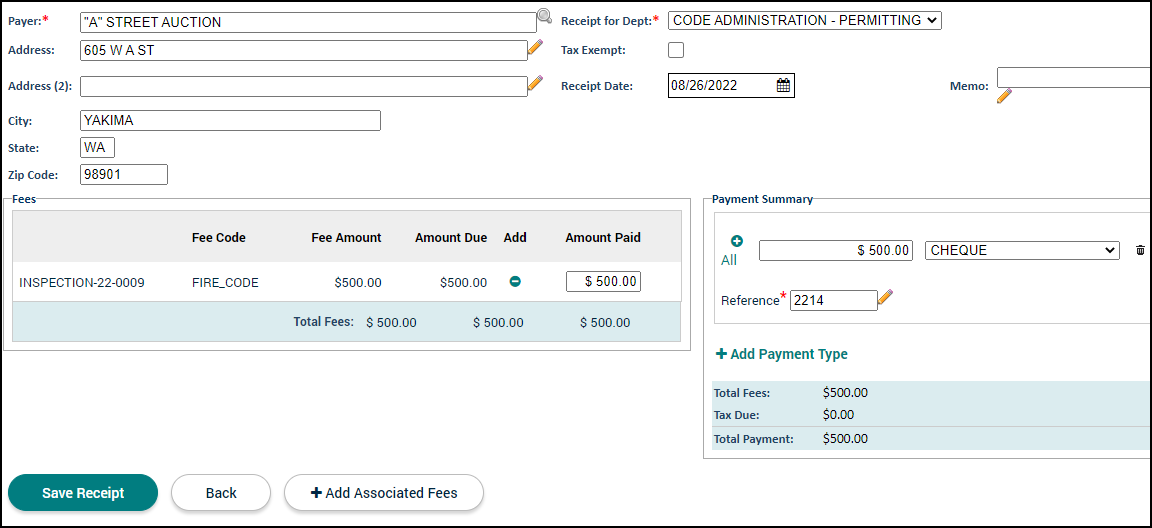
- Click the Create Receipt button at the bottom of the page. This opens the Receipt window.
- The Payer field, as well as the address fields, will automatically populate with the primary contact's information. This information can be edited as needed. *Note: The Payer does not need to be a listed contact in SmartGov. Any name can be entered here.
- The Fees section displays any fee with a remaining balance.
- In the Payment Summary section, select the Payment Type and enter a Reference Number if necessary.
- If you are entering the full amount, click the + All link. This automatically populates the Amount Paid field with the total amount.
- If you are entering a partial payment, enter the Amount Paid next to the appropriate line item in the Fees section or click the plus icon (
 ) to enter the entire line item amount. This will total all partial payments in the Amount Paid field in the Payments section.
 - Click the Create button to create the receipt for this payment.
- Click Receipt History at the bottom of the screen to view any receipts that have been generated for this recurring inspection.
- Select a receipt from the list to view details of the payment or manage the receipt.
- Click Cancel Receipt to void the payments that have been applied to the receipt.
- Click Edit Receipt to adjust the Receipt Date, Payment Type, and Reference Number.
- Click Print Receipt to generate a copy of the receipt which can then be printed.
Click Email Receipt to send the receipt to specific contacts.
- If the contact is listed in the window that displays, check the box in the Send column next to the appropriate contacts.
- If the contact is not listed, enter a Custom Email Address.
- Click Send.
Paying fees online with a credit card
- Click the Calc All link at the bottom of the page to ensure all fees associated with the recurring inspection interval are calculated and up-to-date. *Note: If payments have already been applied to the recurring inspection interval, you will receive a message saying "Calculated fee amounts may differ from what was originally paid. Include fees that are currently paid in full?". Click Yes to include these fees or click No to exclude these fees from the calculation.
- Click the Create Receipt button at the bottom of the page. This opens the Receipt window.
- The Payer field, as well as the address fields, will automatically populate with the primary contact's information. This information can be edited as needed. *Note: The Payer does not need to be a listed contact in SmartGov. Any name can be entered here.
- The Fees section displays any fee with a remaining balance.
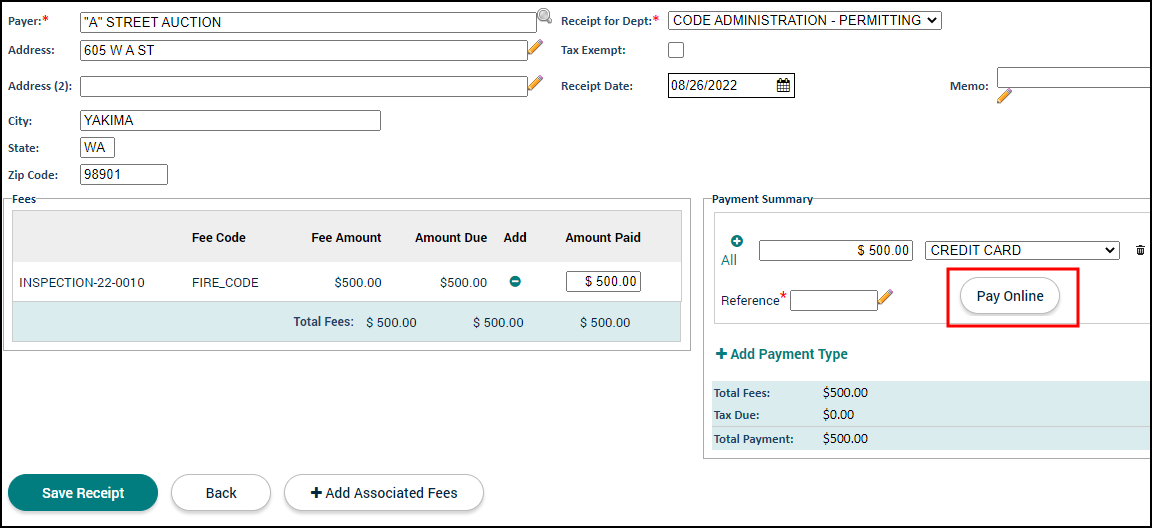
- In the Payments section, select Credit Card as the Payment Type and enter a Reference Number if necessary.
- If you are entering the full amount, click the + All link. This automatically populates the Amount Paid field with the total amount.
- If you are entering a partial payment, enter the Amount Paid next to the appropriate line item in the Fees section or click the plus icon ( ) to enter the entire line item amount. This will total all partial payments in the Amount Paid field in the Payments section.
- Click the Pay Online button. In the confirmation window that appears, click Continue. This will open the payment gateway that has been configured for your account in a new tab.
- Once you have finished paying your fees in the payment gateway, you will be returned to SmartGov where you can continue to process your recurring inspection as needed.
Managing fees
Overriding a fee
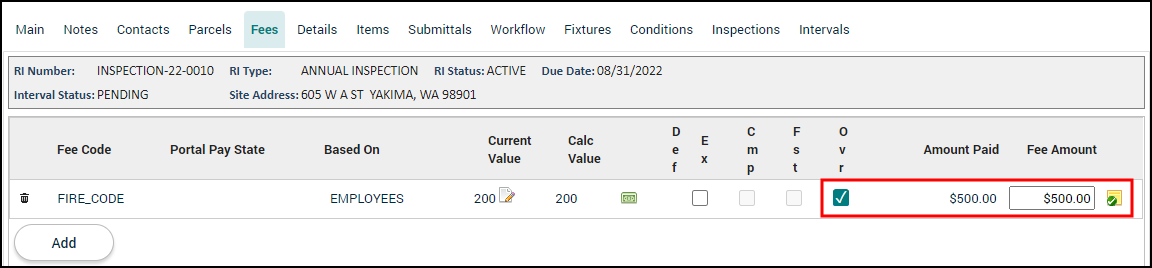
- Check the box in the Ovr column to override the fee. This will open the Note Detail window where you must enter an override note.
- Select the Note Type from the drop-down menu.
- Enter a description of the override in the Text field.
- The Begin Date will default to the current date, however you can select a different date by clicking the calendar icon.
- Enter the End Date and associate a Link, if needed.
- There is no action needed for the Public on Portal option. Recurring inspection notes will not display on the Citizen Portal.
- Click Create.
- Update the Fee Amount field with the new amount.
- Click Calc All to recalculate the total fees with the new fee amount.
- Click Save.
Deferring and exempting fees
Depending on your jurisdiction’s configuration, some fees may be able to be deferred or marked exempt. If so, the fee will have a checkbox under the Deferred or Exempt columns. Any fees marked as deferred must be paid in order to mark the recurring inspection interval as Closed.
- Check the box in either the Def (Deferred) or Ex (Exempt) column. This will open the Note Detail window where you must enter a deferral or exemption note.
- Select the Note Type from the drop-down.
- Enter a description in the Text field.
- The Begin Date will default to the current date, however you can select a different date by clicking the calendar icon.
- Enter the End Date and associate a Link, if needed.
- There is no action needed for the Public on Portal option. Recurring inspection notes will not display on the Citizen Portal.
- Click Create.
- Click Calc All to recalculate the total fees with your changes. *Note: If you created an exemption for a fee, that Fee Amount will not be included in the Total Fees for the recurring inspection interval.
- Click Save.
