Parcel custom attributes
Custom Attributes are jurisdiction defined fields that will display on the Details tab of a parcel and allow you to capture a wide variety of data types. *Note: Details on the parcel can be updated using the Parcel Load Job. Please contact Client Services for additional assistance with the Parcel Load Job.
Adding a parcel custom attribute
- Click on Administration in the navigation menu, then click Parcel Setup.
- Select Parcel Custom Attributes.
- Click Create New.
- Enter a Name and a Description.
- Ensure the Active box is checked to display this custom attribute in the list.
- Check the Required box if this custom attribute should be required when adding a parcel. *Note: Checking this box will require you to enter a Default Value for this custom attribute.
- Check the Read Only box if this attribute should display predefined text that cannot be edited.
- Use the Display Order field to determine the sequential order of the custom attributes.
- Select an appropriate Type.
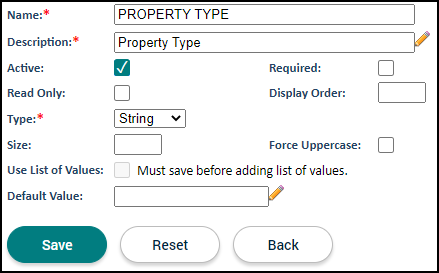
String
The String option should be used if the data being collected is in text format. This custom attribute type can also be configured to display a list of options in a drop-down menu.
- Enter the character limit in the Size field. *Note: The maximum character limit is 1000 characters.
- Check the Force Uppercase box to automatically convert any text entered to uppercase format.
- If you would like specific text to be pre-populated, enter the text in the Default Value field. *Note: If the Required box is checked for this custom attribute, you must enter a Default Value.
- Click Save.
- If you would like the custom attribute to display a list of options in a drop-down menu, check the Use List of Values box.
- To begin defining the list of options, click the Create button in the Values section that appears.
- In the window that displays, enter the Value and Description, then click Save. *Note: The text entered in the Value field will display as the option in the list.
- Repeat this process to add any additional options.
- Click Save.
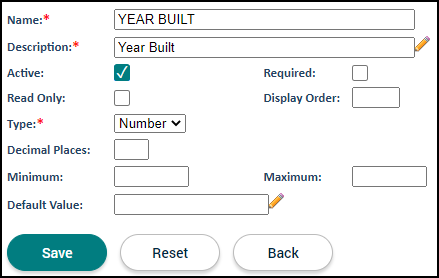
The Number option should be used if the data being collected is in a number format.
- Enter the number of decimal places the value should be rounded to in the Decimal Places field. For example: If the Decimal Places field is set to 2 and the number 3.648 is entered, the system will automatically round that number to 3.65.
- If applicable, enter the Minimum and Maximum values.
- If you would like a specific number to be pre-populated, enter the number in the Default Value field. *Note: If the Required box is checked for this custom attribute, you must enter a Default Value.
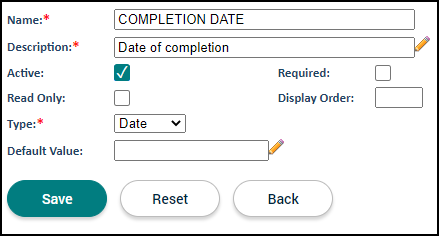
The Date option should be used if the data being collected is in a date format. If this option is used, there will be a calendar icon that displays on the Details tab of the parcel to select the appropriate date.
- If you would like a specific date to be pre-populated, enter the date in the Default Value field. *Note: If the Required box is checked for this custom attribute, you must enter a Default Value.
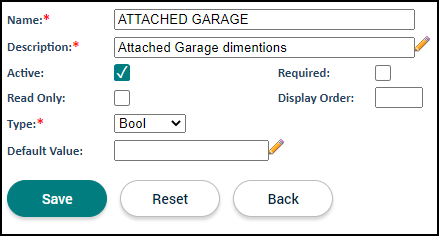
The Boolean option should be used if you would like the field to be displayed as a checkbox.
- If you would like the checkbox to be checked automatically, enter "Y" in the Default Value field. *Note: If the Required box is checked for this custom attribute, you must enter a Default Value.
- Once all custom attribute information has been entered, click Save.
- If this custom attribute needs to be added to all existing parcels, click Propagate to All Parcels.
- Click Yes in the confirmation window that appears. *Note: Once this has been done, the custom attribute cannot be removed from a parcel.
- Click Back to return to the list of Parcel Custom Attributes.
