Back to Event Manager Main Menu
Categories
Categories are used to group similar events into an organized and searchable structure. Event Manager supports two types of categories, Global Categories and Site Categories. Global Categories are created by the Tenant administrator and shared to all sites. Site Categories are created by the Site Administrator and are not shared to all sites, they are local to that specific site. This page pertains to Site Categories.
Adding categories
-
To add Site Categories or Global Categories, click on Settings from the side navigation menu.
- Click on Categories under Site Administration or Global Categories under Global Administration..
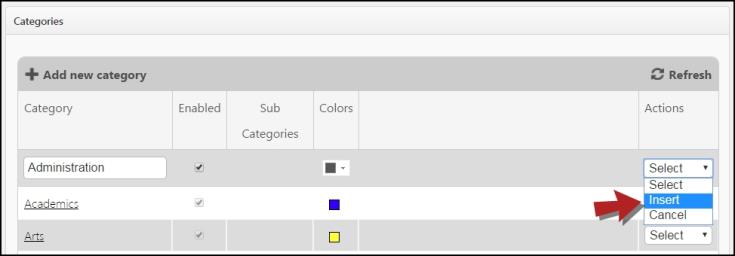
- Click the Add new category link.
- Enter the name of the Category.
- Ensure that the Enabled check box is checked.
- Assign a color to the category if color coding is enabled. Your administrator can enable category color coding on the Site Management Settings page for the site. If enabled this color code will be displayed on the Grid View, List View, Summary View and Event Details View.
- From the Actions drop down for the category you are adding, select Insert.
Adding sub categories
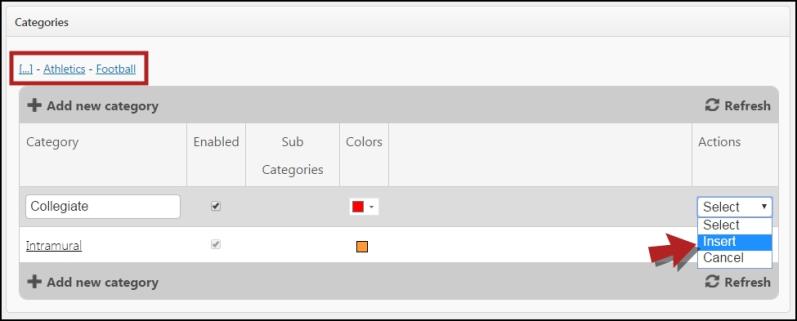
For each category that you add to your account, you can create up to 5 levels of sub categories. This allows you to further classify events into more specific groups for reporting. For example, a parent category of Athletics could have different sports as sub categories, such as Football, Baseball, and Basketball.
- To add a new sub category, click on the name of the Category you would like to add the sub category to. The page will refresh to show any sub categories that already exist for this category. You will see the parent category above the list so you know which category you are under.
- Click on the Add new category link.
- Enter the name of the Sub Category.
- Ensure that the Enabled check box is checked.
- Assign a color to the sub category if color coding is enabled. If enabled this color code will be displayed on the Grid View, List View, Summary View and Event Details View.
- From the Actions drop down for the category you are adding, select Insert.
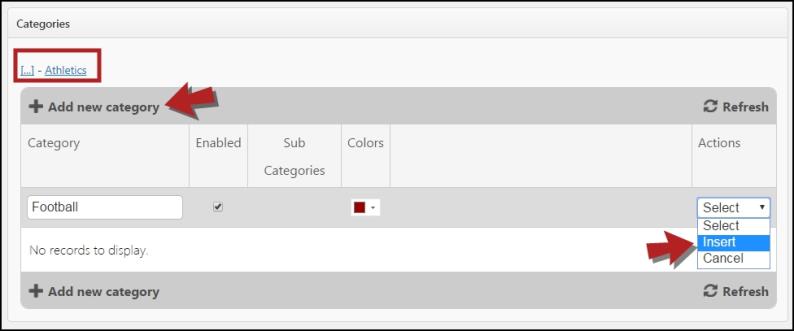
When adding a new category to your site, be aware of your current location within the category list. For example, if you have clicked on the parent Category of Athletics and click Add new category, you will be adding a new sub category under Athletics. If you have clicked on the sub category of Football and then click on Add new category, you will be adding a new sub category level under the sub category of Football.
Modifying and deleting categories
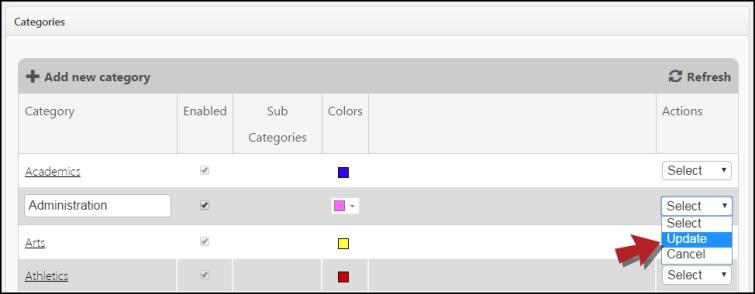
To modify an existing Category:
- From the Category list, click on the Actions drop down next to the Category you would like to edit and select Edit.
- Make the necessary changes to the category's information.
- Select Update from the Actions drop down to save your changes.
To Delete an Existing Category:
- From the Category list, click on the Actions drop down next to the Category you would like to delete and select Delete.
