Back to Event Manager Main Menu
Managing Tasks
Once tasks have been added in Event Manager, there are many options available to manage those tasks. You can search and filter your task list to show a specific task or series of tasks, you can edit and delete tasks, and you can export tasks based on the search or filters you have applied. *Note: If you do not currently have access to this feature, please contact your Sales Representative or Client Services for more information.
Trying to submit a task as a work request? Check out our integrations with MaintenanceDirect and Asset Essentials!
Searching and filtering tasks
Use the search and filter options to find or show specific tasks.
Search Bar
From the Search bar you can search, sort, and change the view of your tasks.

Search
The Search field allows you to quickly find tasks based on the words used in the Task Name. *Note: Only words used in the task name will register against the search. If you are trying to filter by a specific date or priority, use the Filter Tasks panel.
Sort
The Sort drop down allows you to reorganize the task list by whichever field you select:
- Due Date: You can sort by Closest Date First or Furthest Date First for due date.
- Event Date: You can sort by Closest Date First or Furthest Date First for event date.
- Name: You can sort A-Z or Z-A by name.
- Priority: You can sort by High First or Low First for priority.
View
There are two options available for the way you view the task list:
- List View: This is the default view for the task list, and displays detailed information about each task.
- Calendar View: This shows tasks on a calendar by their due date, and only displays the task name and status.
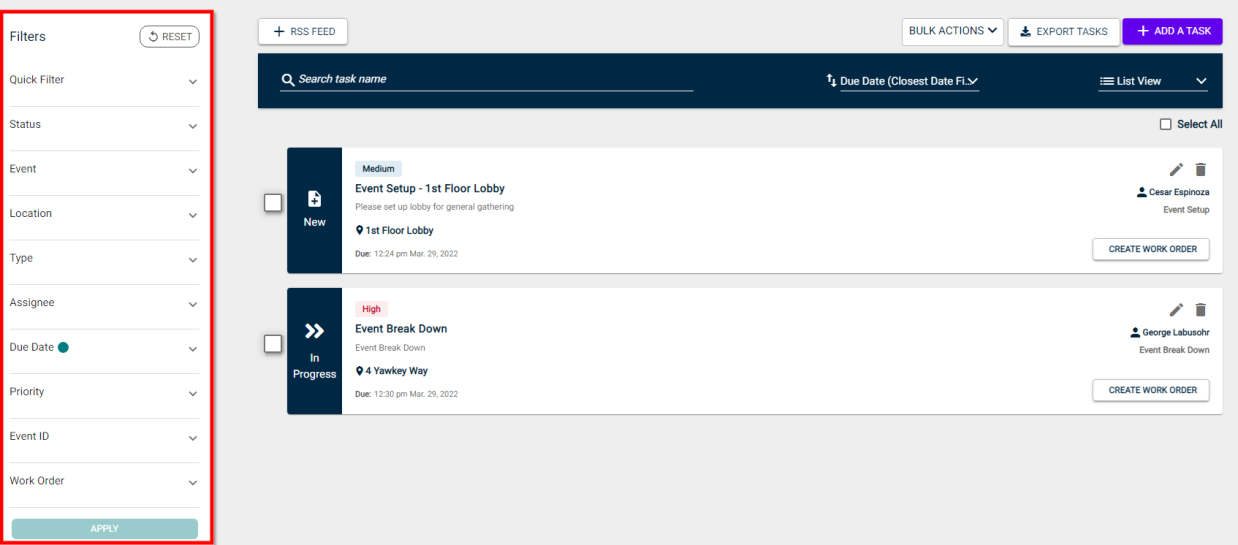
Filter tasks panel
This side panel gives you greater flexibility when searching or displaying certain tasks. You are able to filter by a number of options, including Event, task Type, and Event Date.
Custom default filters
You can define a custom default filter to display when you first navigate to the Tasks list. *Note: These filters are only created for your individual user account and are not shared with other users in Event Manager.
You can add up to 20 custom filters using this method, but only one can be defined as the default filter that will display upon opening the Tasks list. Additionally, be advised that Event Manager will prioritize the default filter, then stock filters, then any custom user defined filters.
-
From the Tasks list, define the filter criteria you would like to save as part of the default filter.
-
Click Quick Filter and then select Add Filter.
-
Enter a Name for this custom filter.
-
Check the Set as Default box if this should be the default filter that displays when first navigating to this page.
-
Click Save.

Deleting a Custom Filter
-
Click the pencil icon next to the custom filter you'd like to delete.
-
Click Delete.
Editing a Custom Filter
-
Adjust the filters from the Filters side panel.
-
Click Apply.
-
Click the pencil icon next to the custom filter you'd like to edit.
-
Click Save.
Viewing tasks on the task list
There are a few details to be aware of when viewing Tasks on the task list:
- Status: The task status will display on the left side of the task underneath the status icon.
- Task Name: The name of the task will display in bold. If the task has been created from an Event Setup, the name will be formatted as "Event Name - Task Name [Location Setup]".
- Due: The time and date that the task is due will display in the bottom left corner of the task.
- Assignee: The person responsible for completing the task will display in the top right corner of the task.
- Task Description: The task description will display beneath the Task Name and will include any information that has been provided on the task.
- Location: The location that the task should be performed at will display beneath the task description field.
- Priority: The priority of the task will display in the top left corner of the task.
- Associated Event/Series: The name of the associated event or series of events will display if the task is associated with an event or series.
- Task Type: The task type will display on the right side of the task if one has been added to the task.

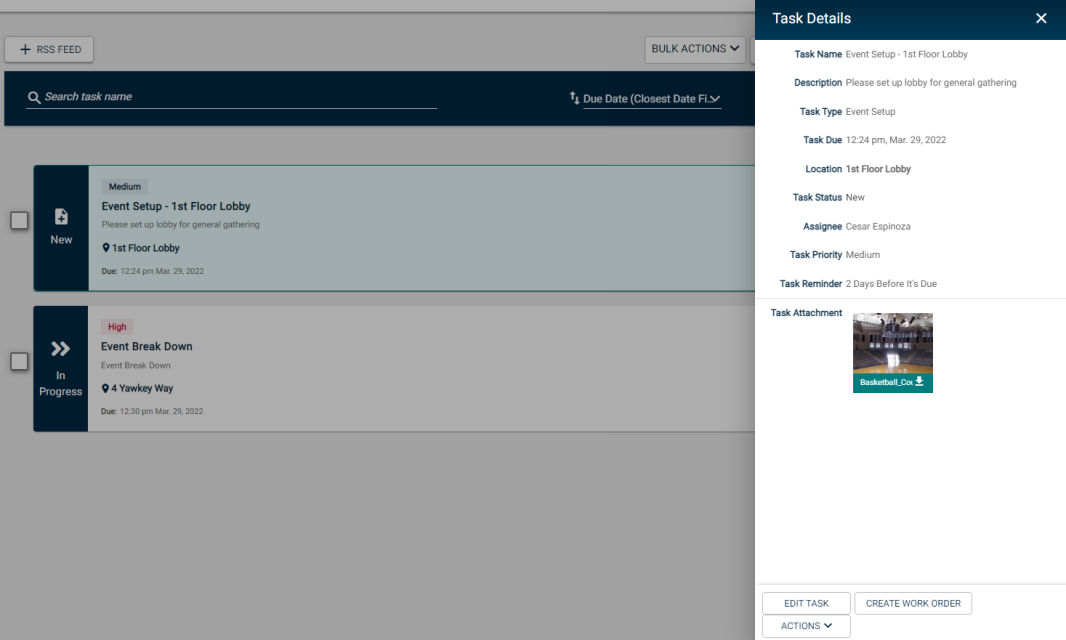
Task Details
Viewing Task Details
You can view most of the relevant details about a task without leaving the task list. You also have the option to edit a task, create a work order, or delete the work order from the Task Details panel. *Note: Assignees can also view task details from their Task Assigned Notification email to learn more.
-
Click on Tasks from the navigation menu.
-
Search or filter the task list to locate the task you would like to view.
-
Click anywhere on the task card from the list. The Task Details panel will expand.
-
Click Edit Task to make changes to this task.
-
Click on Actions and then select Delete Task to delete the task.
-
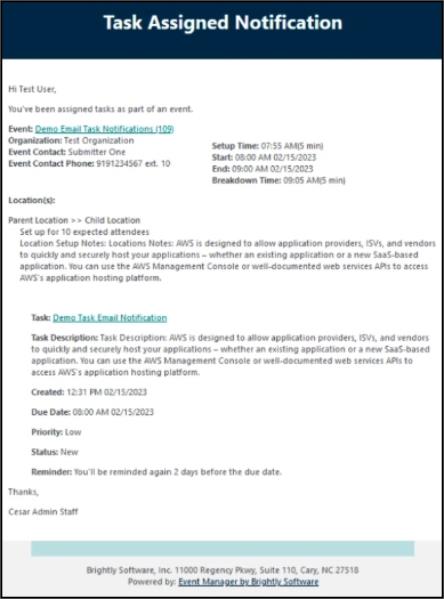
Task Notifications
The assignee receives a task notification email when a task is assigned, updated, completed, or denied. The following example shows a Task Assigned Notification email when you add a task and assign it to a service provider:
Bulk Actions
How to bulk update task status
- Click Tasks from the navigation menu to open the task list.
- Use the Filter Tasks panel on the left side of the screen to find the tasks you would like to change the status of.
- Check the box next to each task for this bulk action.
- Click on Bulk Actions in the top right hand corner of the screen.
- Click Bulk Update Status.
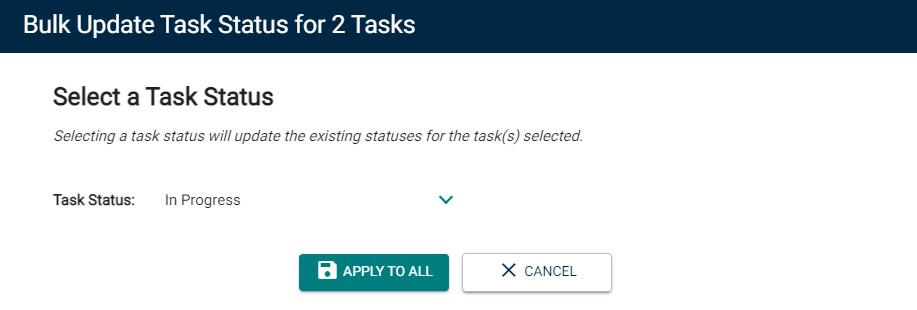
- In the window that appears, click on the Task Status drop-down menu and select the appropriate status.
- Click Apply To All.
Creating a task RSS feed
You can create an RSS feed that will display tasks and updates made to the tasks in real time. This is useful for anyone who needs to receive updates on tasks or anyone who is not a user in Event Manager. The RSS feed will display tasks that match any filters applied to the task list before the feed is created.
- Click Tasks from the navigation menu to open the task list.
- Use the Filter Tasks panel on the left side of the screen to narrow the criteria for the RSS Feed to pull Tasks from.
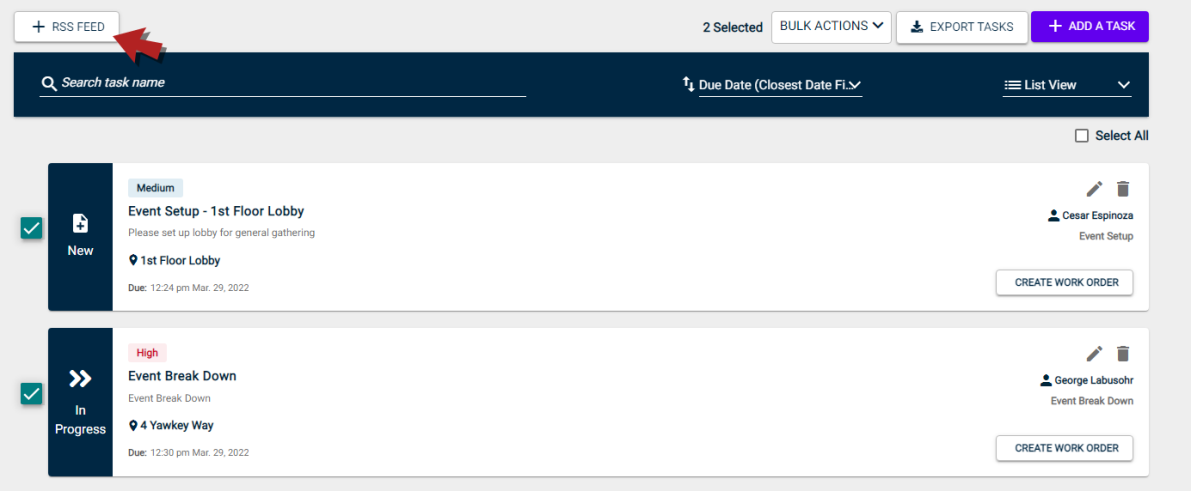
- Once you have filtered the Task list as desired, click the + RSS Feed button. This will open the RSS feed in a new tab.
- Click Subscribe to add the RSS feed in your current browser, or copy the Link to an RSS reader if you have one.
Editing a Task
You are still able to make changes to a Task after it has been added. To edit a task:
- Click Tasks from the navigation menu to open the task list.
- Click on the pencil icon (
 ) on the task you want to make changes to.
 - Make all appropriate changes to the task information. You can edit all available fields at any time. *Note: If this task was created by adding a location setup to an event, the associated image for that setup will display on the task. This will only occur if the location setup has an image.
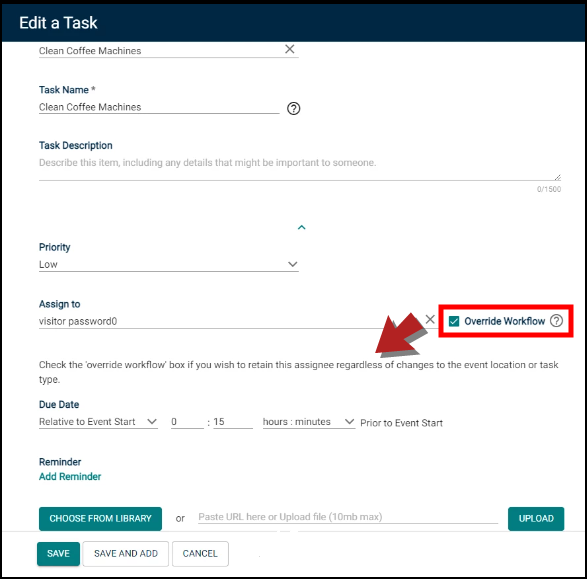
- Authorized users with the Service Provider or the Event Admin permission can change task assignments on the event submission form. Check the Override Workflow option to edit the assignee if:
you cannot edit the field and you want to
you do not want the Assign To field to change regardless of changes to the event's location. *Note: If no workflow applies to the task and you do not check this box, the assignee will be overwritten if the event changes, resulting in a workflow assignee being assigned.
- There are two Save options available:
- Click Save to finalize your changes.
- Click Save & Add to finalize your changes and begin creating a new task.
Deleting a Task
You can delete a task if you decide the task does not need to be performed, or if the task was entered by mistake.
- Click Tasks from the navigation menu to open the task list.
- Click on the trash can icon (
 ) on the Task you want to remove.
 - In the pop up window, click Delete to finalize the removal of the task. *Note: This will remove the Task from the task list and from the event (if it is tied to one).

Exporting Tasks
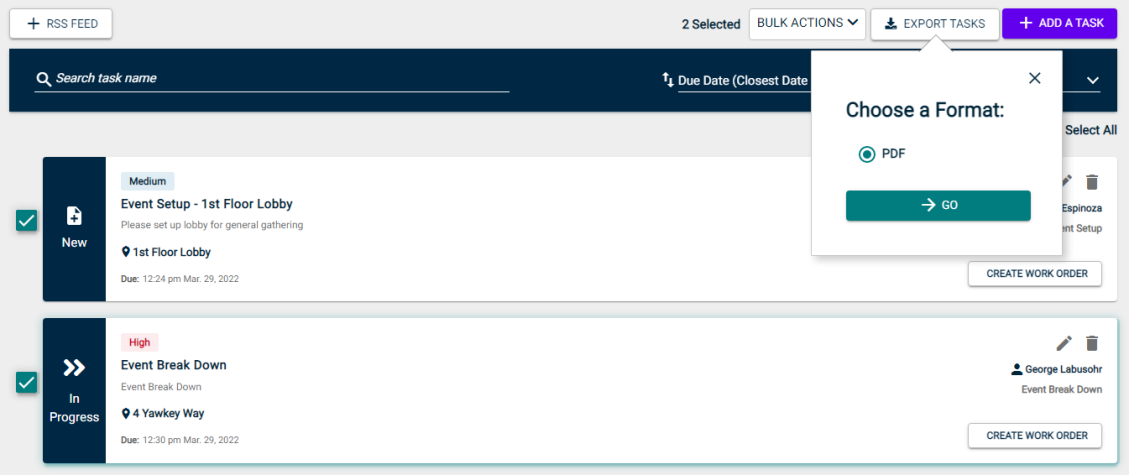
You can export a list of tasks from Event Manager as a PDF.
- Click Tasks from the navigation menu to open the task list.
- Search and Filter to narrow the list of tasks as desired.
- Click Export Tasks.
- Click Go.