Back to Event Manager Main Menu
Managing the Invoice List
Once invoices have been added in Event Manager, there are many options available to manage them. You can search and filter your invoice list to show a specific invoice, edit, share, pay, and archive invoices, and export invoices based on the search or filters you have applied. *Note: If you do not currently have access to this feature, please contact your Sales Representative or Client Services for more information.
To navigate to the invoice list:
- Click Invoices from the side navigation menu and select Invoice List.
Searching and Filtering Invoices
Use the Search and Filter options to find or show specific invoices.
Search bar
From the Search bar you can search, sort, and change the view of your invoices.

Search
The Search field allows you to quickly find invoices based on information found on them, such as the invoice number, title, event ID, or recipient name.
Sort
The Sort field allows you to reorganize the invoice list by whichever field you select from the drop down menu.
Filter Invoices Panel
This side panel gives you greater flexibility when displaying or searching for certain invoices. You are able to filter by a number of options, including invoice Status, Recipient, and Age of the invoice.
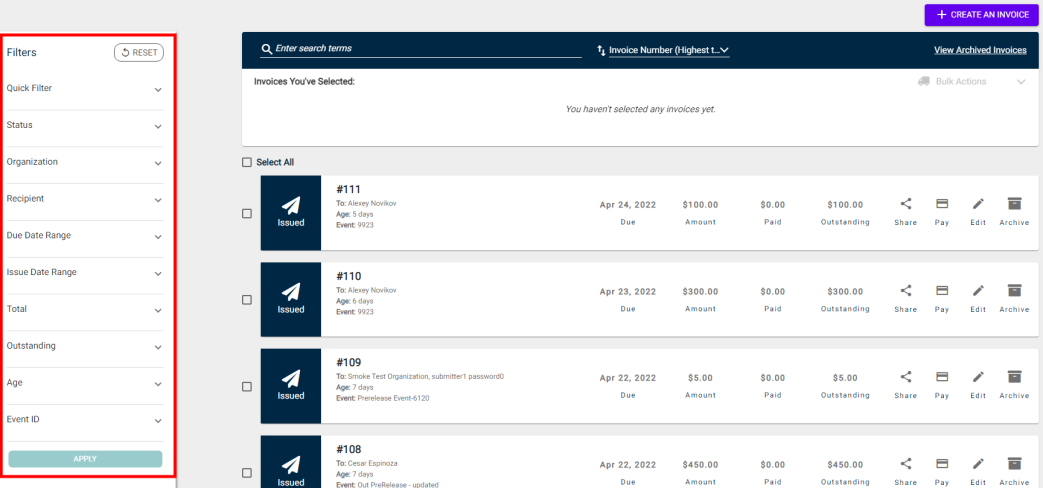
Custom Default Filters
You can define a custom default filter to display when you first navigate to the Invoices list. *Note: These filters are only created for your individual user account and are not shared with other users in Event Manager.
You can add up to 20 custom filters using this method, but only one can be defined as the default filter that will display upon opening the Invoices list. Additionally, be advised that Event Manager will prioritize the default filter, then stock filters, then any custom user defined filters.
-
From the Invoices list, define the filter criteria you would like to save as part of the default filter.
-
Click Quick Filter and then select Add Filter.
-
Enter a Name for this custom filter.
-
Check the Set as Default box if this should be the default filter that displays when first navigating to this page.
-
Click Save.

Deleting a Custom Filter
-
Click the pencil icon next to the custom filter you'd like to delete.
-
Click Delete.
Editing a Custom Filter
-
Adjust the filters from the Filters side panel.
-
Click Apply.
-
Click the pencil icon next to the custom filter you'd like to edit.
-
Click Save.
Sharing an Invoice
You can share an invoice with whoever needs to be able to see it, even after it has been issued.
- Search or filter for the invoice you wish to share and click the Share button.
- In the pop up window, you can either:
- Click Copy Link to get a direct link to the invoice form. *Note: This will display a view only version of the invoice form.
- Alternatively, click Email Invoice to distribute a PDF of the invoice via email to all of it's recipients.

Paying an Invoice
- Find the invoice you wish to process a payment for and click Pay. This will open a window where you can process a payment for this invoice.

Editing an Invoice
You are still able to make changes to an invoice after it has been added.
- Click Edit next to the invoice you want to make changes to.
- Make all appropriate changes to the invoice information. *Note: Check the Do not notify recipient(s) of changes checkbox if you do not want recipients to receive email notification of the changes.
Invoice actions
Click the Actions button in the top right corner of the form. Clicking this will reveal several options for managing the invoice:
- View Invoice History: This will show a timeline view of all changes that have been made to the invoice with time and date stamps next to the changes. You can also make comments on the timeline which will be tagged with a time and date stamp.
- Add a Payment: This will open the payment window so that a payment can be made directly from the invoice.
- Add a Refund: This option is only available if a payment has been made previously, and will open the refund window so that a refund can be processed directly from the invoice.
- Close Invoice: This will open a confirmation window where you can provide a reason for closing the invoice before clicking Save. This will lock the invoice down and prevent further changes.
- Void Invoice: This will open a confirmation window allowing you to either click Void Invoice or Cancel.
- Print Invoice: This will open a PDF of the invoice form, which can then be downloaded or printed out if necessary.
- Copy Invoice: This will create a copy of this invoice which can then be edited before saving it as a new invoice.
- Click Save to finalize your changes.
Archiving an Invoice
You can archive invoices, which will remove them from the invoice list while keeping the records intact. These invoices can be accessed at any time by clicking the View Archived Invoices link in the search bar. *Note: Archiving an invoice will also archive all payments associated with the invoice.
There are times when the best course of action is removing an invoice from the list by Archiving it, which keeps the records intact while getting it out of your way.
Other times, you may want to consider Voiding the invoice, which will effectively cancel it and prevent it from being edited or paid.
- Click Archive next to the invoice you want to remove.

- Click Archive in the pop up window to finalize your changes.
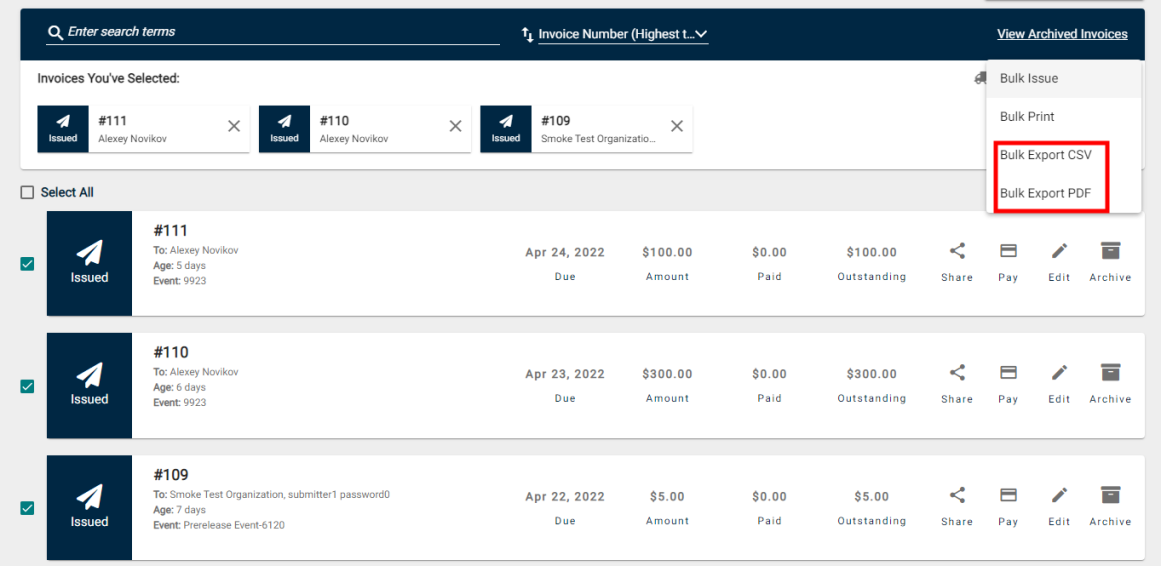
Exporting Invoices
You can export invoices as either a PDF or CSV file.
- Filter or Search the invoice list to narrow the results to those invoices you wish to export.
- Check the box next to each invoice you would like to export.
- Click on Bulk Actions at the top of the page.
- Select either Bulk Export CSV or Bulk Export PDF.