COVID-19 tips - Optimize program resources
We want you to feel empowered even in today's uncertainty, which is why we're sharing Asset Essentials best practices with you. Please reach out to your Client Success Manager for any questions or concerns you may have about utilizing Asset Essentials for your COVID-19 needs.
We have also created a list of resources to help you stay on top of your operations during COVID-19. Check out the blogs, videos, and podcasts we have compiled on our Brightly website and remember that the Dude is beside you!
Automate the routing and approval of work orders
You can maximize social distancing by automating work order routes and work order approvals to reduce the amount of touch points needed to complete work.
Creating a new approval rule
General
- Click on the Admin menu icon, then select Configurations.
- In the Misc section, click Approval Rules.
- Click the New button.
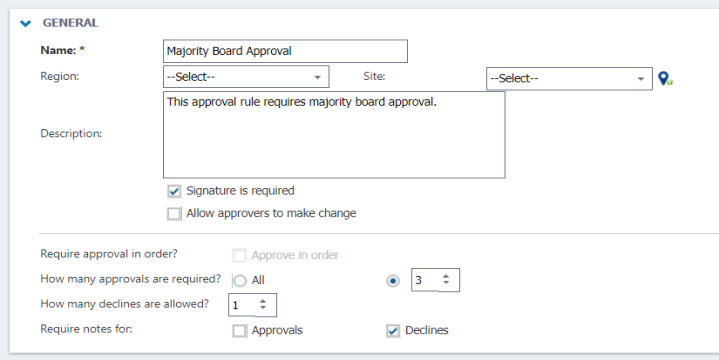
- In the General section, enter a Name for the rule.
- If you would like the Rule to apply to a specific Region or Site, select the appropriate Region or Site from the drop downs.
- Enter a Description.
- Check the Signature is required box, if you would like the approver to be prompted with a signature window when approving.
- If you would like to give the approver the ability to make changes to the work order before approving it, check the Allow approvers to make change box. *Note: If an approver modifies information on the work order that causes a conflict with your account's work order routing, the work order will be removed from automatic routing and will function like a work order requiring manual assignment.
- Select whether you would like to require All approvers or a specific number of approvers. *Note: You must add approvers to the rule in order to select a number of approvers in this step.
Bright Idea:No one can override a work order waiting for approval if they are not in the approval rule. This includes Global and Account Administrators. We recommend selecting a specific number of approvers to prevent organizational bottlenecks. For example, if a designated approver is out on vacation and All is selected, no one can override that approval until he or she returns.
- If you selected All approvals are required and the work order must be approved in a specific sequence, check the Approve in order box.
- Enter the number of declines allowed in the How many declines are allowed field. A request will be declined if the amount of declines given by the approvers exceeds what is entered in this field.
- To Require notes for either Approvals or Declines, check the appropriate boxes.
Approvers
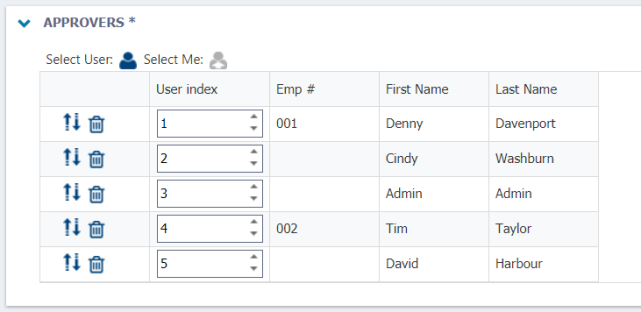
- Click the Select User icon (
 ) to add approvers to this rule. If you would like to add yourself as an approver, click the Select Me icon (
 ).
). - In the Select User window, check the box next to any users you would like to make an approver, then click the Select button.
- If you checked the Approve in order box in the General section, click the rearrange icon (
 ) and drag the approver's names in the proper approval order.
Creating a new route
- Click on the Admin menu icon, then click on Configurations.
- Choose the Work Order Routing option under the Work Order section.
- This page will show any routes that have already been created. Click on the New button to create a new route. If you need to edit an existing route, right-click on it and select Edit. *Note: There can only be one route per site, however each route can contain multiple routing rules allowing for a variety of work flows per site.
General
- Enter a Name for your Route.
- Select the Region or Site.
- Enter a Description if applicable.
- Click Save.

Work order routing rules
- Click the New button to open the Work Order Routing Rules window.
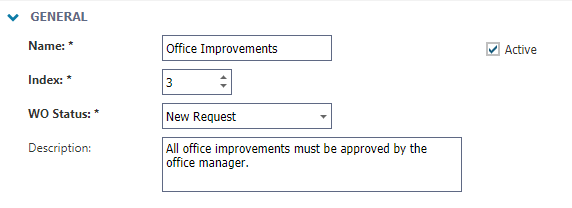
- In the General section, enter a Name for the routing rule.
- Select an Index number to represent where the rule falls in the list.
- Select the WO Status this rule should apply to from the drop-down menu.
- Enter a more detailed Description, if needed.
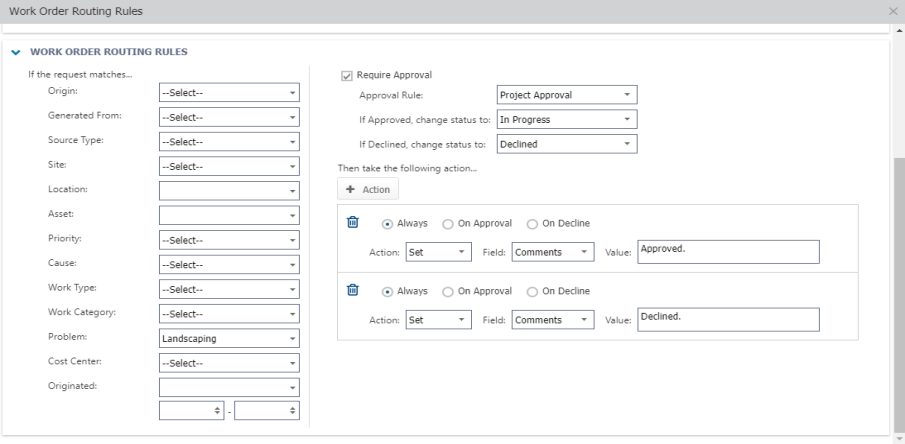
- In the Work Order Routing Rules section, use the drop-down menus to select the filters that will determine which requests this rule should apply to.
Bright Idea:When creating a Location based route, be sure to consider the following:
- If you choose a sub-location to route by from the Location filter, you must also create an individual route for every other sub-location under the associated parent location. Work orders tied to a sub-location will only route successfully if there is a route set up for all sub-locations under the parent location.
- If you choose a parent location to route by from the Location filter, only work orders tied to that specific parent location will follow that route successfully. Work orders tied to a sub-location under the associated parent location will not follow that route successfully.
- Check the Require Approval box if the request needs to go through an approval process. *Note: Approval routing is not yet supported in the Asset Essentials Mobile App. If you rely heavily on the app at your organization, please take this into consideration.
- Select the Approval Rules from the drop down. Click the link to learn more about creating Approval Rules.
- Select the status the work order will be in if approved.
- Select the status the work order will be in if declined.
- Once you have selected the filters and set any approvals, click the Add Action button:
- Choose whether the action will Always happen when a work order follows this rule, will only happen On Approval, or will only happen On Decline.
- Add User - Add User allows you to choose who the work order should be assigned to.
- Responsible Users - Routes the work order to users listed as a responsible user for the Source Type (Asset, Location, Site, or Meter Title) selected on that work order.
- Specified Users - Routes the work order to the users you select in the field to the right.
- Users by Tag - Routes the work order to users that grouped together with a common tag.
- Set - The Set option allows you to choose an automated action for the request.
- Select a Field from the drop down menu, then enter the Value that field should be set to when the work order is routed. For example, you could choose a routing rule that automatically updates the Priority field to Critical.
- Click Save at the top of the Work Order Routing Rules window to add this routing rule to the system.
- If you need to add additional rules to the route, click on the New button under Work Order Routing Rules to add the next rule.
- Click Save at the top of the page to finalize changes to this route.
Update the reorder points of critical parts and supplies
Now is an important time to monitor your on-hand inventory. We suggest reviewing and updating your reorder points for all your critical and essential Parts and Supplies. The reorder point represents the set minimum value that will trigger a notification to reorder the item. Depending on the Part reorder point calculation chosen under system settings, this notification may be triggered when the on-hand quantity is equal to or below the reorder point value.
Updating reorder points
- Click on the Parts & Purchase Orders menu icon, then select Parts.
- A list of all the parts and supplies you are managing in Asset Essentials will appear.
- Click the Columns button.
- Click and drag the Qty Available, Qty Reserved, and Reorder Point boxes onto your parts list in the correct position.
- Check the boxes beside the parts you need to update the reorder point for.
- Click the More button at the top of the page, then select Update.
- In the window that appears, check the box next to Reorder Method and select Reorder Point in the drop-down menu.
- Enter the new Reorder Point, per location.
- Click Save at the top of the window to apply that reorder point to the selected parts.
Monitoring reorder points
- Click on the Dashboard menu icon.
- In the Work Center panel, click the number that corresponds with Parts require reorder.
- This will take you to a list of parts that need to be reordered.
Leverage personal devices
The Asset Essentials mobile app can be downloaded to any device that that has access to the Google Play Store or Apple App Store. By leveraging the mobile app, your staff can practice social distancing by accessing and documenting their assigned work in the field without having to come into the office. If your staff shares a device to access the Asset Essentials mobile app, encourage them to use their own personal devices to help prevent the spread of COVID-19.
Mobile requirements
Below are the minimum supported operating systems and versions for the Asset Essentials mobile app. If you have an older operating system, we recommend upgrading to the latest version for optimal system performance. *Note: The Asset Essentials mobile app is only accessible on devices that include the Google Play Store or the Apple App Store.
- iOS - Version 12.0 or later
- Android - Version 7.0 or later *Note: Android Go edition is not supported.
Downloading the Asset Essentials mobile app
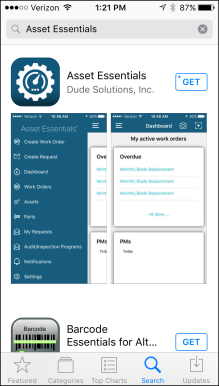
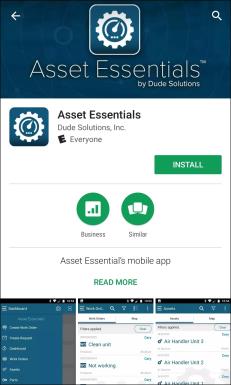
- Access the app store on your smartphone or tablet.
- Search for Asset Essentials.
- Install the app on your device.
| Apple App Store: | Google Play Store: |
|
|
Logging into the Asset Essentials mobile app
*Note: If your organization is using SSO (single sign on) for user authentication, your login experience may be different. If you are having difficulty logging in using SSO or you are unsure whether your organization utilizes SSO for their Dude Solutions products, please contact your technology help desk for assistance.
-
Tap the Asset Essentials app icon on your smartphone or tablet.
![]()
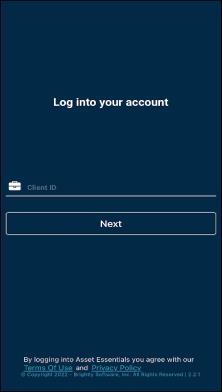
- Enter your Client ID and tap Next. *Note: Your client ID can be found in the web address you use to log into Asset Essentials. Example: https://assetessentials.dudesolutions.com/clientID. If necessary you can also type in the full web address.
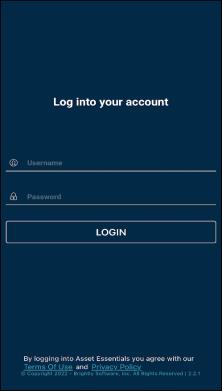
- On the next screen, enter your Username and Password.
-
Tap Login.
|
|
- Once you are logged in to the mobile app, you can create and manage your work orders quickly and efficiently.
