Back to Event Manager Main Menu
Creating an invoice
Invoicing is the easiest and most versatile way to recover costs with Event Manager. You can invoice both approved and pending events. There is no setup required before creating an invoice. However, there are several setup options that will reduce the work required to create an invoice under the Invoice Settings tile. *Note: If you do not currently have access to this feature, please contact your Sales Representative or Client Services for more information.
Watch the video tutorial:

To create an invoice:
- Click Invoices from the side navigation menu and select Invoice List.
- Click Create an Invoice. This will open the Invoice Form.
If you are creating an invoice that should be tied to an event or event series, we recommend starting the invoice creation process from either the Event Dashboard or from the Event Form. This will automatically add the event information to the invoice.
Completing the invoice header
The invoice header houses many important pieces of information about the invoice, such as when the invoice should be issued, who the invoice is from, who is receiving the invoice, and when the invoice is due.
-
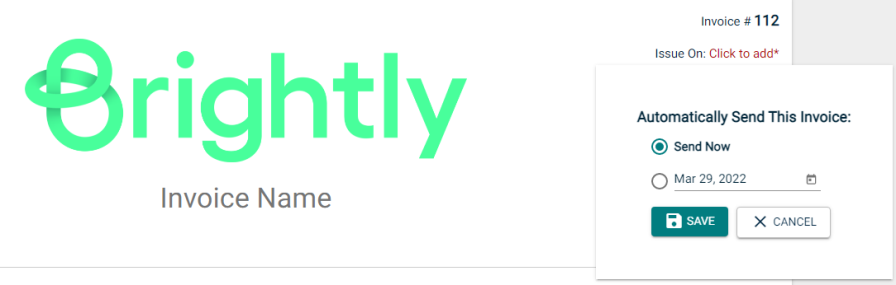
Select Click to Add in the top right corner to determine when the invoice should automatically be sent to the recipient.
- Choose Send Now to email the invoice to the recipient as soon as the invoice is saved.
or
- Choose a specific date to email the invoice to the recipient on the date selected. *Note: You can choose a date in the past to email the invoice on, but it will be sent immediately when the invoice is saved.
- Click Edit to select a logo for the invoice, if applicable. The logo used for invoices should have an aspect ratio of 1.7:1 (approximately 340x200 pixels). *Note: The logo can only be selected from the available images uploaded to the media library within Event Manager.
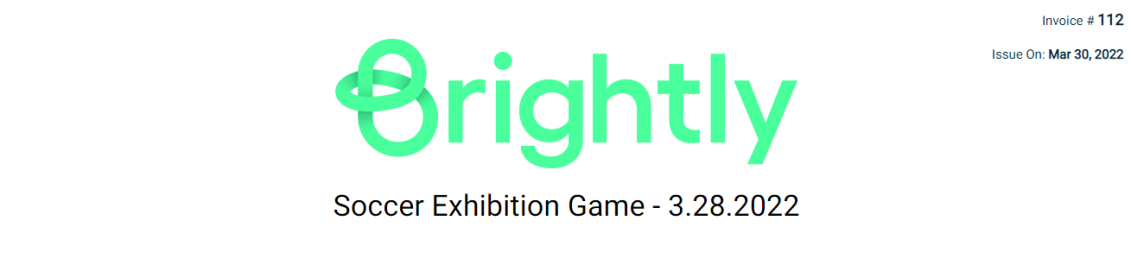
- Enter an Invoice Name. Though this field is not required, it can be used to help distinguish the invoice from others on the invoice list.
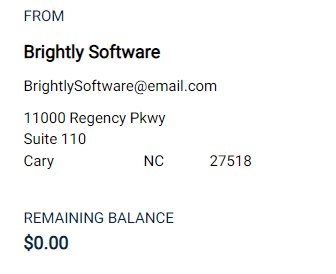
- If the From information has not been auto-populated based on your Invoice Settings, enter your organization's billing address manually.
- Select whether this invoice will be to sent to an Organization or specific User within Event Manager from the drop down menu.
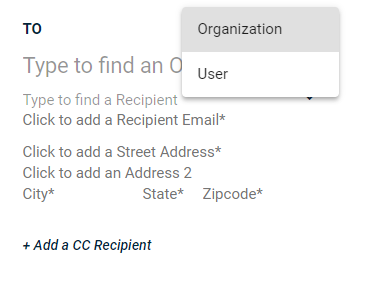
- Fill in the required To information, indicated by an asterisk.
- Click Add a CC Recipient to provide an additional organization member or user who needs to receive an emailed copy of the invoice.
- The Amount Due will be auto-populated with the net balance of the invoice, which takes the invoice total and any payments made into account.
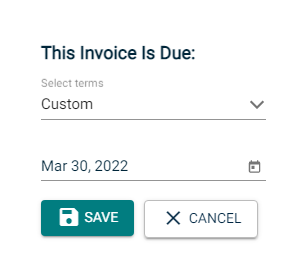
- Select Click to add* under Due On to define when this invoice will be due. *Note: Predefined terms such as 30 days can be set up under the Financial Settings panel of the Invoice Settings page.
Adding events
Once you have selected either an Organization or User on the invoice form, you can associate events to the invoice.
- If you selected Organization, the events available to associate to the invoice will onlybe those that are tied to that Organization.
- If you selected User, the events available to associate to the invoice will only be those that were submitted by that user.
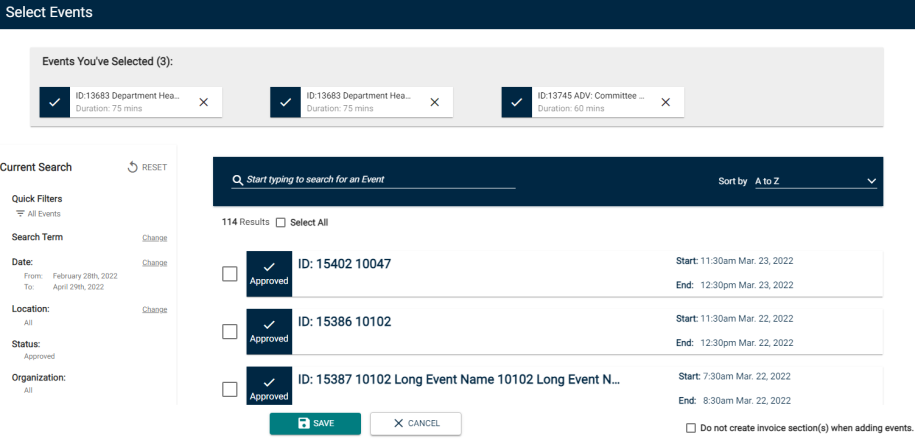
To add events to the invoice:
- Click Add an Event.
- Search or Filter as needed using the search bar at the top and the filter panel on the left side of the window to find the correct events.
- Check the box next to each Event you wish to associate to the invoice, or check the Select All box to invoice all events for this organization. *Note: Associating an event with the invoice will automatically add any packages that match the event details to the invoice.
- Do not create invoice section(s) when adding events: Check this box if you would like for line items for all events to be contained within the same section.
- Click Save.
Adding pending events
Administrators can invoice requesters for payment before approving the event and publishing it to the school's public calendar. This applies to a single event and an event series.
To add pending events to the invoice:
-
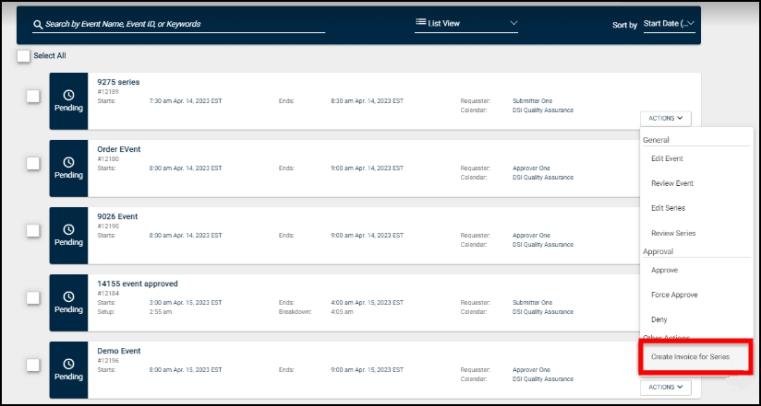
Navigate to the Pending Events list.
-
View the details of an event.
-
Click the Actions dropdown and select the Create Invoice for Event option (or the Create Invoice for Series option for an event series).
-
You will now have the option to receive payment before events are approved through your current system.
Adding sections and line items
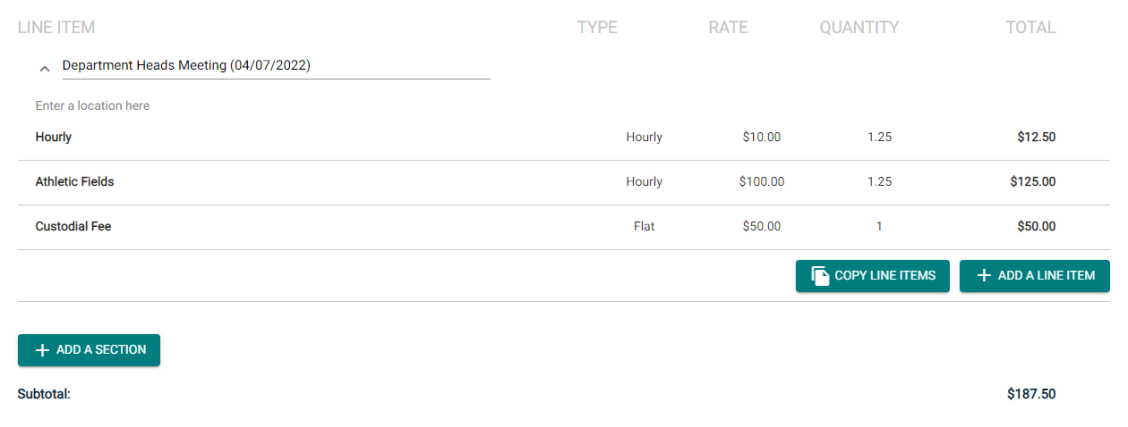
Sections are used to separate or group line items together. Line items represent the actual charges on the invoice that the recipient is being billed for.
How to add a section
- Click Add a Section.You can have as many sections as necessary on an invoice. *Note: You must add at least one section to begin adding line items.
- Enter a Section Title. This will display on the invoice.
Section titles can help to break up the list of line items. For example, if there are multiple events being invoiced, you could add a section of line items for each event.
If, however, you do not need to group line items by section, just add one section to the invoice and do not give it a Section Title. The line items will still display on the invoice.
How to add a line item
- Click Add a Line Item. You can add as many line items as necessary.
- Start typing to search for a line item or package (
 ) and then select the appropriate one from the list. This will automatically populate the line item Type, Rate, and Quantity for the line item (or line items if a package was selected).
 - If there is not a line item template that matches your search, enter the Line Item Description as you need it to appear on the invoice. Line items that are used frequently can be added as Templates under Invoice Settings to make adding them to an invoice easier in the future.
- Select a line item Type.
- Enter a Rate for the line item. This will be multiplied by the Quantity to determine the total amount charged for this line item.
- Enter a Quantity of 1 or more so that the line item Total is calculated properly. *Note: If an Event has been added to this invoice, the duration of the event will auto-populate as the quantity for each Hourly line item. If you are using a line item template that has a Minimum Quantity, that value will populate if the hours of the event are less than the Minimum Quantity.
- Start typing to search for a line item or package (
Adding fees, discounts, and taxes
Fees and Discounts represent additional positive or negative charges that are reflected on the invoice as either a percentage or as a flat fee. Taxes are treated exactly the same as fees and discounts, but are calculated after all line items, fees and discounts have been applied.
When adding Fees and Discounts, be mindful that the order in which you add them matters. Each time a Fee or Discount is added, a new Invoice Total is calculated. For example, if the line items on the invoice add up to $100, and a Fee of $10 is added, the new Invoice Total equals $110. Now, if a Discount of $10 is added, the new Invoice Total equals $100.
How to add a fee or discount
- Click Add a Fee or Add a Discount.
- Enter a description for the Fee or Discount being added, such as Late Registration Fee or Employee Discount.
- Enter the Amount.
- Once Fees or Discounts have been added, you can click and drag the arrow icon (
 ) next to a description to change it's order on the invoice. To delete a fee or discount, click the trash can icon (
 ).
).

How to add a tax
- Click Add a Tax.
- Enter a description for the Tax being added, such as State Tax.
- Select whether this is a Percent or a Flat rate.
- Enter the percentage or dollar amount.
- Once Taxes have been added, you can click and drag the arrow icon (
 ) next to a description to change it's order on the invoice. To delete a tax, click the trash can icon ().

Finishing the invoice
The Total is listed at the bottom of the invoice, and will update according to the line items and other charges added. Below the Total are the Payment, Late Fee, and Notes fields, which allow you to define any necessary information on the emailed invoice.
- Payment: This field allows you to provide a link or email where the recipient can pay the invoice, as well as any other additional information about payment.
- Late Fee: This field allows you to provide any terms regarding late payment of the invoice. *Note: The information provided under Late Fee can be auto-populated by information provided under Invoice Settings.
- Notes: This field allows you to provide any additional information on the invoice that might be necessary.
- Click Save when you have finalized all invoice details. *Note: If you selected Send Now under Issue On, the invoice will be emailed to any recipients immediately. Otherwise, the invoice will be emailed automatically on the date that was selected.

