Processing inspections in the SmartGov mobile app
The SmartGov mobile app gives you the ability to quickly process inspections associated with code enforcement cases, licenses, permits, or recurring inspections on your mobile device.
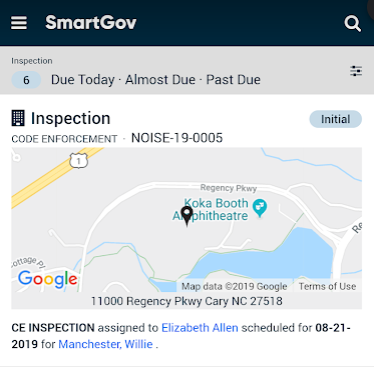
Viewing an inspection
When viewing an inspection from your home screen, you will see information including the associated record, inspection type, location, assignee, scheduled date, and primary contact. *Note: Ensure that your Assignment Filters are set to show inspections in order to view these records on your home screen.
- Tap on the map image to view the location of and directions to the inspection in your device's mapping app. *Note: If the device has multiple mapping apps available, you will be prompted to select the app you would like to use.
- Tap the Inspection title on your home screen to edit the record, add notes, and view previous inspections.
How to process an inspection
Inspection information
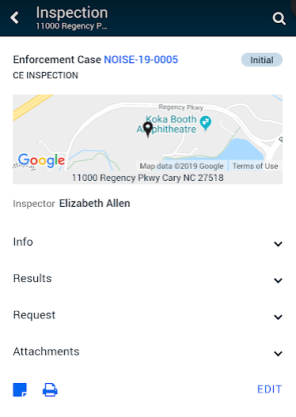
The top section of the inspection lists the record number and current status of the inspection.
- Tap the record number in the top left corner to view the permit, code enforcement case, license, or recurring inspection information including submittals and notes.
- Location: The map view will display a pin (
 ) at the inspection's location as well as the address of the inspection. Tap the map to view the location on your mobile device's mapping app. *Note: If there are multiple mapping apps on your device, a window will display prompting you to select which app to use.
 - Info: This drop-down allows you to view information related to the inspection including the Primary Contact, Inspection Date, and Status Description.
- Tap the Primary Contact to view the record in the SmartGov mobile app.
- Tap the bubble icon (
 ) beside the primary contact and select to Call, Message, or Email. *Note: If any method of contact is not listed for the contact, the option will be grayed out.
- Results: This drop-down displays the results of the inspection as well as the Start Time, Travel Time, and Duration.
- Request: This drop-down displays any scheduling comments, the reason for the inspection, and pertinent dates and times associated with the inspection.
- If you need to request a reinspection for the inspection you are viewing, tap Request Reinspection in the expanded view of the request section.
- Attachments: This drop-down displays any document attached to the inspection. *Note: Any images uploaded via the mobile application will populate under the paper clip icon (
 ) on the inspection. These will not populate on the Citizen Portal.
- Tap the File Name of the document to view the attachment on your mobile device.
- Tap the upload icon (
 ) to Attach an image from your mobile device. You may take a new image or upload an existing one. *Note: If you select an image from your photo library and your device has location enabled, the meta data from the image will populate in SmartGov. This data includes location, date and time.
 - Tap the trash can icon (
 ) to remove the attachment from the inspection.
-
Notes: Tap the note icon (
 ) to view, add, edit, or delete any notes associated with the inspection.
 - Print: Tap the print icon (
 ) to display mobile printing options which allow you to print, publish, and email the inspection report for this inspection.
 - Tap Edit to update information related to the inspection such as the Status, Inspection Results, and Scheduling Comments. Tap Save if any changes are made.
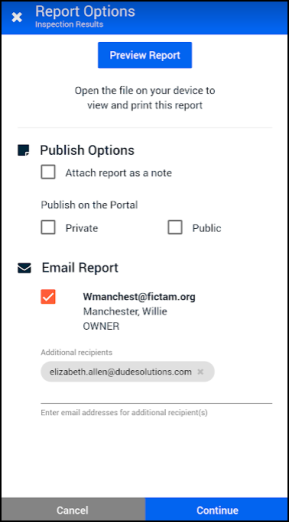
Mobile printing options
You can preview, publish, and email an inspection report from the SmartGov mobile app.
- Tap the Print icon ().
- To view the report on your mobile device, tap Preview Report. You can save the report to your mobile device or print the report if your device is connected to a printer.
- To publish the report on SmartGov and/or the Citizen Portal, select the appropriate Publish Options.
- Check Attach Report as a Note to include this report on the Notes tab of the inspection.
- Check Private if this report should be made available to users with access to the Citizen Portal that are listed as contacts on the inspection.
- Check Public if this report should be made available to any user on the Citizen Portal.
- To email the report, you can check the box beside the Primary contact as well as list any Additional Recipients this report should be sent to.
- Tap Continue to publish and email the report according to your selections.
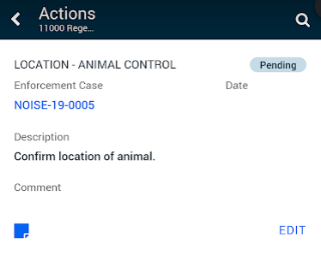
Actions
Any action associated with the inspection will be listed in this section along with the Name, Description, and Status of the action.
- Tap the Actions section to view an expanded list of any action associated with the inspection.
- Tap Edit to update the Status, Status Date, and add any Comments to the action. Tap Save if any changes are made.
- Tap the note icon () to view, add, or edit any notes associated with the action.
- From the Actions section of the inspection, tap Mass Status Change to batch change the status of all actions on the inspection.
Select the From Status in the drop-down box. The status change will apply to any action currently in this status.
- Select the To Status in the drop-down box. This will be the updated status for the actions.
- Tap Save to mass change the statuses.
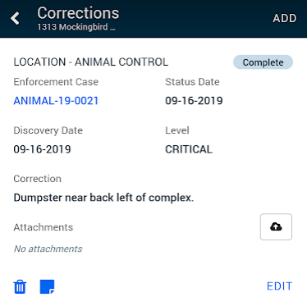
Corrections
Any correction associated with an action will be listed in this section along with the Description, Inspection Action, and Correction Status.
- Tap the Corrections section to view an expanded list of any correction associated with inspection actions.
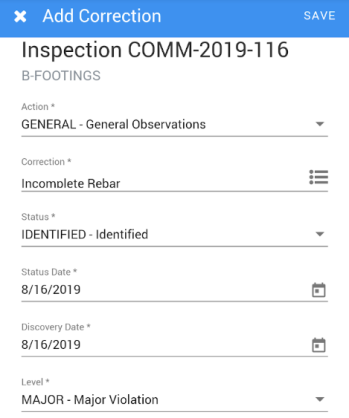
Adding a Correction
- Tap Add.
Use the drop-down menu to select the Inspection Action this correction is associated with. *Note: This list will only display actions associated with this Inspection Type.
Use the Correction field to describe the correction for the selected action.
- Tap the menu icon (
) to view and select a Standard Correction.
Select the appropriate Status for this correction in the drop-down menu.
The Status Date will default to the current date. Begin typing or tap the calendar icon (
) to edit as needed to reflect the date the status of the correction was changed.
The Found On Date will default to the current date. Begin typing or tap the calendar icon (
) to edit as needed to reflect the date the correction was found.
Use the Level drop-down menu to select the appropriate correction level.
- Tap Save.
Managing corrections
- Tap Edit to update fields including the Status, Status Date, and Correction Level. Tap Save if any changes are made.
You can view, add, and remove attachments from the correction.
- Tap the File Name of the document to view the attachment on your mobile device.
- Tap the upload icon (
- Tap the trash can icon (
- Tap the note icon (
- From the corrections section of the inspection, tap Mass Status Change to batch change the status of all corrections on the inspection.
Select the From Status in the drop-down box. The status change will apply to any correction currently in this status.
- Select the To Status in the drop-down box. This will be the updated status for the corrections.
- Tap Save to mass change the statuses.
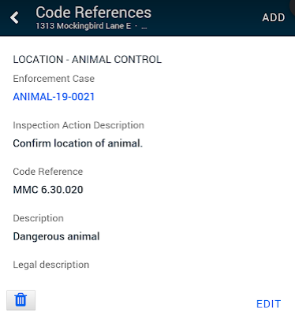
Code references
Any code reference associated with an inspection action will be listed in this section.
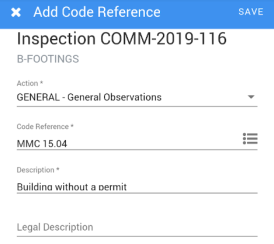
Adding a code reference
- Tap Add in the top right corner of the screen.
Select the Inspection Action this code reference is associated with in the drop-down menu.
Describe the Code Reference.
Tap the menu icon (
) to view a list of all Standard references associated with the inspection type. Tap the toggle in the top left corner of the list to display All code references available in SmartGov. *Note: The Standard reference list will be blank if there are no references associated with the inspection type.
- You may also enter a Custom code reference by typing into the field if the appropriate reference is not available in either list.
If you have selected an existing code reference, the Description field will auto-populate. Tap into this field and edit if needed.
Use the Legal Text field to enter any necessary text.
Tap Save in the top right corner of the screen.
Managing code references
- Tap Edit to update information related to the code reference including the Code Reference, Description, and Legal Text. Tap Save if any changes are made.
- Tap the trash can icon (
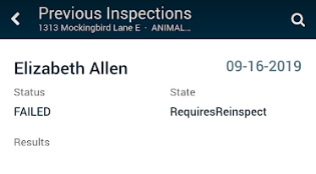
Previous inspections
This section will list the Inspection Date, Inspector, and Inspection Status of all previous inspections of this inspection type.
- Tap into the Previous Inspection section to view the State and Results of the previous inspections.