Code enforcement: Inspections tab
The Inspections tab allows you to keep track of any inspections associated with the code enforcement case. Depending on your jurisdiction's configuration, the Inspections tab may already be populated with inspections associated with this case type, however additional inspections can be added if necessary.
Adding an inspection
- Begin typing or click the magnifying glass icon (
 ) and select an Inspection Type to add to the code enforcement case.
 - Click Add. Repeat this process to add any additional inspections.
- Click Save.
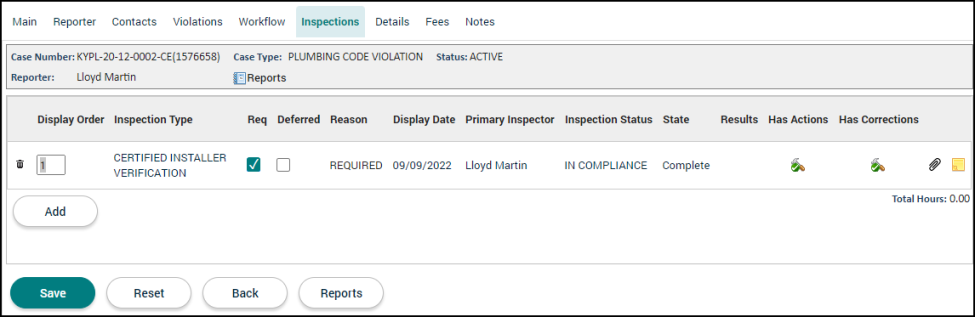
Managing inspections
The inspections list gives you an overview of all inspections associated with the code enforcement case.
- Delete: Click the trash can icon (
 ) to remove the inspection from the code enforcement case.
 - Display Order: Adjust the order of the inspections listed on the tab using the text field.
- Inspection Type: This displays the name of the inspection.
- Req: Check this box to make this inspection required to close the code enforcement case.
- Deferred: Check this box to defer this inspection until the code enforcement case is ready to be closed.
- Reason: This field lists the inspection reason for the current inspection.
- Display Date: If the inspection has not been completed, this date will default to the Scheduled Date. If the inspection has been completed, this will show the Inspection Date.
- Inspector: This is the inspector assigned to the inspection. If auto assign is enabled for this inspection type, the inspector with the least amount of hours in their queue will be assigned this inspection.
- Inspection Status: This field displays the current status of the inspection.
- State: This is the current inspection state. *Note: The state is determined by the status of the inspection.
- Results: A hammer icon (
 ) will display if results have been entered for this inspection. Click the icon to view this section within the inspection.
 - Has Actions: A hammer icon () will display if Actions have been entered for this inspection. Click the icon to view this section within the inspection.
- Has Corrections: A hammer icon () will display if Corrections have been entered for this inspection. Click the icon to view this section within the inspection.
- Attachments A paperclip icon (
 ) will display once an inspection has been requested if any files have been attached to this inspection, typically through the SmartGov mobile app. Click this icon to add and view attachments.
 - Notes: Click the sticky note icon (
 ) to add notes to the inspection. These notes can include attachments such as documents, pictures, or spreadsheets.
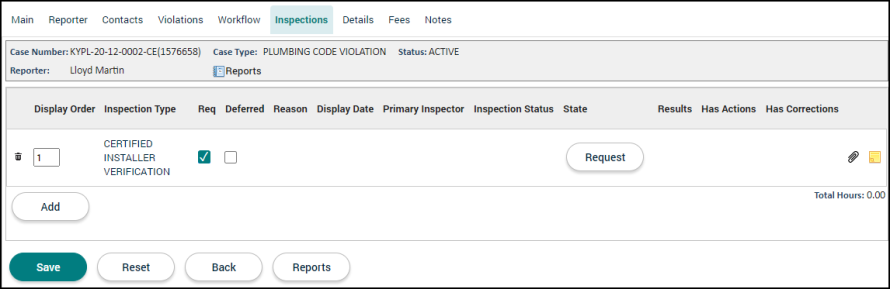
Requesting an inspection
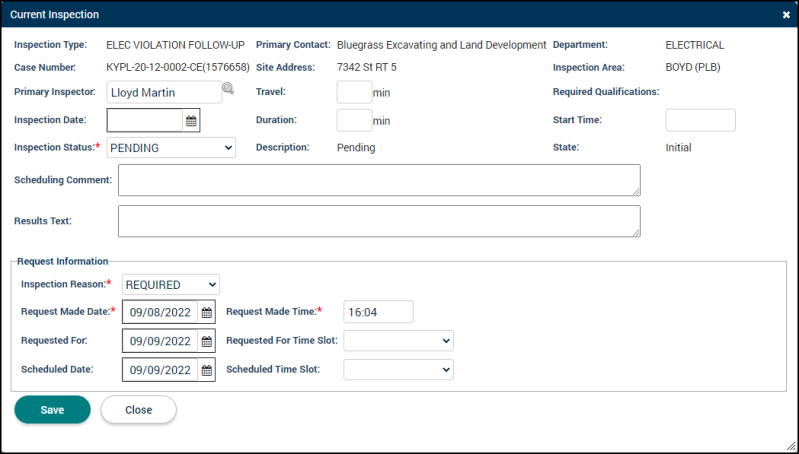
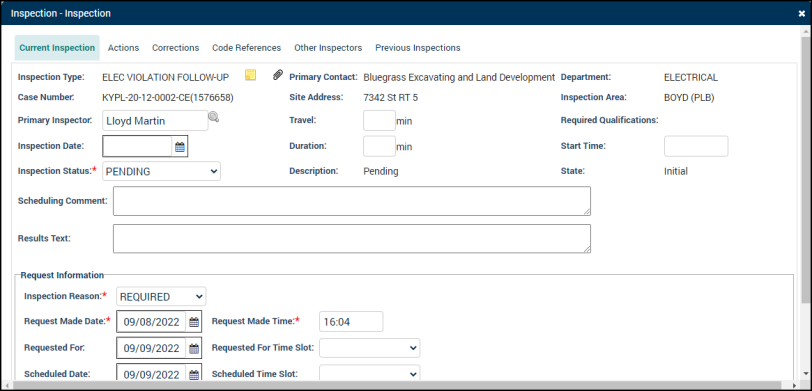
- When it is time to perform the inspection, click the Request button to display the Current Inspection window. Fill out any relevant information.*Note: Every field does not need to be filled out when you initially click the Request button. You have the ability to edit any field at a later time.
- Inspector: Begin typing or click the magnifying glass icon () to select the inspector performing the inspection. If auto assign is enabled for this inspection type, the inspector with the least amount of hours in their queue will be assigned this inspection. *Note: To appear in this list, the inspector must be under the department associated with the inspection, as well as meet all qualifications associated with this inspection type. If a default inspector has been set up for this inspection area but does not meet the qualifications for the inspection, this field will not populate with their name. This is set up by your SmartGov administrator.
- Travel: Fill in the number of minutes of travel time for the inspector.
- Inspection Date: Begin typing or click the calendar icon (
 ) to select the date of the inspection.
 - Duration: Enter the number of minutes the inspection will take to complete.
- Start Time: Enter the time the inspection began.
- Inspection Status: Use the drop-down menu to select the appropriate status for the inspection. *Note: Changing the status to an Approved state will automatically fill in the inspection date field.
- Scheduling Comment: Enter any necessary information around scheduling the inspection.
- Results Text: List any results from the inspection.
- Inspection Reason: Select the appropriate reason from the drop-down menu. *Note: This will default to the reason configured for the inspection type.
- Request Made Date: This will default to the date a user clicked the request button for the inspection. Edit as needed to reflect the date the inspection was requested.
- Request Made Time: This will default to the time the inspection was requested. Edit as needed to reflect the time the inspection was requested.
- Requested For: Select the date you would like the inspection to be performed.
- Requested For Time Slot: Use the drop-down menu to select the time slot you would like the inspection to be performed.
- Scheduled Date: This will default to the next available date for inspections. Edit as needed to reflect the date the inspection is scheduled for. *Note: If the SmartGov user clicks the calendar icon () to schedule inspections, the calendar will show dates in red if the inspection limit has been reached. Users are able to override any limits by manually typing in the inspection date in this field.
- Scheduled Time Slot: Use the drop-down menu to select the time slot the inspection has been scheduled for.
- Inspector: Begin typing or click the magnifying glass icon (
- Click Save to refresh the window and display additional tabs related to this inspection.
Current inspection tab
Along with the information entered on the initial inspection request, the Current Inspection tab allows you to add notes and attachments to the inspection as well as generate an Inspection Results report.
- Click the sticky note icon () to add notes to the inspection. These notes can include attachments such as documents, pictures, or spreadsheets.
- Click the paper clip icon (
 ) to add attachments to the inspection. This will also populate with images added to the inspection via the SmartGov mobile app.
 - Click Inspection Results Report to generate a report that includes any information found during this inspection.
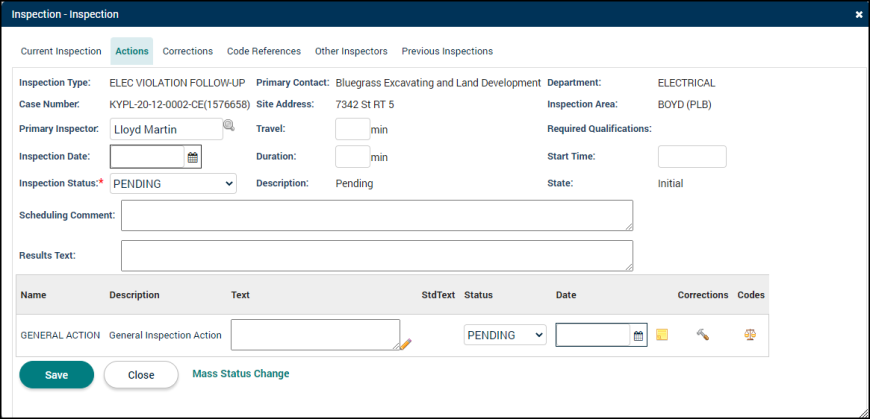
Actions tab
The Actions tab lists specific tasks or checks needed for the inspection. The person performing the inspection has the ability to make comments on each action item as well as list any corrections and code references related to a specific action.
- Text: Use this text field to add any information related to this action. Click the magnifying glass icon () under StdText to quickly add one or more standard texts to this field. *Note: Standard texts are associated with this action step through the configuration of the Inspection Type. These are set up by your SmartGov administrator.
- Status: Use the drop-down menu to select the status of this action.
- Date: This will default to the date the status was changed. Begin typing or click the calendar icon () to edit as needed.
- Notes: Click the sticky note icon () to add notes to the action. These notes can include attachments such as documents, pictures, or spreadsheets.
- Corrections: Click the hammer icon (
 ) to add any Corrections to this action. *Note: If there are many corrections associated with the action, it may be easier to add these through the Corrections tab
 - Codes: Click the scale icon (
 ) to add any Code References to the action. *Note: If there are many code references associated with the action, it may be easier to add these through the Code References tab
You can easily change the statuses of multiple actions by using the Mass Status Change button.
- Click Mass Status Change.
- Select the From Status in the drop-down box. The status change will apply to any action currently in this status.
- Select the To Status in the drop-down box. This will be the status the actions change to.
- Click Select to change the status of the applicable actions.
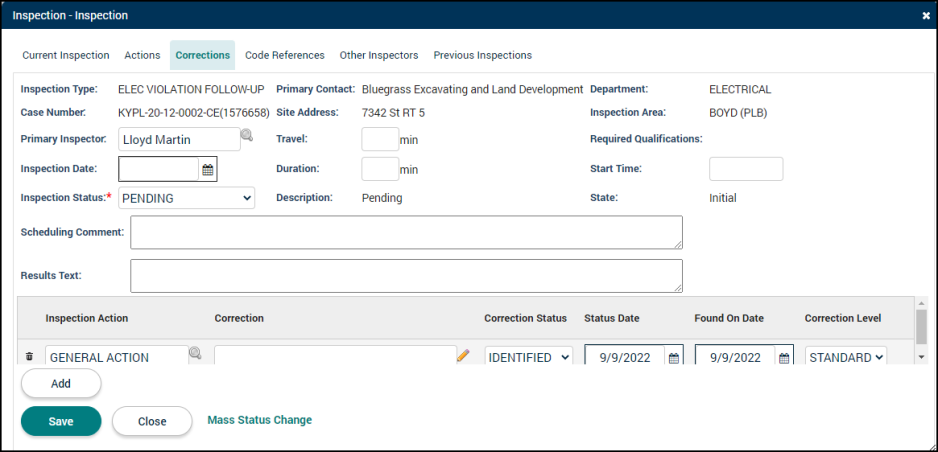
Corrections tab
- Click the Corrections tab.
- Click Add.
- Begin typing or click the magnifying glass icon () to select the Inspection Action this correction is associated with. *Note: This list will only display corrections associated with this inspection type.
- Describe the Correction.
- Select the appropriate Correction Status from the drop-down menu.
- The Status Date will default to the current date. Begin typing or click the calendar icon () to edit this date, if needed.
- The Found On Date will default to the current date. Begin typing or click the calendar icon () to edit this date, if needed.
- Select the appropriate Correction Level from the drop-down menu.
- Click the sticky note icon () to add notes to the correction. These notes can include attachments such as documents, pictures, or spreadsheets.
- Click the paper clip icon () to add attachments to the correction.
- Click Save.
You can easily change the statuses of multiple corrections by using the Mass Status Change button.
- Click Mass Status Change.
- Select the From Status in the drop-down box. The status change will apply to any correction currently in this status.
- Select the To Status in the drop-down box. This will be the status the corrections change to.
- Click Select to change the status of all applicable corrections.
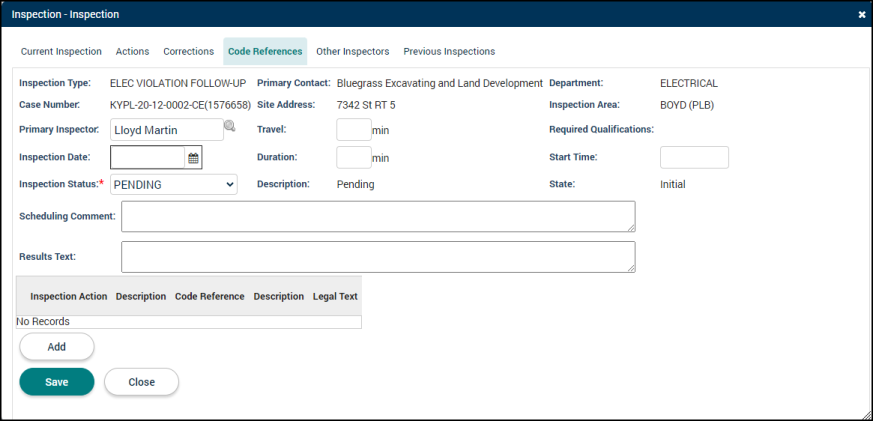
Code references tab
- Click the Code References tab.
- Click Add.
- Select the associated Inspection Action from the drop-down menu.
- Select the appropriate option:
- Standard: This selection will list the code references that have been configured for the actions on this inspection type.
- All: This selection will list all code references.
- Custom: This selection will allow you to create a custom code reference.
- Begin typing or click the magnifying glass icon () to select the specific Code Reference. This will fill in the Code Reference and Description fields. *Note: The magnifying glass icon will not display if you have selected a Custom Code Reference.
- Use the Legal Text field to enter in any necessary text.
- Click Create.
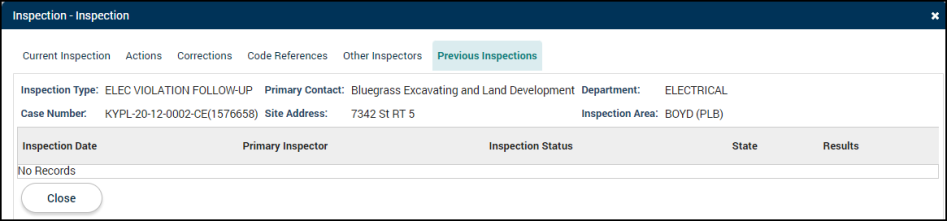
Previous inspections tab
The Previous Inspections tab displays any prior inspections performed for the associated inspection. Click on any inspection in the list to bring up a window with relevant information related to the previous inspection. *Note: Any actions, corrections, and code references added to a previous inspection will populate on the current version of that inspection.
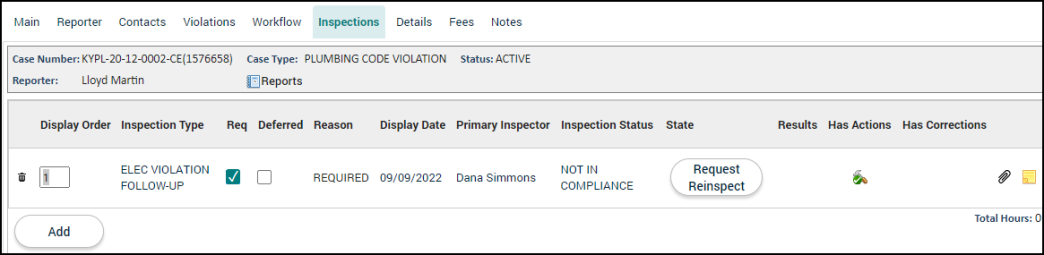
Requesting re-inspection
If the inspection is in a Requires Re-Inspection process state, click the Request Reinspect button from the Inspections tab on the code enforcement case. This will generate a new inspection for the selected inspection.