Inspection types: Actions tab
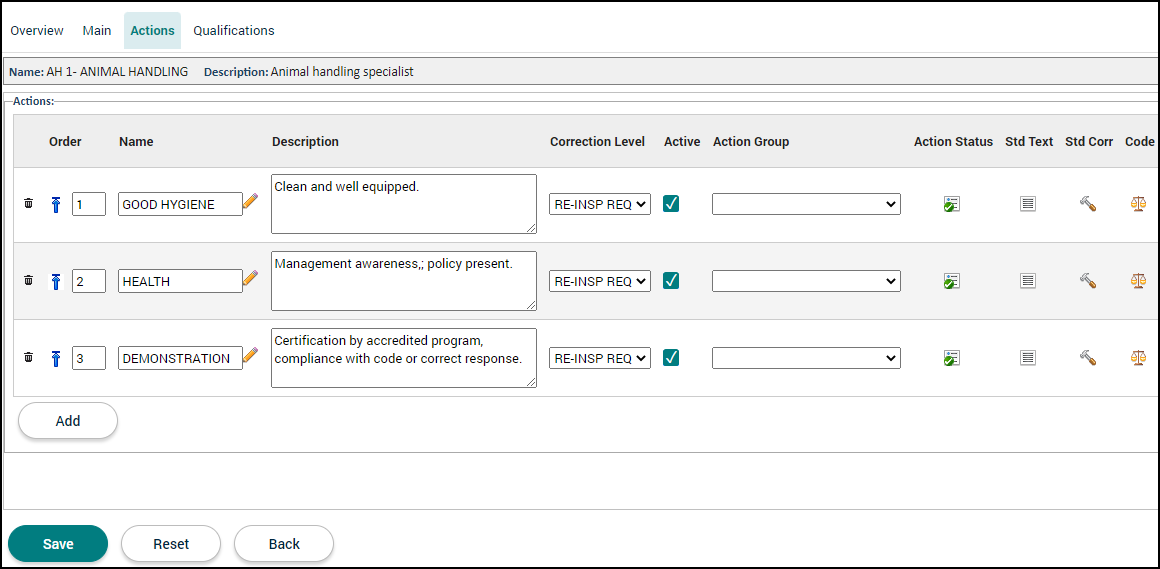
The Actions tab allows you to add, edit, and delete actions associated with the inspection type. You can also manage standard texts, standard corrections, and commonly used code references for the actions.
A common use case would be the use of actions in a food establishment. Within a jurisdiction, a Health Department would likely need to complete a food establishment health inspection in order for that establishment to get their license fully approved. The inspection report would then be translated from paper into SmartGov by using Action Groups, the Actions within those groups, Action Statuses, and Action Points. The examples in the images below represent how your SmartGov account can be configured to document the food establishment inspection report.
Adding an action
- Enter the Name of the action.
- Use the Description field to describe the action.
- Select the default Correction Level for this action.
- Ensure the Active box is checked to allow this action to display on the inspection type.
- Select an Action Group from the drop-down menu. *Note: This field will only display if the Use Action Groups box is checked on the main tab of the inspection type. Action Groups are configured within the lookup values for the module you are using.
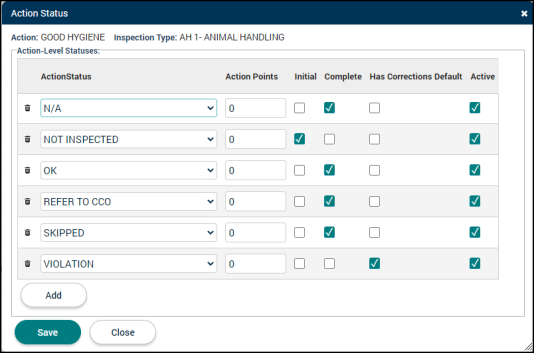
- Click the list icon (
 ) to configure the Action Status and associate Action Point values to each status, if needed. *Note: This field will only display if the Use Action Points box is checked on the main tab of the inspection type. Action groups are configured within the lookup values for the module you are using.
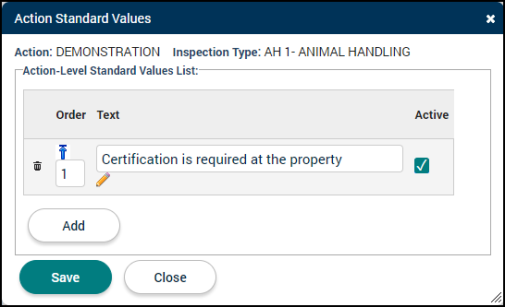
- Click the paper icon (
 ) to add a Std Text (Standard Text) to the action.
- Enter the standard Text.
- Ensure the Active box is checked to display the record in the list of available standard texts.
- Click Add. Repeat this process by adding any additional standard texts in the blank row that appears.
- Use the Order column to sort the standard texts into a sequential order. To move a standard text to the top of the list, click the up arrow icon (
 ).
). - If you need to remove a standard text from the list, click the trash can icon (
 ).
). - Click Save.
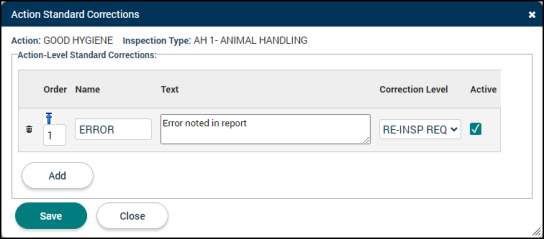
- Click the hammer icon (
 ) to add a Std Corr (Standard Correction) to the action.
- Enter the Name of the standard correction.
- Use the Text field to describe the standard correction.
- Select a default Correction Level using the drop-down menu.
- Ensure the Active box is checked to display the record in the list of available standard corrections.
- Click Add. Repeat this process by adding any additional standard corrections in the blank row that appears.
- Use the Order column to sort the standard corrections into a sequential order. To move a standard correction to the top of the list, click the up arrow icon ().
- If you need to remove a standard correction from the list, click the trash can icon ().
- Click Save.
- Click the scale icon (
 ) to add a Code to the action.
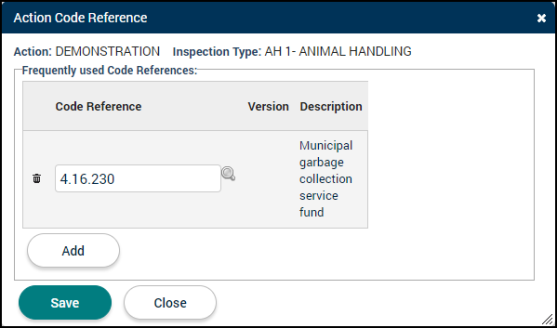
 - Begin typing or click the magnifying glass icon (
 ) and select a Code Referencethat is commonly used for this inspection type.
 - Click Add. Repeat this process by adding any additional code references in the blank row that appears.
- If you need to remove a code reference from the list, click the trash can icon ().
- Click Save.
- Begin typing or click the magnifying glass icon (
- Click Save at the bottom of the page if any changes have been made.
