Documents
The Documents page allows users to add publicly available documents to the Citizen Portal. These documents can be sorted into a folder structure for organizational purposes. The uploaded documents will be available under the Documents icon in the Other Services section on the Main page of the Citizen Portal.
Setting up documents
- Click Administration in the navigation menu, then click Portal Setup.
- Select Documents. This allows you to view available documents.
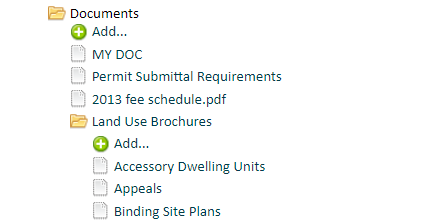
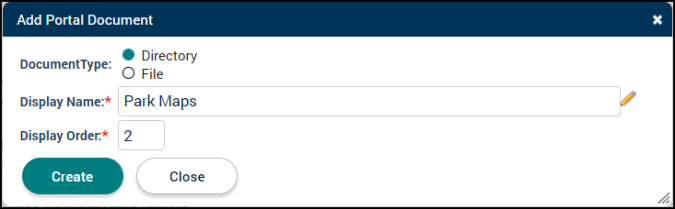
Creating a folder
- Click Add (
 ).
). - Select Directory next to Document Type.
- Enter the Display Name. This will define the name of the folder.
- Define the Display Order. This will determine the folder's position in the list.
- Click Create.
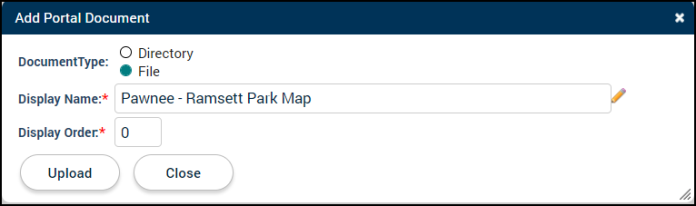
Uploading a file
- Click Add under the appropriate folder.
- Select File next to Document Type.
- Enter the Display Name. This will define the name of the file.
- Define the Display Order. This will determine the file's position in the list or folder.
- Click Upload and select the appropriate file from your computer.
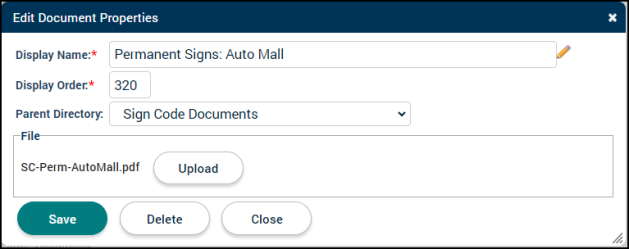
Managing files
- Select the appropriate file from the list.
- Edit the applicable file information, such as Display Name or Display Order.
- Select a new folder under the Parent Directory drop-down menu to move the file to a different folder, if necessary.
- Click Save to finalize the changes.
Deleting a file or folder
- Select the appropriate file or folder. *Note: The Documents folder is the default and cannot be edited or deleted.
- Click Delete.
- Click Delete Record to finalize the change. *Note: If you delete a folder, the documents housed in the folder will also be deleted.
