Back to Event Manager Main Menu
Managing the Location List
There are a number of different actions that can be performed from the Location List after you have configured and added your Locations.
- Click on Settings from the navigation menu.
- Click on Locations under Site Administration or Global Locations.
Searching for an Existing Location
You can search for a location either by entering a keyword in the Search field or by selecting one of the many helpful filters available under the Filters section. When you know the name of the location, you can directly enter it in the search box. Otherwise, you can select the filter options depending on your business requirement. The system then displays the locations that closely match the selected options.
- Click on the Search field and enter a keyword to search for a location.
- Press Enter on your keyboard to filter the list of locations by the term.
- Adjust the filters as necessary and select the required options.
- Click Apply.
The list of locations matching the selected criteria is displayed on the page.
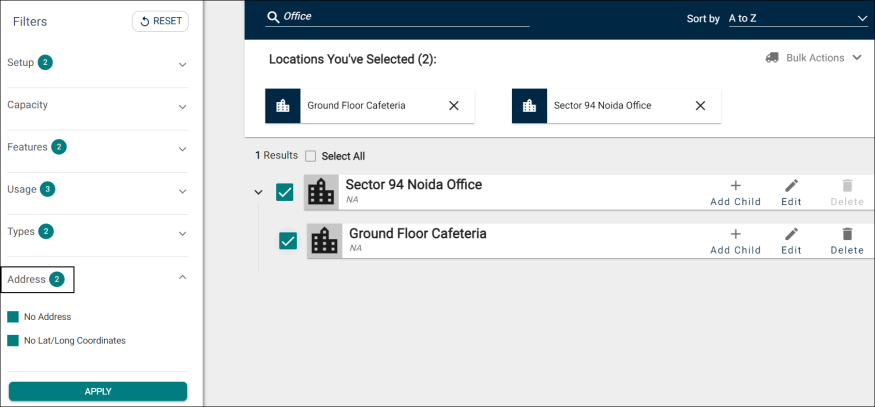
NOTE The Addresses filter category is added in this release with two options, No Address and No Lat/Long Coordinates. Selecting these options displays all locations where a complete address or Lat/Long Coordinates are not updated. A complete address consists of minimum Address Line 1, City, State, and Zip Code.
Bulk actions
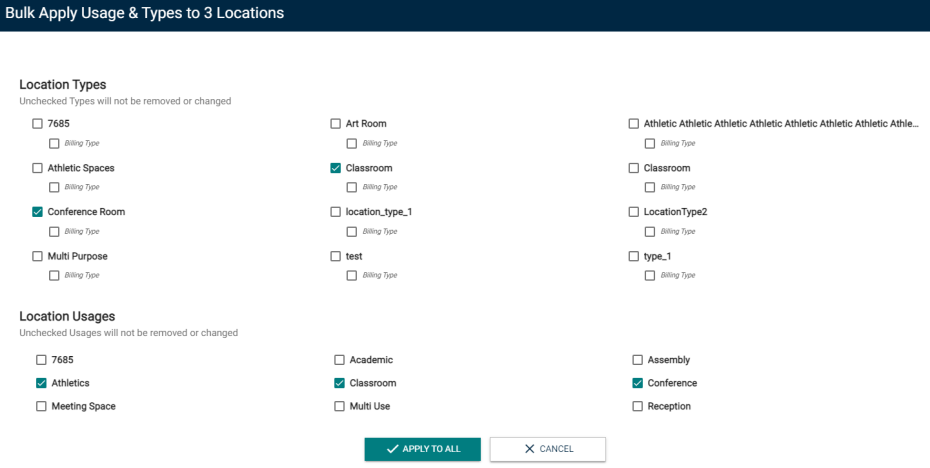
Bulk Actions allow users to apply and remove Location Setups or apply Usages and Types to multiple locations at one time.
To use Bulk Actions:
- Check the box next to each location in the list to which you'd like to apply a bulk action. They will appear in the Locations You've Selected field.
- Click on the Bulk Actions drop down menu and select from:
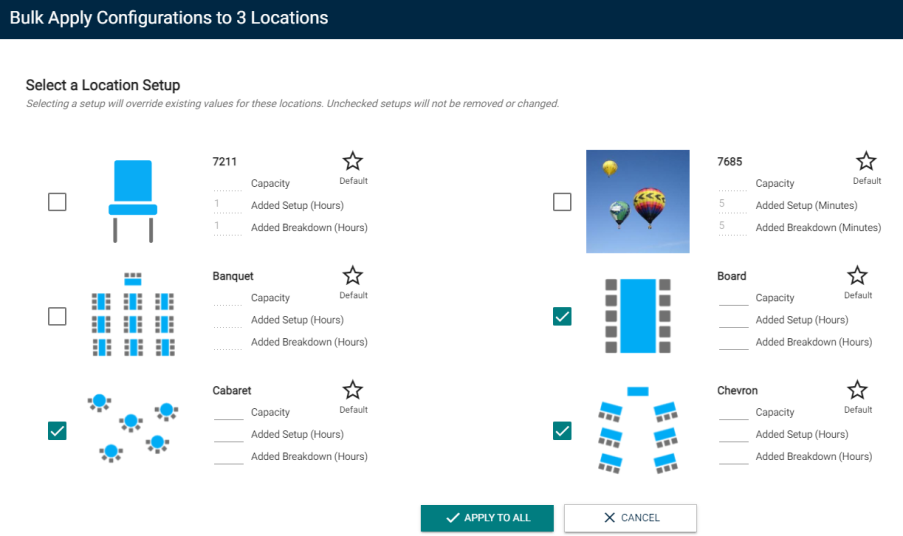
- Check the box next to each Setup you'd like to associate to these locations.
- If necessary, enter the Capacity, Added Setup, and Added Breakdown for each selected setup.
- Click on the star icon (
 ) to mark a setup as the Default setup for these locations.
 - Click the Apply To All button to save the changes.
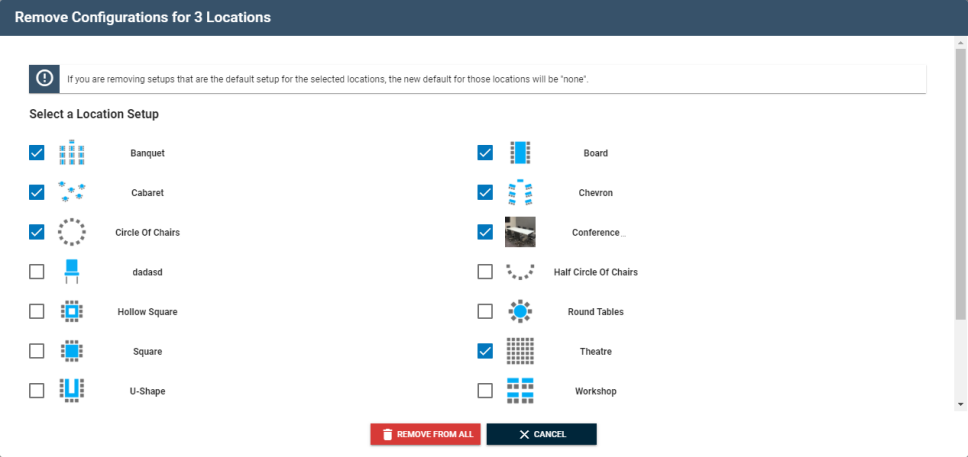
- Check the box next to each Location Setup that should be removed from these locations. *Note: If you are removing setups that are the default for the selected locations, the new default setup for those locations will be "none".
- Click on the Remove From All button to save the changes.
- Check the box next to each of the Location Types that should be associated with these locations.
- Check the box next to each of the Location Usages that should be associated with these locations.
- Click on the Apply to All button to save the changes.
- If you would only like to allow this location to be booked within a certain time range of the event date, you can set a minimum and maximum number of days or hours in this window.
- Select Hours or Days from the drop-down menu next to the Minimum field and enter the appropriate number. *Note: This will restrict event requests from being entered for these locations after the defined value. For example, if you have entered 7 days as the minimum, you will not be able to enter a request for these locations if there are fewer than 7 days before the event.
- Select Hours or Days from the drop-down menu next to the Maximum field and enter the appropriate number. *Note: This will restrict event requests from being entered for these locations before the defined value. For example, if you have entered 365 days as the maximum, you will not be able to enter a request for these locations if there are more than 365 days before the event.
- Check the box next to Prevent Double-booking to avoid more than one event from being scheduled at the same time for these locations. *Note: Unchecking this box may result in double-bookings and can create schedule conflicts.
- Check the Use Parent Hours box if the selected locations should use the same restricted hours as their parent location.
- Under Hours of Operation, click Add a Set of Hours if you would like to restrict the available hours for these locations. You can define a different set of available hours for the weekdays and weekends.*Note: Only Tenant Administrators will be able to book events outside of these hours.
- Select the applicable days of the week for this set of hours.
- Click on the Open field and select the start of the booking period.
- Click on the Close field and select the end of the booking period.
- Repeat this process if you need to add multiple sets of hours for these locations.
- Under Internal Hours of Operation, click Add a Set of Hours if you would like to define the days and times that a location should be reserved for internal booking. You can define a different set of available hours for the weekdays and weekends. *Note: Community Portal users will only be allowed to enter an event request for this location outside of any defined bookable hours set in this window.
- Select the applicable days of the week for this set of hours.
- Click on the Open field and select the start of the booking period.
- Click on the Close field and select the end of the booking period.
- Repeat this process if you need to add multiple sets of hours for these locations.
- Click Apply to All to save any changes you've made for the selected locations.

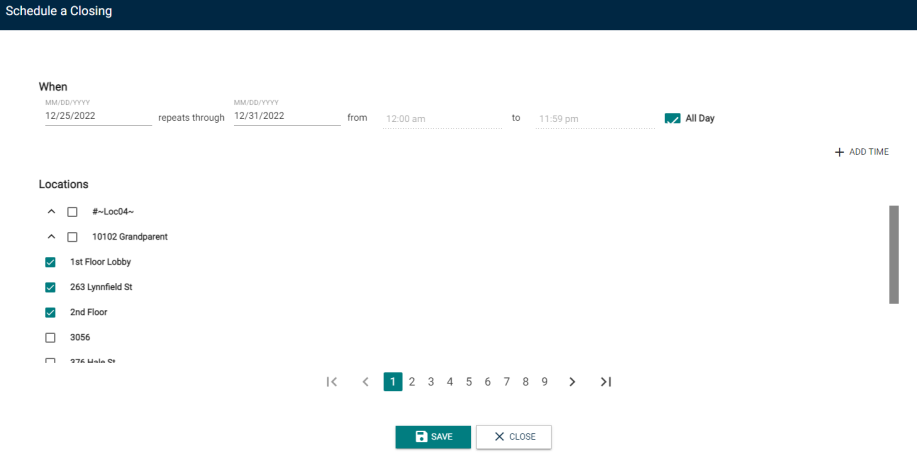
- Select the date range that these locations should be unavailable for booking.
- Select the start and end time for these locations to be closed, or check the All Day box to close these locations completely for the selected date range.
- If you need to add multiple exceptions for these locations, click Add Time to repeat this process.
- If applicable, check the box next to any additional Locations that should be included in these exceptions.
- Click Save to finalize the changes.
Add a Child Location
- From the Locations list, click on the Add Child button next to the location you would like to add a child location to.
- Add all necessary information to the new Location.
- Click Save.
Modify an Existing Location
- From the Locations list, click on the Edit button next to the location you would like to make changes to.
- Make the necessary changes to the location's information.
- Click Save.
Delete an Existing Location
-
Navigate to Dashboard > Settings > Locations/Global Locations.
-
Click the Delete button for the location you would like to remove.
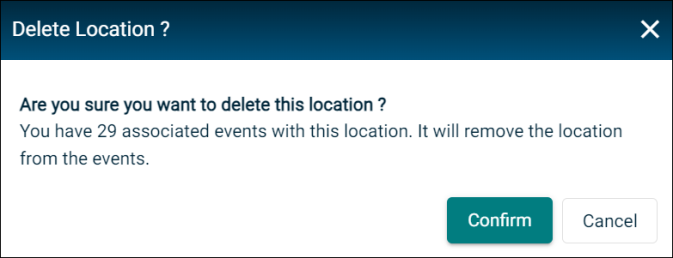
If the location is linked to an event(s), a popup message is displayed informing the user that deleting the location will remove it from all the associated events. To bypass the warning and continue, click Confirm.
NOTE It is recommended to deactivate a location associated with an event(s) rather than delete.
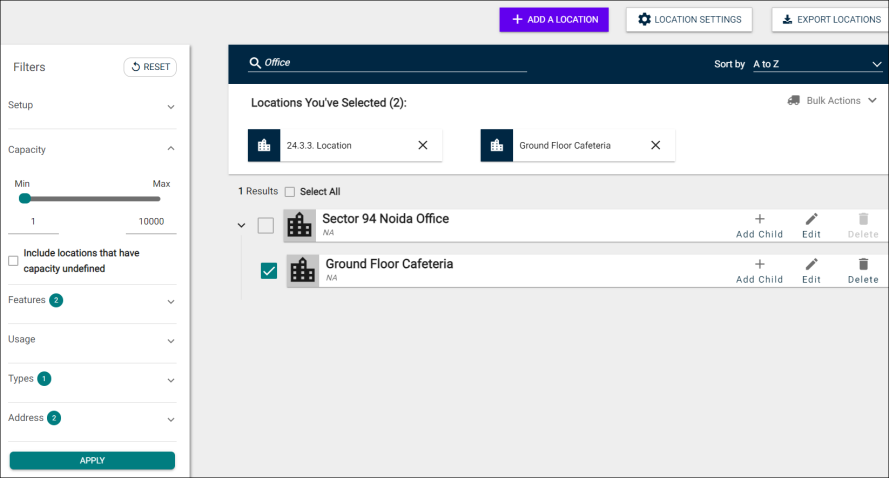
NOTE A parent location that also has a child location cannot be deleted. The Delete button is disabled.
Deactivate an Existing Location
-
Navigate to Dashboard > Settings > Locations/Global Locations.
-
Click Edit for the location that you want to deactivate.
-
Click the Active toggle.
-
Scroll down to the bottom of the page and click the Save button.
How to Export Locations
You can export Location information to a CSV file at both the Site and Global level.
-
Click on Settings from the navigation menu.
-
Click on either Site Locations under Site Administration or Global Locations under Global Administration.
-
Use the filtering options under Current Search if you would like to narrow the results of the export.
-
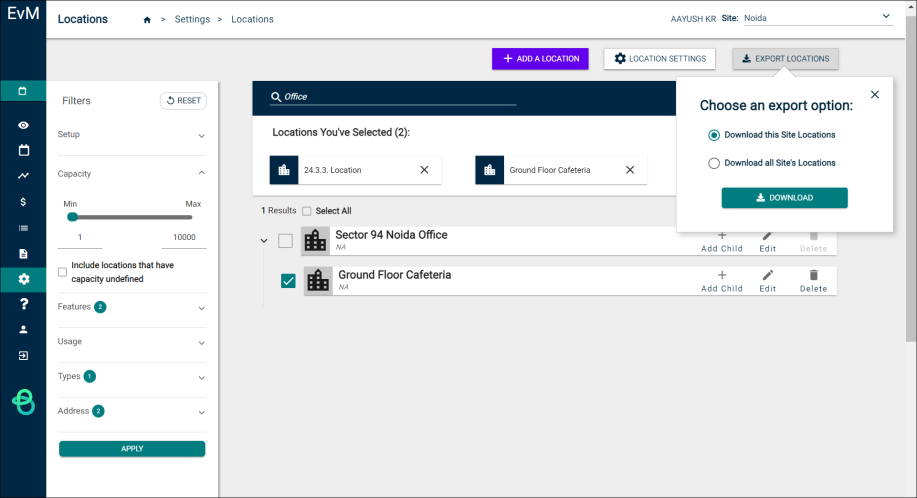
Click on the Export Locations button in the top right-hand corner.
-
If you are exporting locations from the Site Locations list, you can choose to Download this Site's Locations or Download all Site's Locations.
-
Download this Site's Locations: This will include locations from the site you are currently on.
-
Download all Site's Locations: This will include locations from every site.
-
-
Click Download. This will download the CSV file to your computer.
