Back to Event Manager Main Menu
Payment Gateway Configuration
A payment gateway provides a means of processing payments for items sold, such as registrations and products, and allows invoices to be paid online.
Setup registration gateways
Before you begin to set up Payment Gateways for registration payments, you must have your account configured for the gateway you wish to use. This is a separate process from having your account configured for Invoicing. Contact Client Services to start this process.
Prior to being able to sell items and registrations using Event Manager you will be required to configure your payment gateway. Event Manager supports receiving payments through a number of different vendors, including MySchoolBucks, PayPal, SchoolPay, Stripe, NIC, TrustCommerce, PayFlow Pro, Authorize.Net, and Tempus.
- Click on Settings from the side navigation menu.
- Click on the Payment Gateway Configuration tile under Global Administration. *Note: If you have already set up your Invoice Registration Gateway for MySchoolBucks, PayPal, SchoolPay or Stripe, you do not need to follow the instructions below. Instead, click Setup Invoice Gateway and click Copy to RegistrationInvoice to use the same account for the Registration Invoice Gateway.
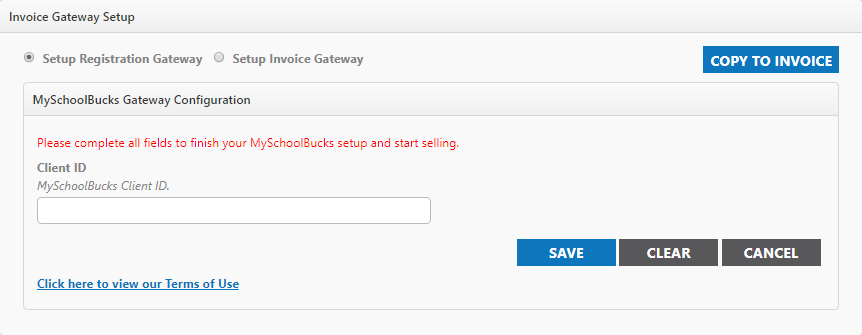
- Enter your Client ID from MySchoolBucks. *Note: This Client ID is provided by MySchoolBucks. If you do not know your Client ID, contact MySchoolBucks support for assistance.
- Click Save. You will see a confirmation message informing you that you can now receive payments for your events.
- Click Clear if you need to reconfigure the connection for this payment vendor.
*Note: Event Manager requires that your PayPal account is configured as a "premium", "merchant", or "business" account. You will be prompted to upgrade your PayPal account during the PayPal configuration process.
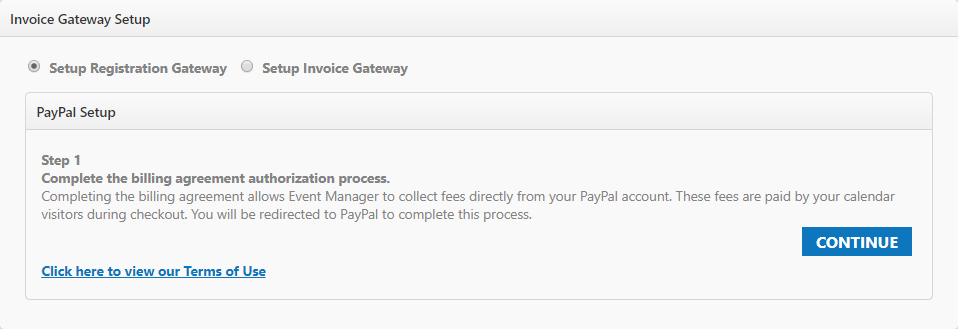
Step 1: complete the billing agreement
- Click the Continue button.
- You will be re-directed to PayPal and asked to either log into your existing PayPal account, or create a new PayPal account.
- After accepting the agreement, you will be brought back to the payment gateway screen to complete Step 2.
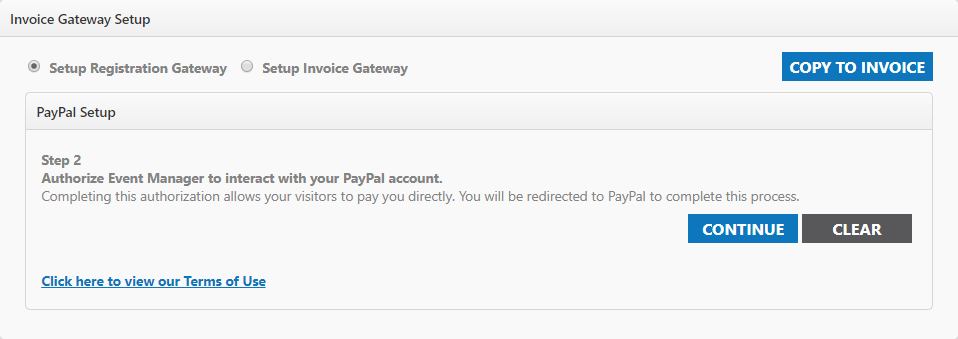
Step 2: Authorize Event Manager to Interact with Your PayPal Account
- Click the Continue button.
- You will be re-directed to PayPal and asked to log into your existing PayPal account.
- Once you are logged in, you will need to click the Grant Permission button.
- After clicking the Grant Permission button you will be brought back to the payment gateway screen to complete Step 3.
Step 3: Supply your PayPal user name
- Type the email address associated with your PayPal account in the Username field.
- Click the Save button.

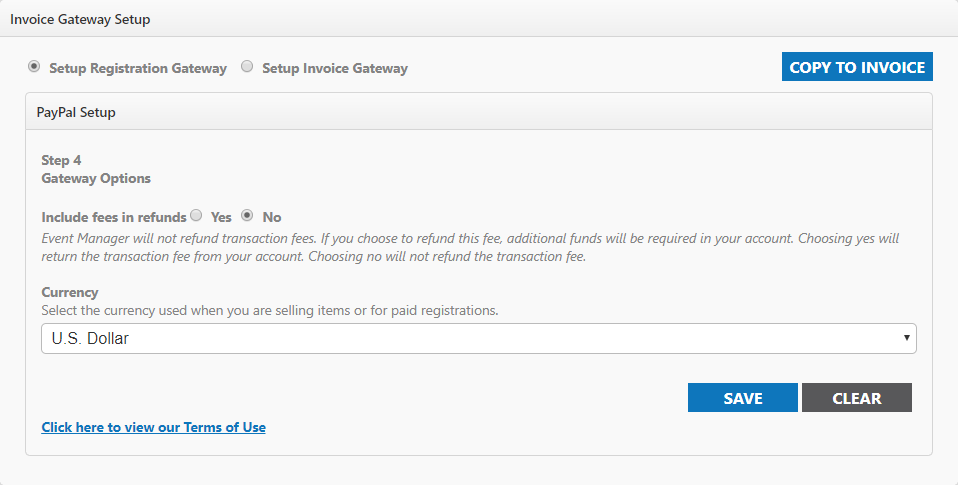
Step 4: Gateway Options
Include Fees in Refunds: This option allows you to configure how refunds handle processing fees paid during a transaction. By default, "no" is selected. There are two available options:
- No - Exclude transaction fees paid by the buyer in refunds. *Note: Dude Solutions will not refund transaction fees. When this value is selected:
- Upon refund, the buyer will be refunded the full cost of the item that they registered for only.
- For example, if the purchase was for a $50.00 registration they would be refunded $50.00.
- PayPal Refunding Fees may apply
- Yes - Include transaction fees paid by the buyer in refunds. *Note: Dude Solutions will not refund transaction fees. Selecting this option will incur additional costs charged to the PayPal account specified in Payment Gateway Configuration. When this value is selected:
- Upon refund, the buyer will be refunded the full dollar amount of the transaction.
- For example, if the purchase was for a $50.00 registration and included fees of $2.24 they would be refunded $52.24.
- The total fees of $2.24 were paid to Dude Solutions at the time of transaction. These fees are not refunded by Dude Solutions.
- The PayPal Account specified in the Payment Gateway Configuration will be responsible for funding the $2.24 resulting in net loss of $2.24 from the PayPal Account specified in the Payment Gateway Configuration.
- PayPal Refunding Fees may apply
Currency
Currency: This option allows you to configure the currency to use with PayPal when you are selling items or using paid registration. By default, U.S. Dollar will be selected.
- Select the appropriate Currency from the drop down.
- Click Save to confirm your selections on the Gateway Options page to finish PayPal Setup.
- Click Clear to remove your acceptance of Dude Solutions Billing Agreement. *Note: Selecting this option will prevent you from collecting revenue from registrations and purchases. Users on your site will be unable to complete registration, or purchase items that have a cost associated with them.
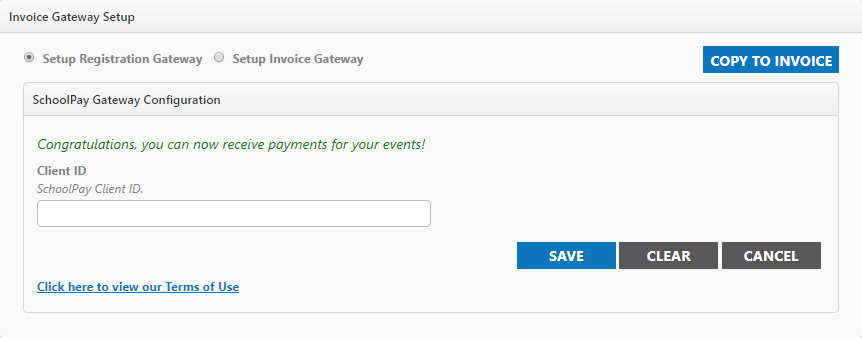
- Enter your Client ID from SchoolPay. *Note: This Client ID is provided by SchoolPay. If you do not know your Client ID, contact SchoolPay support for assistance.
- Click Save. You will see a confirmation message informing you that you can now receive payments for your events.
- Click Clear if you need to reconfigure the connection for this payment vendor.
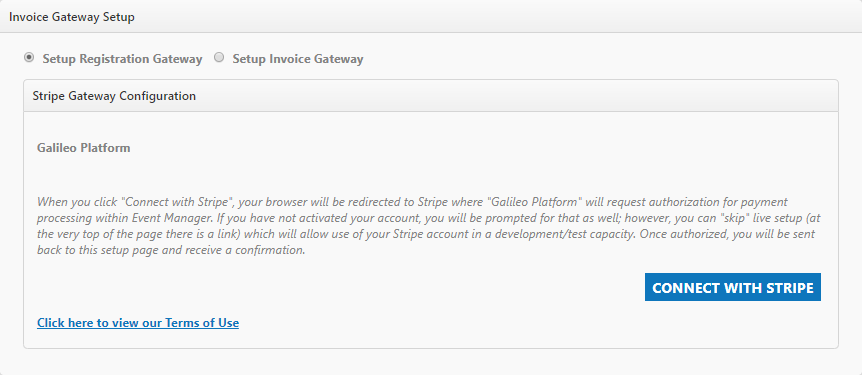
*Note: The Stripe payment gateway can be configured to use US or Canadian dollars for currency.
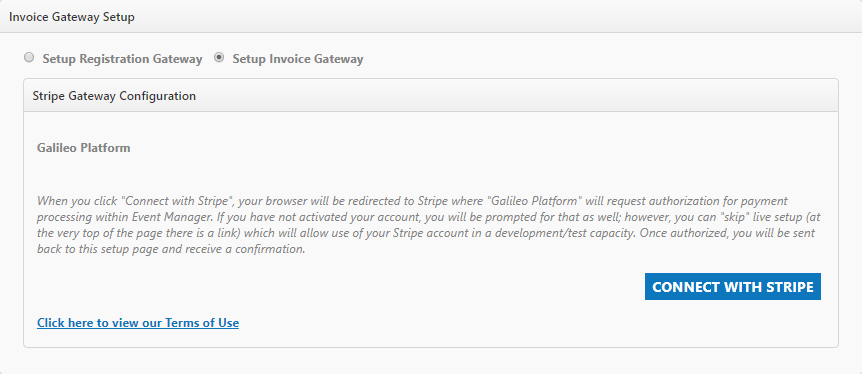
- Click the Connect With Stripe button. *Note: You will be redirected to Stripe, where you can request authorization for payment processing within Event Manager. Once all necessary steps within Stripe have been completed, you will be sent back to the Stripe Gateway Configuration page and receive a confirmation message.
- Click Clear if you need to reconfigure the connection for this payment vendor.
Setup invoice gateways
Before you begin to set up Payment Gateways for invoice payments, you must have your account configured for the gateway you wish to use. This is a separate process from having your account configured for Registration. Contact Client Services to start this process.
Prior to being able to pay online using Event Manager you will be required to configure your payment gateway. Event Manager supports receiving payments for invoices through a number of different vendors, including MySchoolBucks, PayPal, SchoolPay, Stripe, and Authorize.Net.
- Click on Settings from the side navigation menu.
- Click on the Payment Gateway Configuration tile under Global Administration. *Note: If you have already set up your Registration Gateway for MySchoolBucks, PayPal, SchoolPay, Stripe, or Authorize.Net, you do not need to follow the instructions below. Instead, Click the Setup Registration Gateway radio button and then click Copy to Invoice to use the same account for the Invoice Gateway.
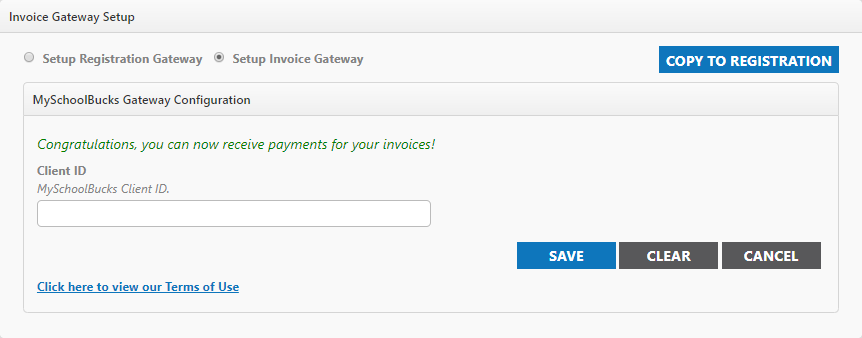
- Select Setup Invoice Gateway from the Invoice Gateway Setup panel.
- Enter your Client ID from MySchoolBucks. *Note: This Client ID is provided by MySchoolBucks. If you do not know your Client ID, contact MySchoolBucks support for assistance.
- Click Save. You will see a confirmation message informing you that you can now receive payments for your invoices.
- Click Clear if you need to reconfigure the connection for this payment vendor.
Prior to being able to sell items and registrations using Event Manager you will be required to configure your payment gateway :*Note: Event Manager requires that your PayPal account is configured as a "premium", "merchant", or "business" account. You will be prompted to upgrade your PayPal account during the PayPal configuration process.
- Click on the gear icon (
 ) to access the Site Administration settings page.
 - Click on Payment Gateway Configuration under Global Administration.
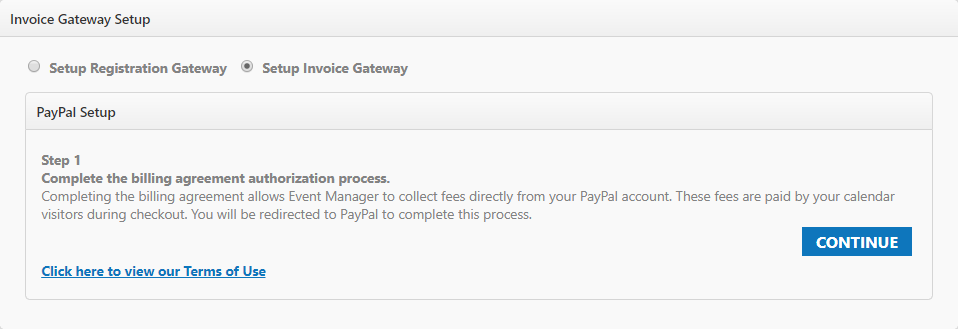
Step 1: complete the billing agreement
- Click the Continue button.
- You will be re-directed to PayPal and asked to either log into your existing PayPal account, or create a new PayPal account.
- After accepting the agreement, you will be brought back to the payment gateway screen to complete Step 2.
Step 2: Authorize Event Manager to Interact With Your PayPal Account
- Click the Continue button.
- You will be re-directed to PayPal and asked to log into your existing PayPal account.
- Once you are logged in, you will need to click the Grant Permission button.
- After clicking the Grant Permission button you will be brought back to the payment gateway screen to complete Step 3.

Step 3: supply your PayPal user name
- Type the email address associated with your PayPal account in the Username field.
- Click the Save button.

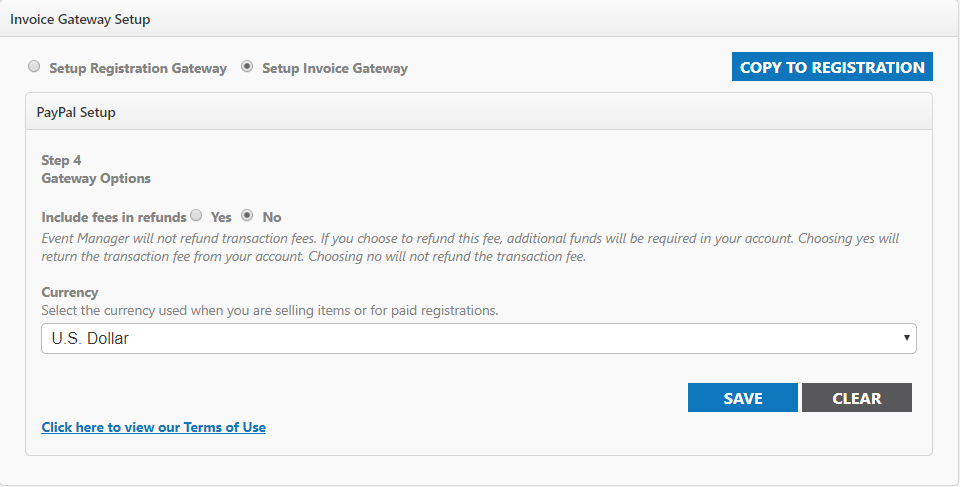
Step 4: gateway options
Include Fees in Refunds: This option allows you to configure how refunds handle processing fees paid during a transaction. By default, "no" is selected. There are two available options:
- No - Exclude transaction fees paid by the buyer in refunds. *Note: Dude Solutions will not refund transaction fees. When this value is selected:
- Upon refund, the buyer will be refunded the full cost of the item that they registered for only.
- For example, if the purchase was for a $50.00 registration they would be refunded $50.00.
- PayPal Refunding Fees may apply
- Yes - Include transaction fees paid by the buyer in refunds. *Note: Dude Solutions will not refund transaction fees. Selecting this option will incur additional costs charged to the PayPal account specified in Payment Gateway Configuration. When this value is selected:
- Upon refund, the buyer will be refunded the full dollar amount of the transaction.
- For example, if the purchase was for a $50.00 registration and included fees of $2.24 they would be refunded $52.24.
- The total fees of $2.24 were paid to Dude Solutions at the time of transaction. These fees are not refunded by Dude Solutions.
- The PayPal Account specified in the Payment Gateway Configuration will be responsible for funding the $2.24 resulting in net loss of $2.24 from the PayPal Account specified in the Payment Gateway Configuration.
- PayPal Refunding Fees may apply
Currency:This option allows you to configure the currency to use with PayPal when you are selling items or using paid registration. By default, U.S. Dollar will be selected.
- Select the appropriate Currency from the drop down.
- Click Save to confirm your selections on the Gateway Options page to finish PayPal Setup.
- Click Clear to remove your acceptance of Dude Solutions Billing Agreement. *Note: Selecting this option will prevent users from being able to process online payments until you have completed the configuration process.
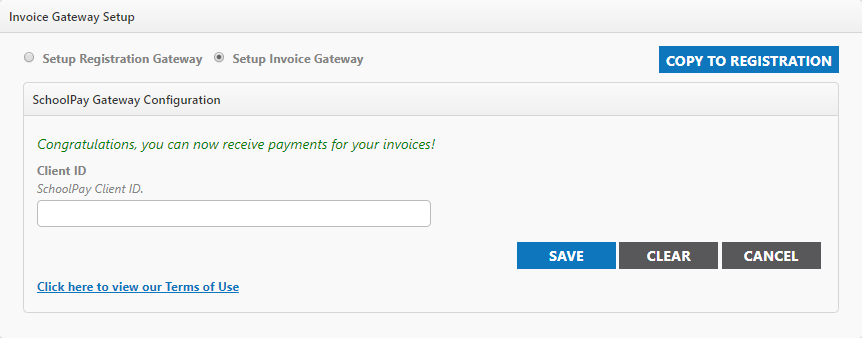
- Enter your Client ID from SchoolPay. *Note: This Client ID is provided by SchoolPay. If you do not know your Client ID, contact SchoolPay support for assistance.
- Click Save. You will see a confirmation message informing you that you can now receive payments for your invoices.
- Click Clear if you need to reconfigure the connection for this payment vendor.
- Click the Connect With Stripe button. *Note: You will be redirected to Stripe, where you can request authorization for payment processing within Event Manager. Once all necessary steps within Stripe have been completed, you will be sent back to the Stripe Gateway Configuration page and receive a confirmation message.
- Click Clear if you need to reconfigure the connection for this payment vendor.
