Back to Event Manager Main Menu
Importing Locations
Event Manager allows you to add multiple locations at once using its import feature. This is a useful tool if you have a large amount of location information that you'd like to add quickly and efficiently. *Note: You can only import locations into Event Manager using a CSV or XML file type.
How to Import Locations
- Click on the Settings option from the side navigation menu.
- Click on the Import Data tile under Global Administration.
- Click on Add New Import.
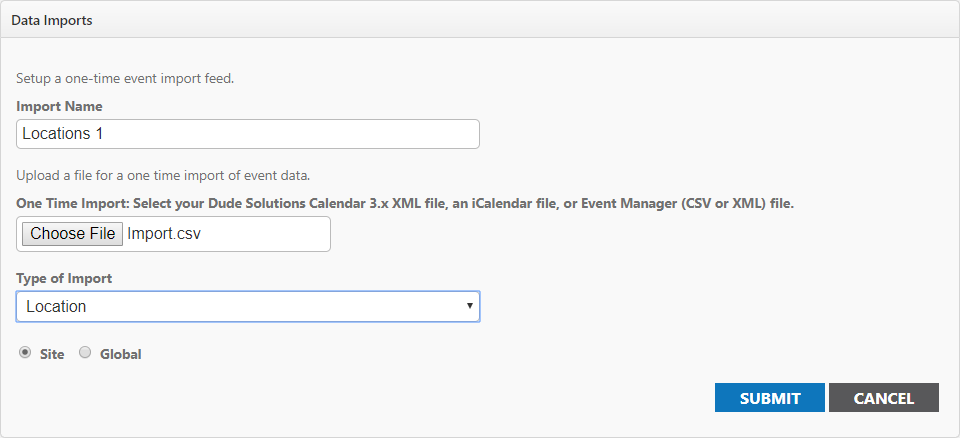
- Enter an Import Name. Be sure to give it a name that will allow you to identify the import when viewing the list of imports.
- Click Choose File and browse your computer for a data file to import.
- Select Location from the Type of Import drop down menu.
- Select either Site or Global to determine whether the imported locations will exist at the current site or at every site.
- Click Submit.
Import Mapping
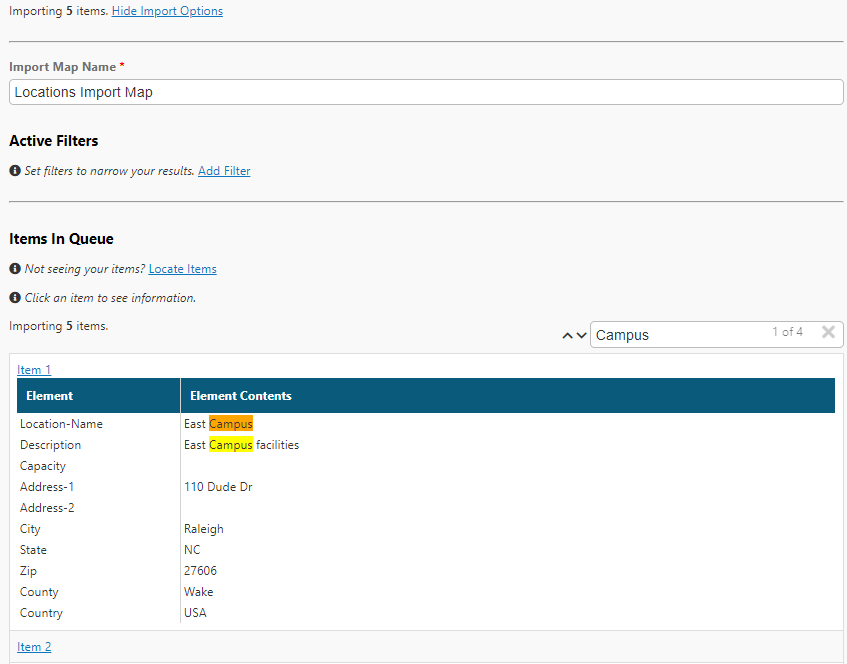
Import Mapping allows you to match the location fields in Event Manager to the fields in the file you are uploading. The system will detect how many locations are listed in the file and display that number at the top of the Location Import Map panel.
- Enter an Import Map Name.
- To see more detailed information about the import, such as the details of the locations, click on Show Import Options next to the number of import items.
- Click on the Add Filter link if you'd like to narrow the results to find a particular location in the file.
- Click on an item in the list to view all entered fields for that location.
- Use the search field under Items In Queue to filter the list of locations by a specific search term, such as "Campus".
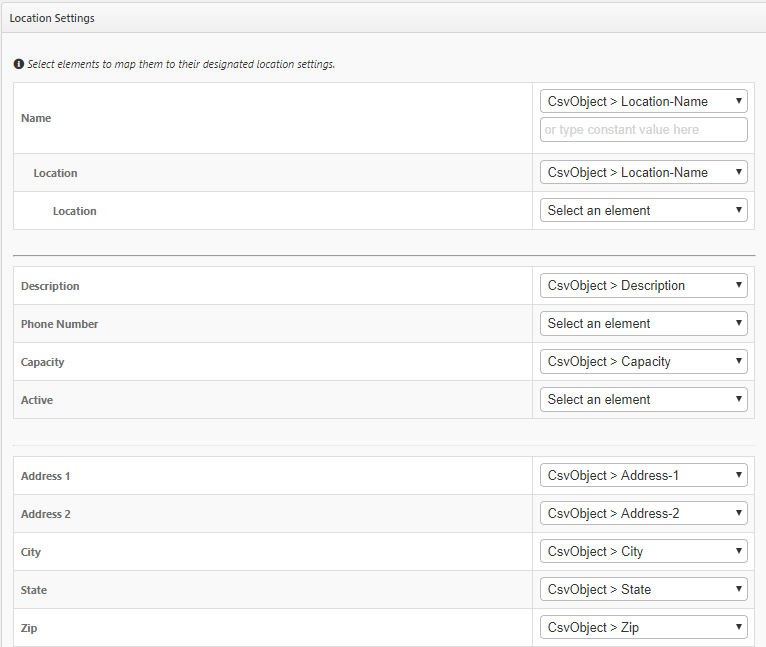
- In the Location Settings section, each Event Manager field will be listed on the left. If the field is required, it will be marked with an asterisk (*).
- To the right of each Event Manager field there will be a drop down menu listing all XML and CSV elements found on the uploaded file. Select the XML or CSV element you would like to associate with that Event Manager field.
- Once you have mapped the fields, click Submit to add this to your list of imports.
Viewing and Deleting Imports
- Click on the Settings option from the side navigation menu.
- Click on the Import Data tile under Global Administration.
Viewing import history
- Locate the import in the Data Imports list and select View Import History from the Actions drop down.
- This will download a CSV file of the import history to your computer.
Deleting an Existing Import
- Locate the import in the Data Imports list and select Delete from the Actions drop down for that import.
- This import will be deleted from the list.
