Back to Event Manager Main Menu
Quick Forms
In Event Manager, quick forms provide a way to share a site specific event form with people who need to quickly add events without the need to create an account. An Administrator can provide the shareable link to whoever needs to enter events, and they can add as many events for that site as necessary while the form is enabled. *Note: If you do not currently have access to this feature, please contact your Sales Representative or Client Services for more information.
Setting up a quick form
- Click on Settings from the side navigation menu.
- Click on the Quick Forms tile.
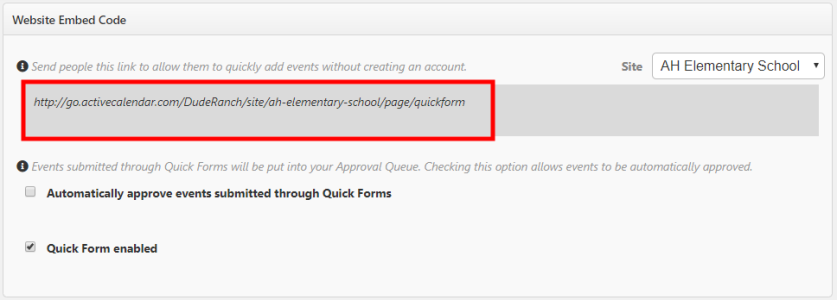
- Select the Site from the drop down menu in the top right corner to generate the Quick Form. This will auto-populate the quick form link for the corresponding site.
- If you would like any event requests submitted through a Quick Form to bypass the site's approval process, check the box next to Automatically approve events submitted through Quick Forms. *Note: Checking this box will apply this automatic approval to Quick Forms at all sites.
- Check the box next to Quick Form enabled. This will enable the Quick Form for the link that has been generated.
Filling out a quick form
Once the Quick Form has been enabled by an Administrator, anyone with the link can utilize this form to enter a schedule of events.
To enter a schedule of events through Quick Forms:
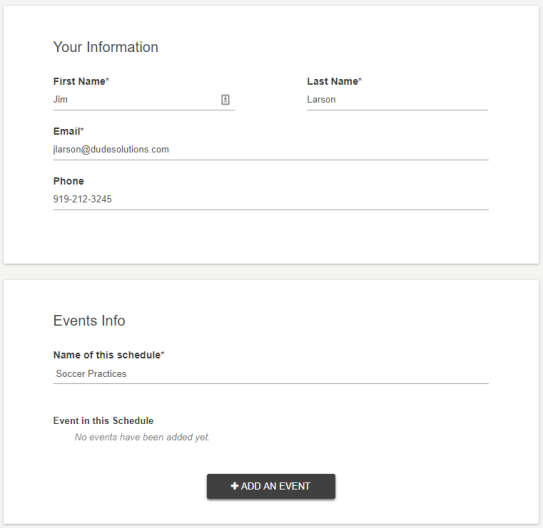
- Enter your First Name, Last Name, Email address, and Phone number.
- Enter the Name of this schedule.
- Click Add an Event. This will expand the form so that events can be added to the schedule.
- Enter the Event Name.
- Select the Location for this event from the Where is the Event? drop down menu.
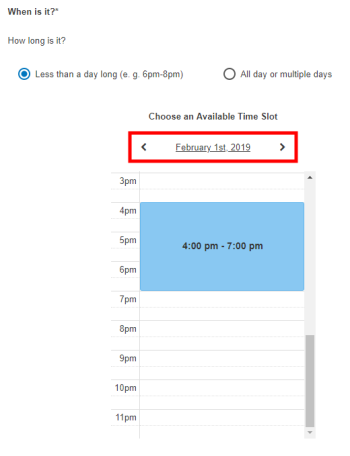
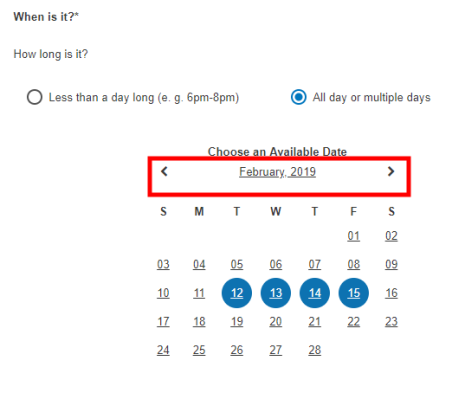
- Define the length of the event by selecting Less than a day long or All day or multiple days.
Less than a day long
- Use the arrows to define the date for the event.
- Select the time you need by clicking on the appropriate start time on the calendar. Drag the time slot to be the appropriate length. *Note: Any times that are unavailable will show with a block marked Reserved. This means the time has been booked with another event.
All day or multiple days
- Use the arrows to define the month of the start date and click on the date desired.
- In the pop-up window, confirm the Start Date and select an End Date.
- Click OK.
- Enter a summary for this event in the text box. *Note: There is a character limit of 250 for this field.
- Choose any Category that applies to this event. Visitors will be able to search and filter events based on categories.
- Enter any Keywords or tags that visitors may use to search for your event.
- Upload a file by locating it on your computer, or pasting the attachment URL in the text field.
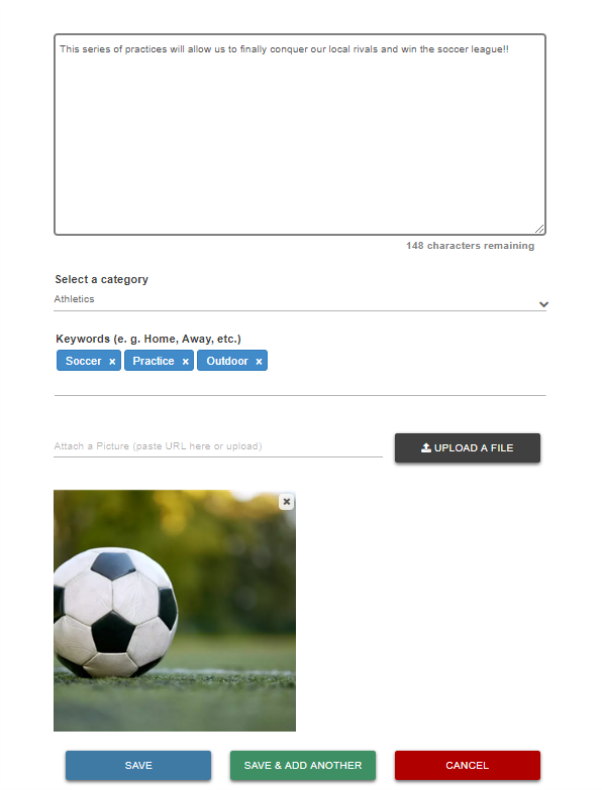
- Click Save, Save & Add Another, or Cancel.
- Save: This will finalize the changes for this event.
- Save & Add Another: This will finalize the changes for this event and allow you to add another event to the schedule.
- Cancel: This will negate any event changes you have made.
- Check the box next to I'm not a robot and click Submit to finalize all changes.
