Back to Event Manager Main Menu
Managing the Payment List
Once payments and refunds have been added in Event Manager, there are many options available to manage them. You can search and filter your Payment List to show a specific payment. You can also edit and archive payments or refunds, and view archived payments. *Note: If you do not currently have access to this feature, please contact your Sales Representative or Client Services for more information.
Searching and Filtering Payments Or Refunds
Use the Search and Filter options to find or show specific payments or refunds.
Search bar
From the Search Bar you can search, sort, and change the view of your payments or refunds.

- Search: The Search field allows you to quickly find payments or refunds based on information found on them, such as the payment or invoice number.
- Sort: The Sort field allows you to reorganize the payment list by whichever field you select from the drop down menu.
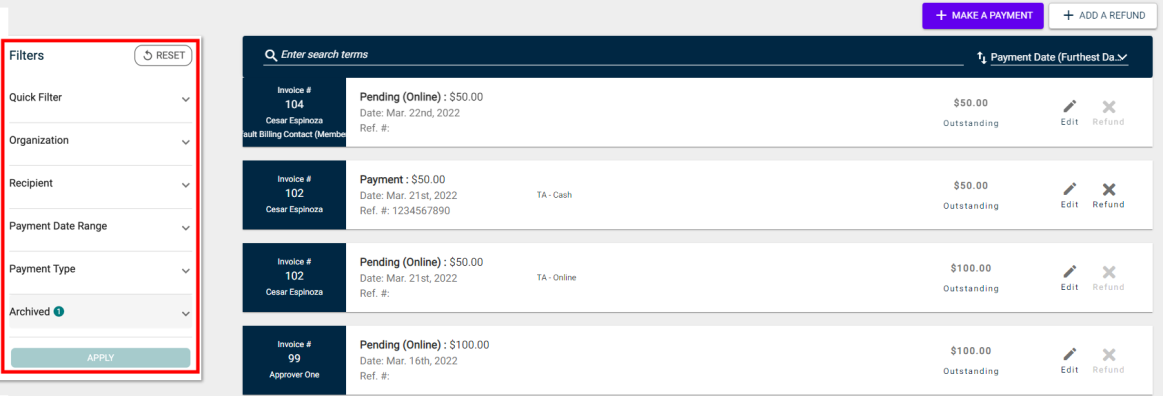
Filter Payments Panel
This side panel gives you greater flexibility when displaying or searching for certain payments or refunds. You are able to filter by a number of options, including the Organization, Recipient, and Payment Type.
Creating Saved Filters
On the Payments List, you can create and save up to 20 custom filters and set one as your default filter. *Note: These filters are only created for your individual user account and are not shared with other users in Event Manager
You can add up to 20 custom filters, but only one can be defined as the default filter that will display upon opening the Payments list. The Quick Filters list will show the default filter first, followed by stock filters, and then any custom filters you have saved.
-
Enter your filter criteria in the filter panel.
-
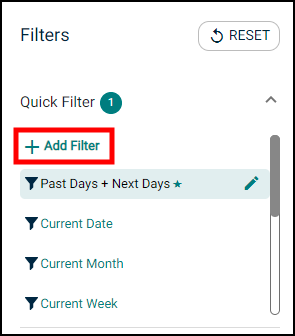
Expand the Quick Filter section at the top of the panel.
-
Click Add Filter.
-
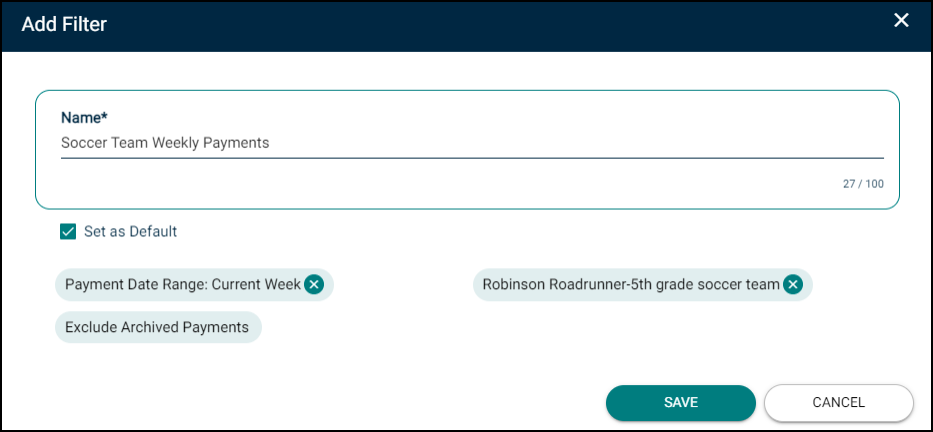
Enter a Name for this filter.
-
Check the Set as Default box if this should be the default filter that displays when first navigating to this page. Note: If you click the Reset button in the filter panel, the system default filter is restored.
-
Click Save.
Editing Saved Filters
-
If the filter you want to edit is not your default filter, select it from the Quick Filter list to make it active.
-
Adjust the filters to include or remove criteria.
-
Click the pencil icon next to the filter in the Quick Filter list. You will see the criteria listed should reflect your edits.
-
Click Save to update your filter.
Deleting Saved Filters
-
Expand the Quick Filters section at the top of the filter panel.
-
Click the pencil icon next to the filter you want to delete.
-
Click Delete.
Editing a Payment
You are still able to make changes to a payment after it has been added.
- Click Invoices from the side navigation menu and select Payment List.
- Click Edit next to the payment you want to make changes to.
- Make all appropriate changes to the payment information.
- Click Save to finalize your changes.
Editing a Refund
You are still able to make changes to a refund after it has been added.
- Click Invoices from the side navigation menu and select Payment List.
- Click Edit next to the refund you want to make changes to.
- Make all appropriate changes to the refund information.
- Click Save to finalize your changes.
