Back to Event Manager Main Menu
Creating an Account
In order to begin entering facility requests for your organization, you will first need to create an account and be approved as a member of an organization.
Watch the Video Tutorial
Registering for a Community Account
To register for a community account, you will need to be able to access the community portal. This link may have been emailed to you by the community contact, or it might be posted on the website of the organization whose facilities you are trying to rent.
Once you have navigated to the community portal:
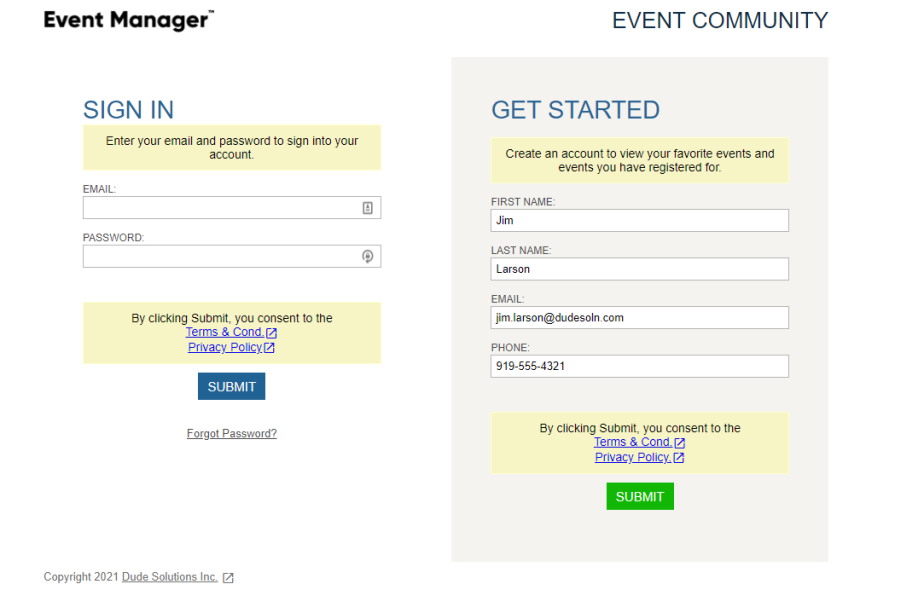
- Click the Login button to go the login page. *Note: No matter where you go on the Community Portal, if you are not logged in, you will see the Login button in the bottom right of the page.
- Under the Get Started panel, enter your First Name, Last Name, Email Address, and Phone Number.
- Click Submit to save your information and submit your membership request. You will be sent an email message to verify your account and set your password.
Verifying your User Account
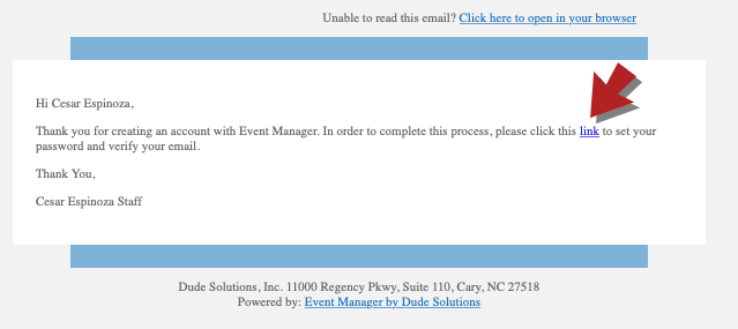
Once you have entered your information and clicked Submit on the Get Started section of the login page for Event Manager, you will receive an email notification from the application so that you can set your password and verify your email address.
-
Open the confirmation email from Event Manager.
-
Click the hyperlink in the confirmation email.
-
In the window that appears, enter your desired password under New Password and Confirm New Password.
-
Click Submit and Verify. You can now log in. *Note: Though you can now log in to Event Manager, you cannot request any events until your membership request(s) have been approved by an Administrator in your organization.
Logging on to the Community Portal
Once you have entered your request to be a member of an organization, you can log into the Community Portal. However, you cannot enter any events until your membership requests have been approved.
To log in to the Community Portal:
- Under Sign In, enter your Email and Password.
- Click Submit.
Joining an Organization
If you need to be a member an organization in Event Manager, you will need to request to join those organizations or submit an organization request. After initial registration, those requests are made from My Profile once you have logged in.
- Click My Profile from the side navigation menu.
- Click My Organizations. *Note: You can also view the status of any previous membership requests you have made from this page.
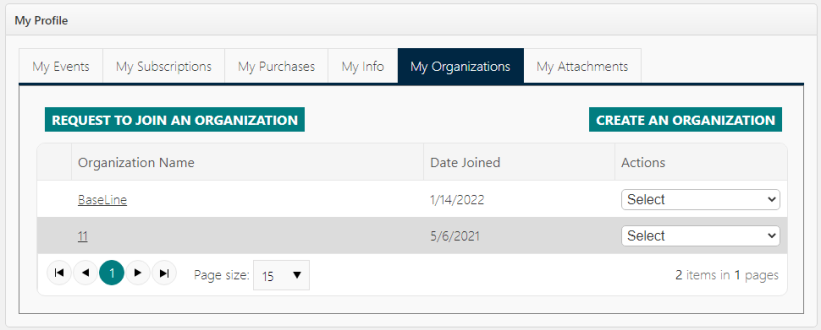
Request to Join an Organization
- Click Request to Join an Organization.
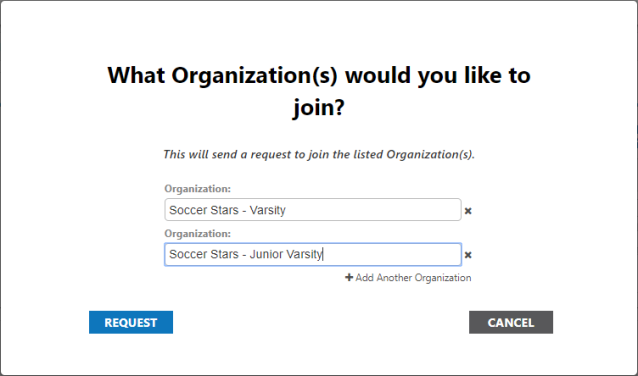
- Enter the name of your Organization.
- To register as a member of more than one organization, click Add Another Organization and enter the name in the field. *Note: You can request to be a member of as many organizations as needed.
- Click Request to submit your request(s).
Create an Organization
- Click Create an Organization. This will open the Organization creation form. *Note: All required fields are indicated with an asterisk.
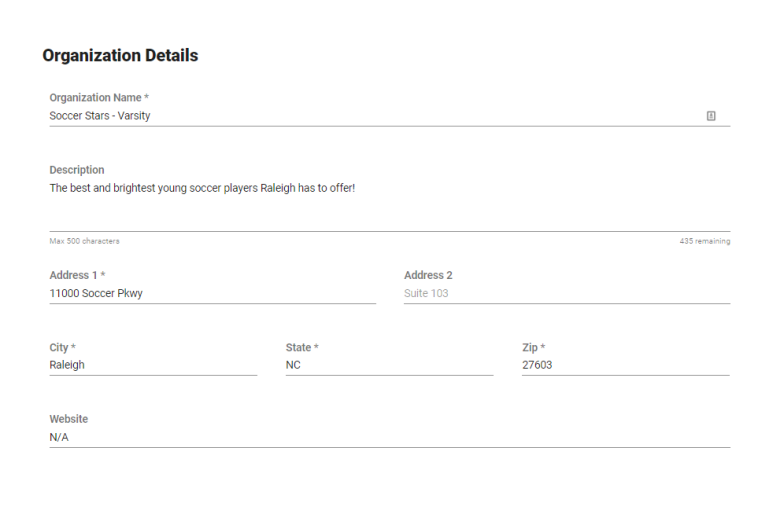
Organization details
- Enter the Organization Name.
- Enter a Description for the organization. *Note: There is a character limit of 500 characters.
- Enter the organization's address information under Address 1, Address 2, City, State, and Zip.
- Enter the organization's Website, if applicable.
Financial Info
Provide any financial information that is relevant for the organization.
- Select an Organization Type.
- Select the Payment Type.
- Select the Invoice Type.
- Enter the organization's FEIN (Federal Tax ID), if applicable.
- You can enter the organization's insurance information, if relevant, in the Insurance Company, Policy Number, Coverage Amount, and Coverage Expiration fields.
- Click Submit to complete your request. *Note: Your Organization request will be reviewed and you will receive notification once the request has been approved or denied.

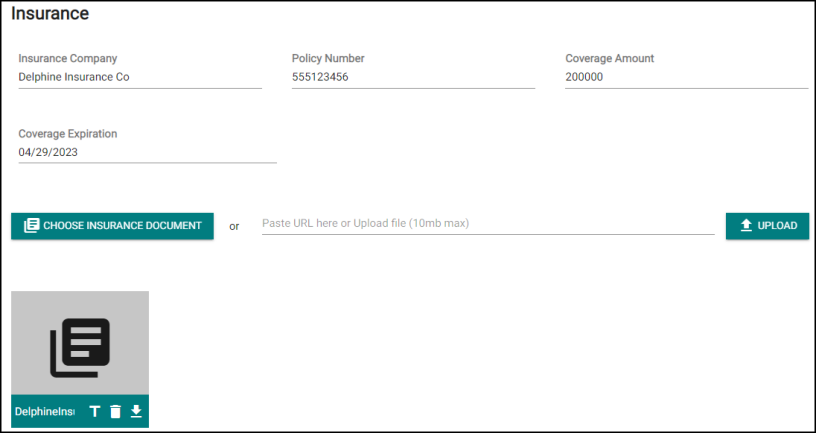
Insurance
Add any insurance information that is relevant for the organization. This includes the name of the insurance provider, but you can also upload an insurance document, if you have one.
-
Enter the name of the Insurance Company.
-
Enter the Policy Number.
-
Enter the Coverage Amount.
-
Enter the Coverage Expiration date.
-
Upload an insurance document, if you have one, or click Choose Insurance Document if one has been uploaded previously. *Note: The maximum allowed file size for insurance documents is 10 mb.