Back to Maintenance Manager Main Menu
You are able to create planned maintenance schedules for your regularly scheduled inspections and recurring preventive maintenance work. By utilizing PM Schedules, you have the flexibility to set up multiple schedules that may have different recurrences, locations/equipment, or assignees but all share the same tasks.
Watch the Video Tutorial:
Creating a PM Schedule
When first creating your schedule, you will fill out a template that stores specific information such as Purpose and Trade. This information will reflect across all schedules you create within the template as well as any work orders that generate from it. After entering your PM Template details, you will then set up your schedules and select the frequency, locations/equipment and assignees associated with each schedule you create. Once you have chosen your frequency, locations/equipment and assignees, you can enter your tasks and procedures that will reflect across all schedules created within the template.
- To create a new PM Schedule, click on the Admin tab and select PM Schedules.

- On the next screen, you will see a list of your PM Template Titles. Click on the New button to begin setting up your template and adding schedules to it.
*Note: Any information filled out in the PM Template section will reflect across all PM schedules created under this template as well as any work orders that generate from the schedules.
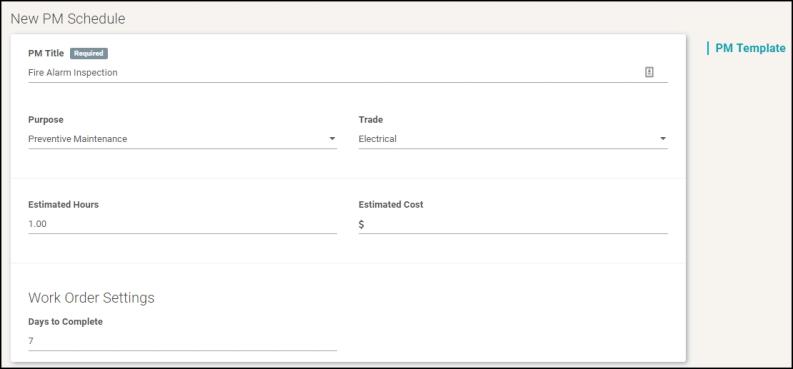
- Enter a PM Title. This will be the title for your template. You want to be as descriptive as possible when entering a title so that when you are looking at your list of PM Titles, you know exactly what type of work is being done. *Note: The PM Title will show under the work order Description once a work order is generated.
- Select a Purpose that best describes why the work is being requested.
- Select a Trade to describe what type of work is being requested for the schedule.
- Utilize the Estimated Hours and Estimated Costs fields to track this information on your planned maintenance work orders.
- Under Work Order Settings, enter a number to reflect how many days after the scheduled start date a work order is due. For example: If you want the work order to be due a week after its scheduled start date, enter a 7 on the line. *Note: This will add a due date on the work order.
Next you will set up when and how work orders are created and the locations/equipment that those work orders will be associated with.
*IMPORTANT: After you have set your frequency and selected your locations/equipment and assignee(s), be sure to click the DONE link and the Save button at the bottom of the screen otherwise the information you have entered on your schedule will not be saved.
- To add a schedule to your template, click on Add Schedule. *Note: You can add as many schedules to a template as needed.
Repeats
- Click Set Schedule Pattern to specify how often you want the PM work done. A side panel will open for you to select your desired frequency.

- There are two types of schedules you are able to create:
- Fixed - This option allows you to specify how often you want PM work orders to generate based on your selected frequency.
- Floating - This option allows you to set up a PM Schedule that will generate work orders based off of the completion of the previous work order. For example, if a work order has generated from a floating schedule, the next WO will not generate until the Status of the prior WO has been updated to Complete. The system will then look at frequency entered to determine the generation date of the next work order.
Fixed Schedules
- Select Fixed Schedule.
- Choose a Frequency from the drop down. *Note: Be sure to click the Add button once you have set your frequency.
- Select either Repeat every ( ) day(s) or Every weekday. Example: For work that needs to be done every day including weekends, enter Every (1) day. *Note: The Starting date is the date in which the schedule will first look to generate a PM work order based on the recurrence pattern set.

- Repeat every ( ) week(s) on (day(s) of the week). Example: For work that needs to take place every week on Thursday, enter Repeat every (1) week(s) with a check mark in the box next to Thursday. *Note: The Starting date is the date in which the schedule will first look to generate a PM work order based on the recurrence pattern set.
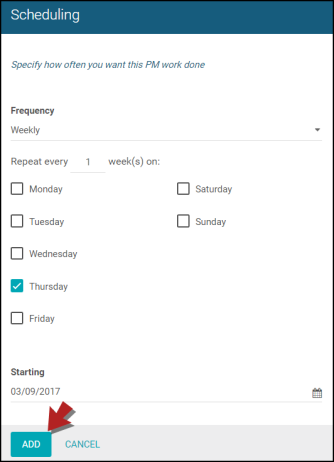
- Day ( ) of every ( ) month(s). Example: For work that needs to take place on the 2nd day of every month, enter Day (2) of every (1) month. *Note: The Starting date is the date in which the schedule will first look to generate a PM work order based on the recurrence pattern set.
- The (first) (day) of every ( ) months. Example: For work that needs to be done on the first Thursday of every month, enter The (first) (Thursday) of every (1) month. *Note: By default, your recurrence fields will automatically be populated to reflect the next available generation date. Example: If I log into Maintenance Manager on June 1st (a Wednesday) and I am entering a monthly schedule, my default field selections are going to read Day (2) of every (1) month or The (first) (Thursday) of every (1) month.
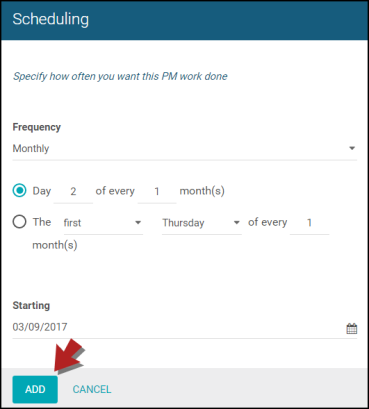
- Day ( ) of (month) every ( ) year(s). Example: For work that needs to be placed on June 2nd every year, enter Day (2) of (June) every (1) year. *Note: The Starting date is the date in which the schedule will first look to generate a PM work order based on the recurrence pattern set.
- The (first) (day) of (month) every ( ) year(s). Example: For work that will be done on the first Thursday of June every year, enter The first Thursday of June every 1 year.

Floating Schedules
- Select Floating Schedule.
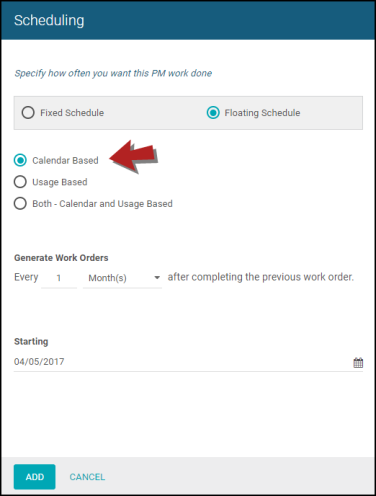
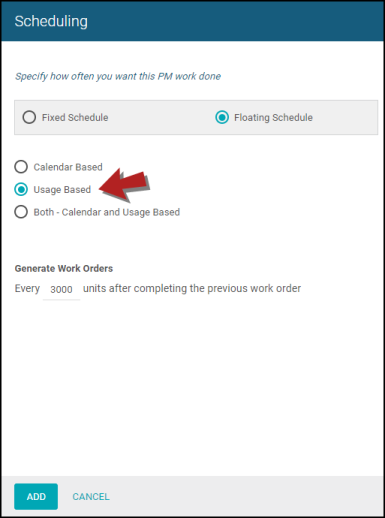
- Decide if the schedule will be Calendar Based, Usage Based, or Both.
- Select when you would like this PM schedule to Generate Work Orders after the previous work order has been completed. For example, if you would like the next work order to generate exactly one month after the prior work order has been marked as Complete, enter a 1 on the line and select Month(s) from the drop down.
- Choose a Starting date for when you want this floating schedule to begin. *Note: Be sure to click the Add button once you have set your frequency.
- Enter the number of units needed before a work order is generated. For example, if you have a vehicle that needs to be inspected every 3000 miles, enter this into the field. Once the vehicle reaches that threshold, a work order will generate immediately. *Note: Each time a work order is generated, the system will look at the last reading on the PM schedule and the threshold you have set under Scheduling to determine when the next work order will generate.
- Click Add once you have set your frequency.
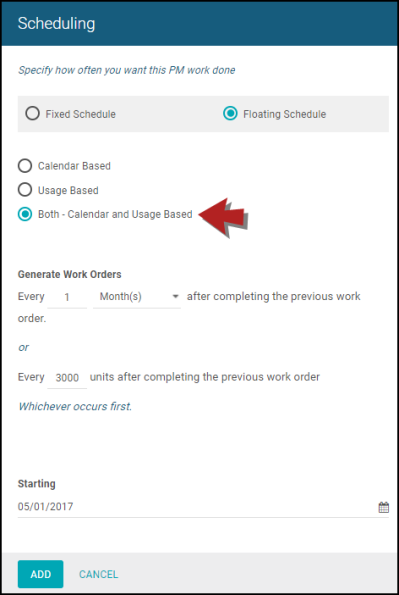
This option allows you to select both a calendar-based frequency and enter units. The PM Schedule will generate a work order according to which of the two options occurs first.
- Select when you would like this PM schedule to Generate Work Orders after the previous work order has been completed. For example, if you would like the next work order to generate exactly one month after the prior work order has been marked as Complete, enter a 1 on the line and select Month(s) from the drop down.
- Enter the number of units needed before a work order is generated.
- Choose a Starting date for when you want this floating schedule to begin. *Note: Be sure to click the Add button once you have set your frequency.
Location/Equipment
You are required to tie at least one location or piece of equipment to your schedule.
- Click the Select link to specify which locations/equipment will be associated with the schedule. A side panel will open for you to select your locations/equipment.

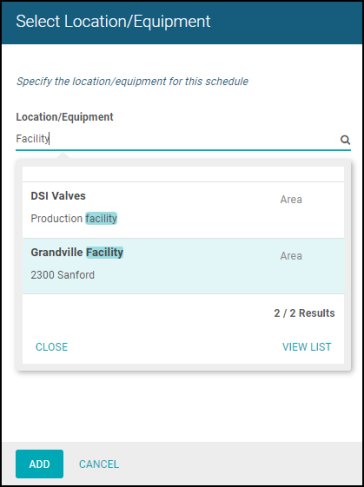
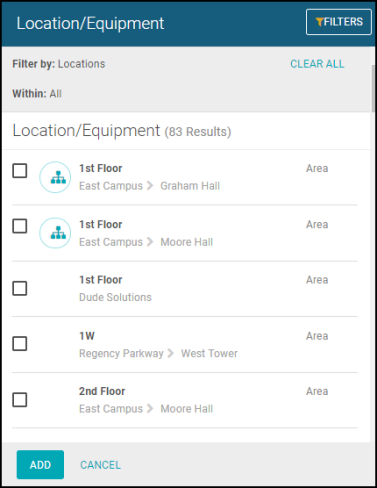
- Use the type-ahead feature to select your locations/equipment. You can also click on the magnifying glass to view a list of your locations/equipment and select the desired ones using the check box. When a Location or piece of Equipment is chosen from the list view, the children of that location/equipment are not included. You can click on the tree diagram to select children of the locations/equipment that you would like to be added to the schedule. *Note: Be sure to click the Addbutton once you have selected your locations/equipment.
|
|
Assign
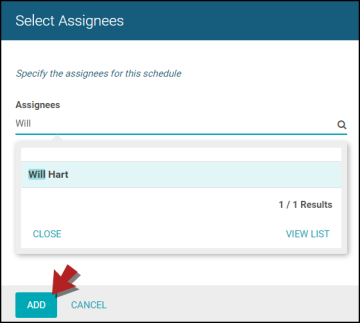
- Click the Assign link to assign this schedule to one or more users. A side panel will open for you to select the assignees. *Note: Be sure to click the Add button once you have selected your assignees.

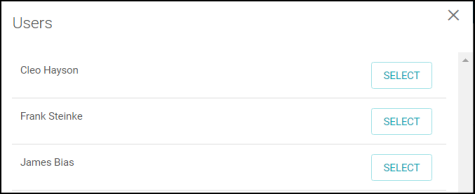
- Use the type-ahead feature to select the users that will be assigned to the schedule. You can also click on the magnifying glass to view a list of your users and select them this way.
|
|
- After you have entered your template details, schedule(s), locations/equipment, and assignee(s), be sure to click the Save button at the bottom of the screen to ensure that your schedule(s) are activated.
Associate a list of tasks that must be completed for each work order that is associated with your PM Schedule(s). Use tasks and procedures to describe the tasks needed to complete this job. *Note: This step is optional.
Adding Tasks
- To add tasks to your template click on Add Task.
- Enter a title for the task on the blank space beside the task number to give an overall idea of what the task will be.
- On the Procedure line below this, go into detail about the task to tell the worker exactly what needs to be done.

Selecting a Task Book
- You also have the option of selecting a pre-made Task Book. Click on Select a Task Book.

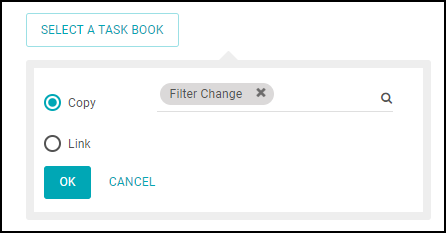
- When selecting a task book you will have two options:
- Copy - allows you to choose an existing Task Book you would like to copy.
- Link - allows you to choose an existing Task Book and link it to a schedule as a master task template. Linked Task Books allow you to share the task list among multiple schedules in a way that prevents those tasks from being edited from within the schedules. The benefit to linking Task Books is if you need to edit the task list, you can make the changes in the Task Book and it will change all of the schedules where that Task Book is linked.
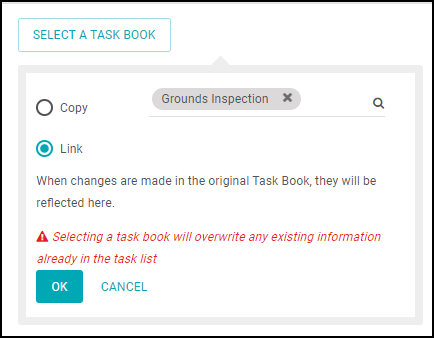
- Click on the magnifying glass to choose a Task Book you would like to copy or link. Click the OK button when you're finished.

- If you have added any tasks, make sure to click Save at the bottom of the screen to save the schedule.

