Back to Asset Essentials Main Menu
Managing audit/inspection programs
*Note: The Audit/Inspection programs feature is available to Asset Essentials clients for an additional cost. Please contact your Sales Representative or Client Services if you are interested in purchasing this feature.
Adding individual audits and inspections
- Click on the Safety Programs menu icon.
- Select Audit/Inspection.
- Right-click on the record for the audit/inspection program you would like to add an individual audit or inspection to.
- Click Show Individual Audits/Inspections. Any previously added audits or inspections will show on this summary page.
- Click the New button.
- Fill in the appropriate information in the following sections.
General
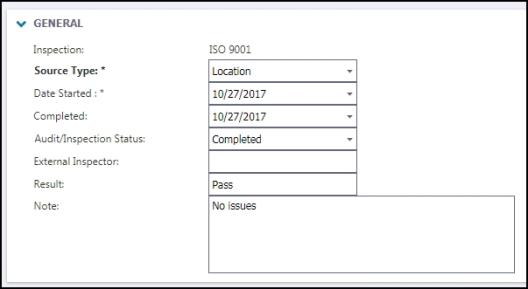
The General section contains the most detailed information for your audit/inspection program.
- Enter any applicable information you can here, including Source Type, Date Started and Completed, Audit/Inspection Status, External Inspector, Result, and any Note you may want to add. *Note: You can add additional Audit/Inspection Statuses in the Configuration section of your account.

Sites/Locations/Assets
The Source Type you selected in the General section will determine if this section shows, and what field this section is dedicated to.
- If you selected Site, Location, or Asset in Source Type, you can select the specific Site(s), Location(s), or Asset(s) the audit or inspection will be for.
User
- Click the Select User icon to assign a user or users to this audit or inspection from the database of Users in Asset Essentials.
- In the Select User window, check the box to the left of the user(s) needed and click the Select button.
Tasks/Steps
The Tasks/Steps section is where you enter what was done during the audit or inspection.
- Click the Select Task from library button to choose tasks that are preloaded into your Task Library, which can be done in the Configuration section of your account.
- Click Add New Task to add tasks just to this audit or inspection:
- Select the appropriate status in the Done column - Failed, Passed, or Unfinished.
- Select the Task Type of either Instruction, Collect Reading, or Pass/Fail.
- If the task is an instruction, you can enter a Site, Location, Name, Note, and Description.
- If the task is to collect a reading, you can enter the Asset, Meter Title, Reading, as well as a Name, Note, and Description for the reading.
- If the task is for a pass/fail review, you can enter the Asset, as well as a Name, Note, and Description.
- Click Add New Task to add an additional task.
- Use the icons, or the Step section to the left of the Task Type, to either delete or move the task in the list.
Documents
Use this section to attach documents related to your audit or inspection.
- Click on the Select Document icon (
) to either select a document from the documents library, or add a document from your computer.
- Click Save at the top of the screen to save this audit or inspection to the Audit/Inspection program log.
How to duplicate an audit/inspection program
- Click on the Safety Programs menu icon.
- Select Audit/Inspection.
- Right-click on the record for the Audit/Inspection program you would like to duplicate and select Duplicate.
- Make any appropriate edits to the new Audit/Inspection program.
- Click Save at the top of the screen to add this Audit/Inspection program to Asset Essentials.
How to delete an audit/inspection program
- Click on the Safety Programs menu icon.
- Select Audit/Inspection.
- Right-click on the record(s) for the Audit/Inspection program(s) you would like to delete and select Delete.
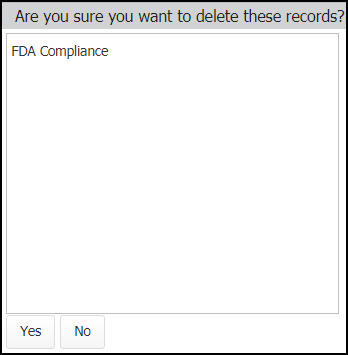
- A window will appear asking, “Are you sure you want to delete these records?” with the name of the selected Audit/Inspection program(s) listed. Click Yes to delete the record(s).
- Alternatively, you can check the box to the left of the Audit/Inspection program Name, and select Delete from the Delete drop down menu.

