Printing location barcodes/QR codes
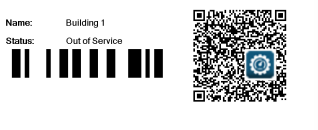
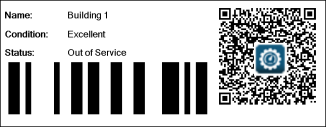
Printing Location Barcodes/QR Codes can be a useful tool for your team while they are out in the field. The Location Barcode/QR Code printout offers a barcode that can easily be scanned, as well as a QR code. *Note: In order for the printout to produce a barcode, you must enter a barcode number on the Location detail page.
Advantages of using barcodes and QR codes
Barcodes and QR codes created outside of Asset Essentials
- Barcodes and QR codes created outside of Asset Essentials can be scanned using the Asset Essentials mobile app on your device.
- If you have an existing barcode label for your item, such as a manufacturer's barcode, you can add that same barcode label to the item in Asset Essentials.
- The item's barcode or QR code label can also be used by other systems outside of Asset Essentials. Barcode and QR codes are represented by a numerical value entered in a text field and are not unique or specific to Asset Essentials, making them universal.
Asset Essentials created QR codes
- QR codes that were created in Asset Essentials can be scanned directly from the Asset Essentials mobile app or from your device's camera. If you open your device's camera to scan the QR code, it will ask you if you want to open the item using your Asset Essentials account URL in a web browser. *Note: If you are using your device's camera to scan the QR code, you will need to log in to Asset Essentials in order to see the item.
- When scanning an Asset Essentials created QR code in the Asset Essentials mobile app, it will automatically recognize what type of item is being scanned and direct you to a list of actions you can choose from.
- QR codes provide layers of protection for your items stored in Asset Essentials.
How to print location barcodes/QR codes
- Click on the Assets menu icon, then click on Locations.
- Check the box next to each Location that you would like to print a barcode/QR code for. *Note: If you would like to print the full list of Location barcodes/QR codes by page, do not check any boxes.
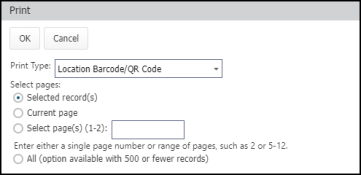
- Click on the Print/Report button and then click Print.
- Choose from one of two printing options:
- If you checked off any specific Locations, you will have an option to print only the Selected record(s). Otherwise, you can choose to print just the Current page of Locations, or Select page(s) to print, such as pages 1-3. If you'd like, you can also select to print All Locations.
- Click OK to produce the printout.


