Adding physical counts
Maintaining accurate part quantities can be crucial to your operations. Asset Essentials provides you with two methods for updating your part quantities. *Note: The Parts & POs feature is available to Asset Essentials clients for an additional cost. Please contact your Sales Representative or Client Services if you are interested in purchasing this feature.
Creating a quick count
A Quick Count is the fastest way to adjust the actual quantity of the items in your Inventory . When an item's count is adjusted using a Quick Count, a Physical Count transaction will be created to show the adjustment.
- Click on the Parts & Purchase Orders menu icon then select Physical Counts.
- Click the Quick Count button.
- You may be prompted with the option to go directly to the Quick Count form the next time you access the Physical Counts page. Choose Yes or No. *Note: If you select Yes, and want to turn off this setting later, uncheck the Go to quick count directly box on your profile page.
- A list of your parts will display on the Quick Count form. You can filter and sort this list as your would any summary page in Asset Essentials.
- Make adjustments to the Actual Qty field as needed.
- When you have finished making adjustments, click Save.

Physical counts
While a Quick Count is the fastest way to update the actual quantity of the items in your Inventory, your organization may require the additional documentation captured by a Physical Count.
Adding a physical count
- Click on the Parts & Purchase Orders menu icon then select Physical Counts.
- Click the New Button.
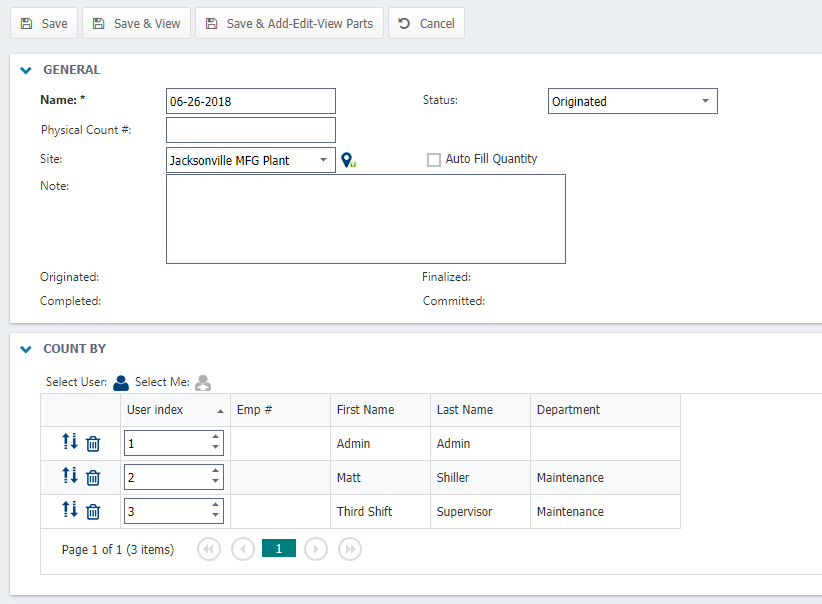
- In the General section, enter a Name for the Physical Count.
- Check the Auto Fill Quantity box if you would like the part's current quantity to display in the Actual Qty field on the Physical Count. If left unchecked, the Actual Qty field will display with no value.
- In the Count By section, click the Select User(
 ) icon and select any user(s) that will be responsible for completing the count. If you will be responsible for completing the count, click the Select Me icon (
 ).
). - If there are any documents you would like associated with this Physical Count, click the image icon to select a document from your Document Library or upload one from your computer.
- Click the Save & Add-Edit-View Parts button.
- On this page you will add parts to the Physical Count. Click the Add Parts icon (
 ).
). - Check the box next to any required parts, then click the Select button to add the parts to the Physical Count.
- To begin the Physical Count, click the Finalize button.
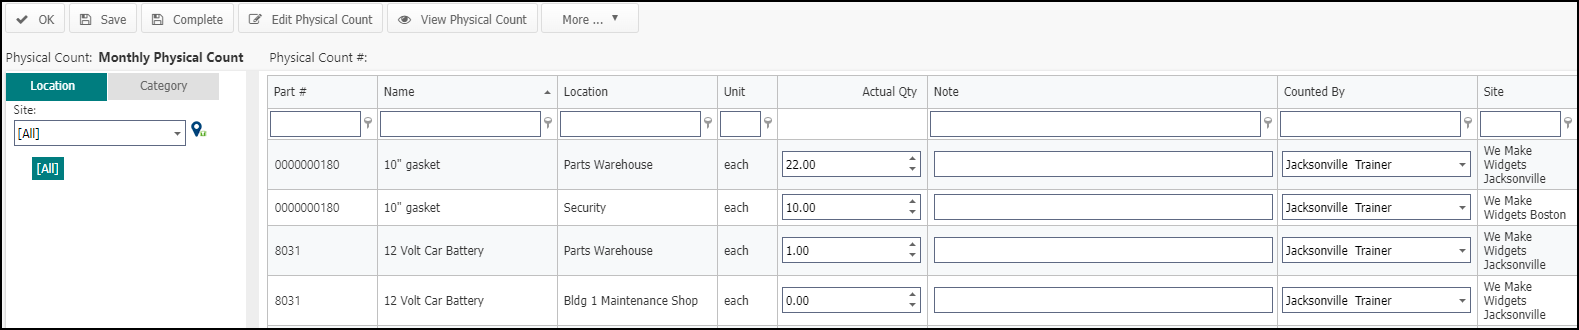
- Enter the Actual Qty for each part included in the count.
- If necessary, enter a Note and select the user that completed the count in the Counted By field. *Note: Only users selected in the Count By section of the Physical Count will show as options in the drop down.
- Once you have finished making adjustments, click the Complete button.
- Review over your changes. If you would like to NOT update the inventory count for a particular part, uncheck the Update Inventory box.
- Click the Commit button to finish the Physical Count. *Note: Once a Physical Count has been set as Committed, it cannot be edited.
Creating physical count print outs
- Click on the Parts & Purchase Orders menu icon then select Physical Counts.
- Right-click on the Physical Count record, and select Show Parts List.
- Click the More button, and select Report.
- Select the Report Type from the drop down.
- Count Sheet - This print-out is useful for a single user to use while counting the parts included on the Physical Count.
- Tally Sheet - This print-out is used to record the count results of multiple users.
- Variance Detail by Category - This report helps show the quantity and cost variance broken down by category.
- Variance Detail by Location - This report helps show the quantity and cost variance broken down by location.
