GIS map settings
In Asset Essentials, you can configure your map to correlate with your organization's GIS data. *Note: The GIS Asset Management feature is available to Asset Essentials clients for an additional cost. Please contact your Sales Representative or Client Services if you are interested in purchasing this feature.
How to access and edit map settings
*Note: Only Global Administrators are able to edit GIS map settings.
- Click on the Admin menu icon, and then click on Configurations.
-
Select Map Configuration from the GIS Settings section.
- Click the Edit button.
- Make necessary edits in the sections shown below.
- Click Save at the top of the screen to save your changes.
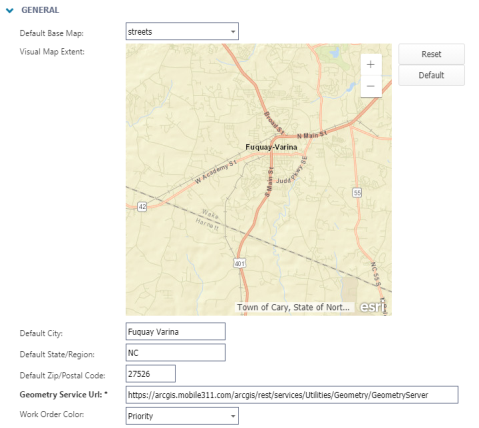
General
- Select either streets or satellite from the Default Base Map drop down menu to determine how your map will appear when you log into Asset Essentials.
- In the Visual Map Extent section, use the zoom in/zoom out buttons to adjust the map to the location you want to see as your default view when you log in.
- Click the Reset button if you would like to set the default of the map back to the initial extent.
- The Geometry Service Url link ensures that Asset Essentials is pulling the correct location and shape data for your account.
- Select either Priority or Work Category in the Work Order Color drop-down menu to determine what represents the color of your work order points on the map.
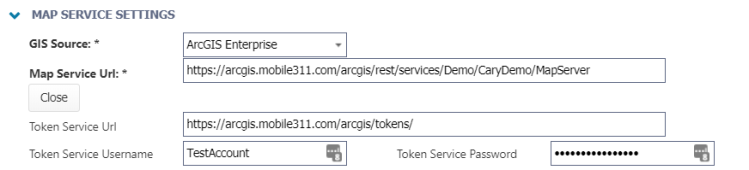
Map Service Settings
Choose the GIS Source from the drop down menu.
- If you choose ArcGIS Enterprise you will have to enter a Map Service Url that is unique and contains GIS data for your organization.
- Click on the Secure Service button to set up token-based security. You will need to enter a separate token service URL, as well as a username and password. *Note: Once the token service password is entered, Brightly is unable to see what that password is.
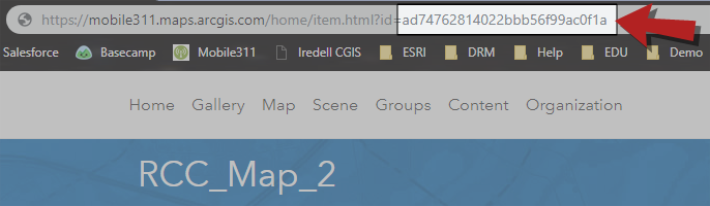
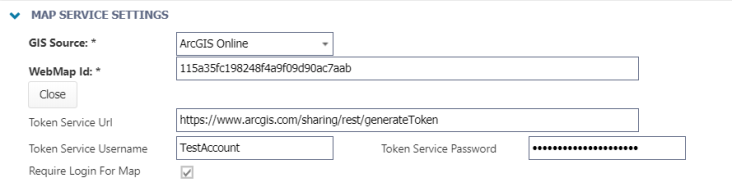
- If you choose ArcGIS Online you will have to enter a WebMap ID. The WebMap ID is embedded in the URL of the WebMap when accessed from ArcGIS Online.
- For more information on how to use ArcGIS Online, check out our Self Hosting Best Practices page.
- Click on the Secure Service button to set up token-based security. You will need to enter a separate token service URL, as well as a username and password. The Token Service Username and Token Service Password are used for importing data from ArcGIS Online into Asset Essentials using the GIS Feature to Asset Import. *Note: Once the Token Service Password is entered, Brightly is unable to see what that password is.
- If the box next to Require Login for Map is checked, the end user will be required to enter their ArcGIS Online credentials when accessing the GIS data on the map through Asset Essentials. If the box next to Require Login for Map is not checked, then the credentials listed are used to give access to the GIS data on the map in Asset Essentials for every end user.
-
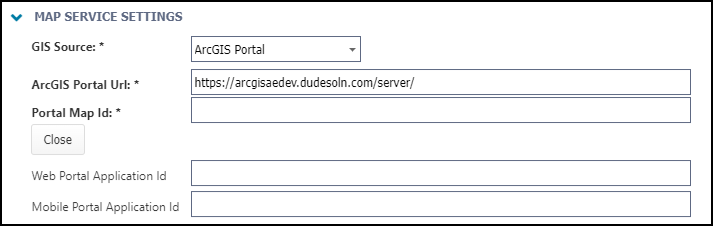
If you select ArcGIS Portal, you will need to enter the ArcGIS Portal URL and the Portal Map Id provided by your ESRI ArcGIS Portal service.
-
If you use a Secure Service, then you will also need to enter an additional Web Portal Application Id and a Mobile Portal Application ID.
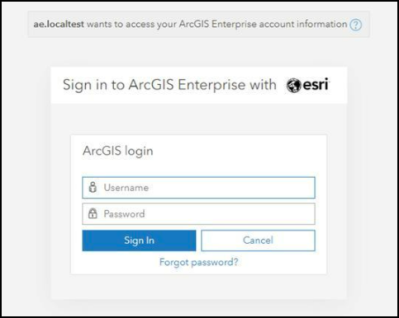
With this setting, when you first open a map session, you will be required to sign into the ArcGIS Portal service with your ESRI username and password.
Geocode Settings
*Note: Geocode Settings are a feature of the GIS asset management module. To access this feature, please contact your Sales Representative.
- The Geocode Service Url link contains your address data in the GIS geocode server or map server.
- Click on the Secure Service button to set up token-based security. You will need to enter a separate token service URL, as well as a username and password.

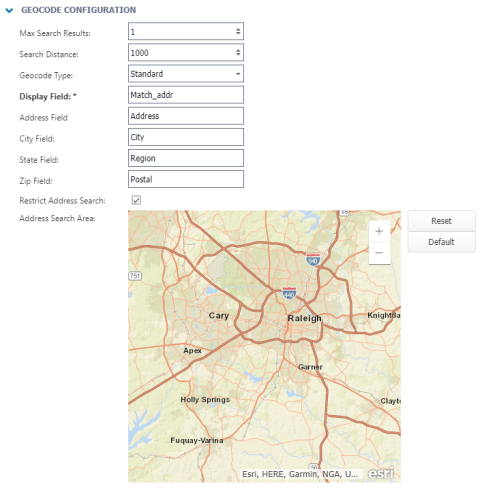
Geocode Configuration
*Note: Geocode Configuration is a feature of the GIS asset management module. To access this feature, please contact your Sales Representative.
- Enter a number in the Max Search Results field to indicate how many results you want to appear when doing a search. *Note: We recommend entering 5 in this field.
- In the Search Distance field, indicate how far out you would like to search. *Note: The unit of measure for the number in this field depends on your GIS data. For example, if your GIS data is in meters, then this field will represent meters.
- Select a Geocode Type from the drop down. The selection you make here may populate additional fields to complete in this section. *Note: If you select Standard, you must have a geocode server in the Geocode Settings section. Also, when ArcGIS Online is selected as your GIS Source, the only valid Geocode Type supported is Standard.
- Enter the Display Field.
- Type in the Address Field, City Field, Zip Field, and State field information. *Note: Depending on the selection you made in the Geocode Type field, you may see other fields to fill out here.
- Check the box next to Restrict Address Search to limit the area that is searched when applying an address to a work order or work request. *Note: You must have Standard selected as the Geocode Type in order for this option to appear.
- Scroll with your mouse or click the zoom in and zoom out buttons on the Address Search Area map until it is set to the appropriate search area.
- To return back to the initial search extent, click Reset.
- To return back to the Visual Map Extent, click Default.