How to Create an Invoice using Manual Invoicing
Invoicing is a great way to start recovering costs for your organization. Even if you have not established a defined fee structure, manual invoicing allows you to start applying charges for the use of your facilities.
How to Create an Invoice
-
Pull up an activated schedule. You can do this by typing the schedule number into the Search for box and then click Go. This will take you to the Update Schedule screen.
-
Hover your mouse over the Shortcuts menu and click on Invoicing. This link will take you to the bottom of the schedule form to the Invoices section.
-
Click on Create Invoice.

-
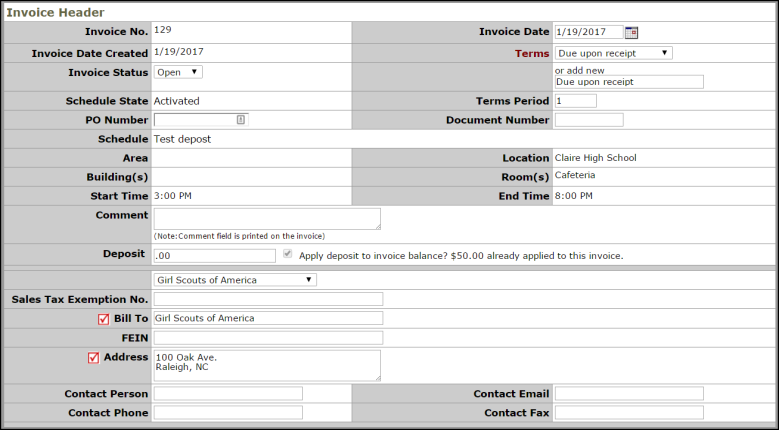
You are now on the Add Invoice screen. In the Invoice Header box select the Invoice Date, Terms (Net 30, Net 10, Due upon Receipt, etc.), Bill To (organization name), and the Address.

-
Scroll to the bottom of your screen and look for the box shown below.
-
Select the Event date and Charge Type. The Description box will automatically populate after selecting the Charge Type. Enter the Rate and press the Tab key on your keyboard for the Amount field to populate. You can enter up to 5 charges at a time.
-
Click Submit to save. Continue to add additional charges if needed.

-
Once you have entered all of your charges, scroll to the top of the page and click on the printer icon next to Print This Invoice. A print preview screen will appear for you to save or print.
-
If any of the charges are incorrect, close out the print preview screen to go back to the Update Invoice screen and scroll to the bottom of the page. Select the date from the Event drop down menu in the Line Items section. You will then be able to Edit or Delete a charge.

