Back to CrisisManager Main Menu
Setting up Polling
The Polling feature allows you to survey your plan's listed users and receive answers in real time. You will set up Poll Templates in the web portal. Once you have templates created, you can either launch a poll from the web portal or you can add Poll Events to your administration plan. Poll Events will allow your administrators to launch and manage polls right from their mobile devices while on the go.
Creating a Poll Template
- From the Home Page in the CrisisManager Administrator Portal, click on the Collaboration tab at the top of your screen.
- Select Poll Definitions from the drop down menu.
- Click Add New to add a new Poll to the list.
- Click Select next to the new Poll to edit it.
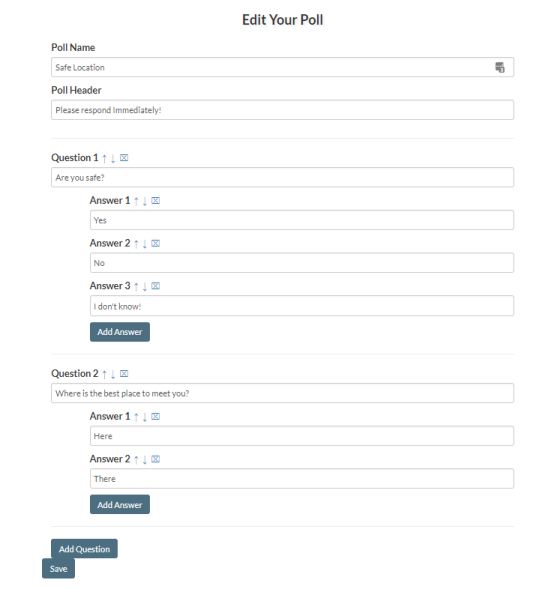
- Under the Edit Your Poll section, enter your Poll Name. You will use the Poll Name to identify your Poll when launching to a plan. The Poll Name will also display in the Mobile App whenever the poll is launched.
- Enter a Poll Header. This is a short description intended to grab the attention of the poll recipient and guide them in what they need to do.
- Click Add Question to add a new question to the Poll and then click Add Answer to add a new answer to the question. *Note: You can add as many Questions and associated Answers as you need for your Poll.
- You can make changes to the Questions and Answers as needed:
- To edit your Questions and associated Answers, click into the appropriate text box.
- To adjust the order of your Questions and Answers, click the Up or Down arrows to the right.
- To delete a Question or Answer, click the X button next to each item.
- When you are finished making changes, click Save. You will be taken back to the Poll Definition page.
- You now have the option to Publish the Poll. *Note: Publishing the Poll does not launch the poll in the mobile app. It adds the Poll to the list of options available when launching a Poll.
Creating Polling Events
There are three different Polling Events that can be added to your plan(s) in CrisisManager. You can use these to Launch a Poll, Manage a Poll, or to View Poll Results. Any user who has access to the plan will have access to these events when added.
If you would like to limit the users who have access to Launch a Poll, Manage a Poll, or View Poll Results, you may want to create a plan specifically for this feature and only grant access to those users who should have access.
- To add Polling Events, access the appropriate Plan by clicking on the Plans tab and select My Plans.
- Click Edit beside the appropriate Plan.
- Click on the Event tab, then select Event Sequence.
- Click Add Event and then Edit beside the newly created event.
- Click Edit on the Event Information page.
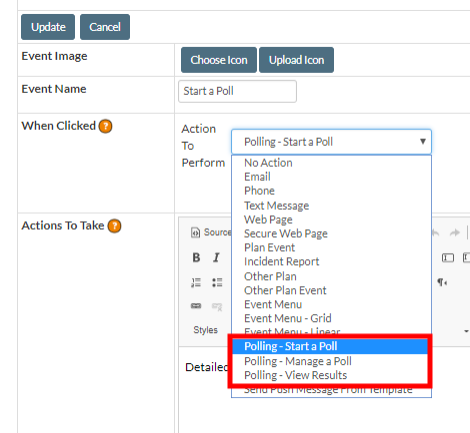
- Choose an icon and rename the event. You may find it helpful to identify the event with a clear title, such as Launch a Poll, Manage a Poll, or View Poll Results, depending on which type of Polling Event you are creating.
- Delete any text in the Actions to Take section. *Note: Do not add any other information (Actions to Take, Contacts, Attachments, or Reports/Forms) to this event.
- In the When Clicked section, select Polling - Start a Poll, Polling - Manage a Poll, or Polling - View Poll Results from the Action to Perform drop down menu.
- Click Update.