Back to InventoryDirect Main Menu
In InventoryDirect, you can create barcode labels for your inventory items which can be scanned to quickly populate item information on transaction screens throughout the application.
Types of Scanners
There are many different models of scanners available. The options listed below are the most commonly used. *Note: In InventoryDirect, Barcode/QR scanners act as a data entry mechanism similar to using a keyboard for entering information such as an Item ID. When you scan a barcode on a item, the Item ID will populate on the form.
- Bluetooth scanner that wirelessly connects to a mobile device ($70-$300)
- A USB scanner that plugs into a laptop ($20-$100)
- A smartphone application used for scanning (price varies)
Setting Up Barcode Scanning
Method 1: Create Barcode Labels for your InventoryDirect Items
In InventoryDirect, you have the ability to create barcode labels for your existing inventory items. *Note: If you created your own Item IDs in InventoryDirect, be aware that using certain special characters in the Item ID can limit functions such as searching on web pages. For example, Item IDs such as WD40 or WD_40 work well, where Items IDs such as WD-40 or WD 40 do not.
- Click on the Inventory tab.
- Select Print My Inventory from the Inventory Shortcuts menu.

- Here you can filter the items that you would like to make barcode labels for.
- In step 14, choose Bar Code Labels.
- Choose the size of the labels from the drop down and check the box next to Print pool on label if you would like the name of the pool the inventory item is stored in printed on the barcode label.
- If you need to make margin adjustments to the print out, click Align Labels to adjust the left and top margins.
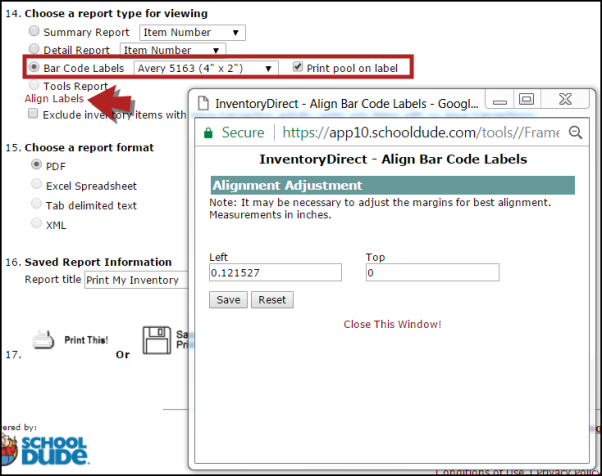
- Click the Print This! icon to print your labels.
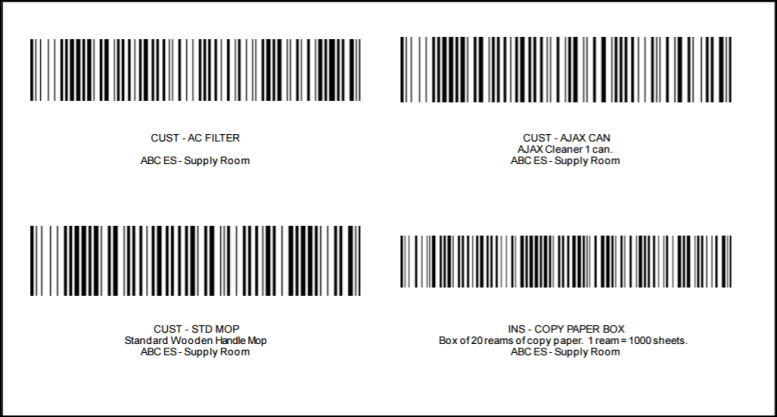
These barcodes can be scanned to quickly enter item numbers into the appropriate field on the transaction forms. For example, with the item number field selected on a receiving transaction form, you could scan the barcode to quickly enter the item number. If the item has a default supplier that information would also fill in automatically. Once you select the Pool and enter the quantity, you're all set to save the transaction.
![]()
Method 2: Associate Existing Barcode Labels with Inventory Items
If you are already using barcodes and would like those barcode numbers to be associated with your Inventory Items, you can utilize the Item ID field to represent your existing barcode.
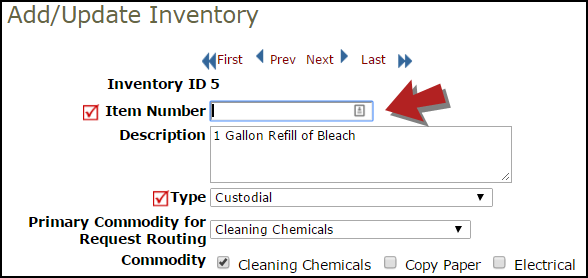
- On the Add/Update Inventory page for the item, delete the text in the Item Number field.
- Scan the barcode for the item to allow the barcode number to fill in the Item Number field.
- Be sure you have given the Item a Description that accurately represents the item.
- Scroll down and click on Save to save that Item Number.
- Now when scanning that barcode label, the number that fills into the Item ID field will be associated with that Inventory Item.