How to Create an Invoice using Fee Tables
Invoicing is a great way to start recovering costs for your organization. Fee Tables may be a good option if you have a defined fee structure where certain charges are consistently applied with very few exceptions. There are a few things that need to be done before creating an invoice using fee tables. Charge Types will need to be created, organization types must be assigned to every Organization, area types assigned to all Rooms, and Fee Tables need to be setup.
Creating an invoice using fee tables is a two step process. The first step is to "pull in" the charges for the spaces that are indicated on the schedule. The second step is to apply the fees while creating the invoice.
How to "Pull in" the Fees
- Pull up an activated schedule. You can do this by typing the schedule number into the Search for box and then click Go. This will take you to the Update Schedule screen.
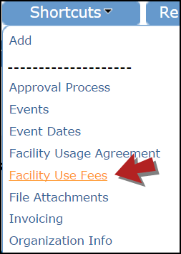
- Hover your mouse over the Shortcuts menu and click on the Facility Use Fees link.
- You are now on the Facility Use Fees page, select your Terms (Net 30, Net 10, Due upon Receipt).
- Click on Use predefined fee tables then click Update. You will notice after clicking on the update button that the system will have pulled in the appropriate fees from your fee table.
- You are able to add additional line items (Custodial Fee, Lighting Fee, etc.) by clicking on Additional Charges displayed in the Event Charges section.
*Note: If you are using the Automatic Invoice Generation feature you will not need to proceed with creating an invoice, since the system will do that for you.
How to Create the Invoice
Once you have "pulled in" the fees on the Facility Use Fees page, it is now time to create the invoice.
-
Scroll back to the top of the Facility Use Fees page. Hover your mouse over the Shortcuts menu then click on Invoicing. This link will take you to the Invoice section on the Schedule form.
-
Click on Create Invoice.
-
You are on the Add Invoice screen. In the Invoice Header box select the Invoice Date, Terms (they will populate from the previous screen), Bill To (organization name), and the Address.
-
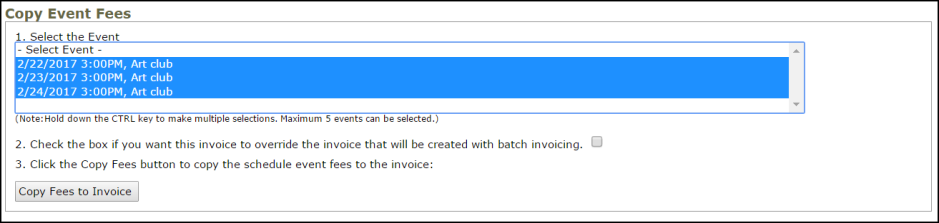
Scroll down and look for the box with the heading Copy Event Fees. This is where you “pull in” the fees from the Facility Use Fees page and apply them to the appropriate event date(s).
-
Click on the first date, hold down the Ctrl key on your keyboard (and continue to hold it down) while selecting the other dates to which you would like the fees to apply. You will be able to select up to 5 dates at a time.
-
Click on the Copy Fees to Invoice button. Continue this process until you have applied the charges to all dates that you want to invoice.
-
Once you have entered all of your charges, scroll back to the top of the page and click on the printer icon next to Print This Invoice. A print preview screen will appear for you to save or print.
-
If any of the charges are incorrect, close out the print preview screen to go back to the Update Invoice screen and scroll to the bottom of the page. Select the date from the Event drop down menu in the Line Items section. You will then be able to Edit or Delete a charge.

-
If there is an additional line item that you did not enter in the Facility Use Fees screen, scroll to the bottom of the current page and look for the box shown below. You will choose the Event date and Charge Type from the drop down boxes. The Description box will automatically populate after selecting the Charge Type. Enter the Rate and click the Tab key on your keyboard for the Amount field to populate. You can enter up to 5 charges at a time. Click Submit to save. Continue to add additional charges if needed. *Note: You will only be able to select Charge Types that were used on the Facility Use Fees page.

